Dashboard
It typically displays an overview of key metrics, recent activity, and system statistics.
In this section provides a quick summary of key platform metrics:
- Total Users: — Represents the total number of registered users on the platform.
- Total Posts: — Shows the total number of posts that have been created so far.
- Scheduled Posts: — Displays the total number of posts scheduled for future publishing.
- Admin Staffs: — Shows the total number of admin-level staff accounts.
- Active Subscriptions: — Number of users with an active subscription plan.
- Total Revenue: — Cumulative earnings generated from subscriptions.
- Active Social Accounts: — Displays the total number of social media accounts currently connected and active.
- Average Subscription Price: — Displays the average value of all active subscriptions.

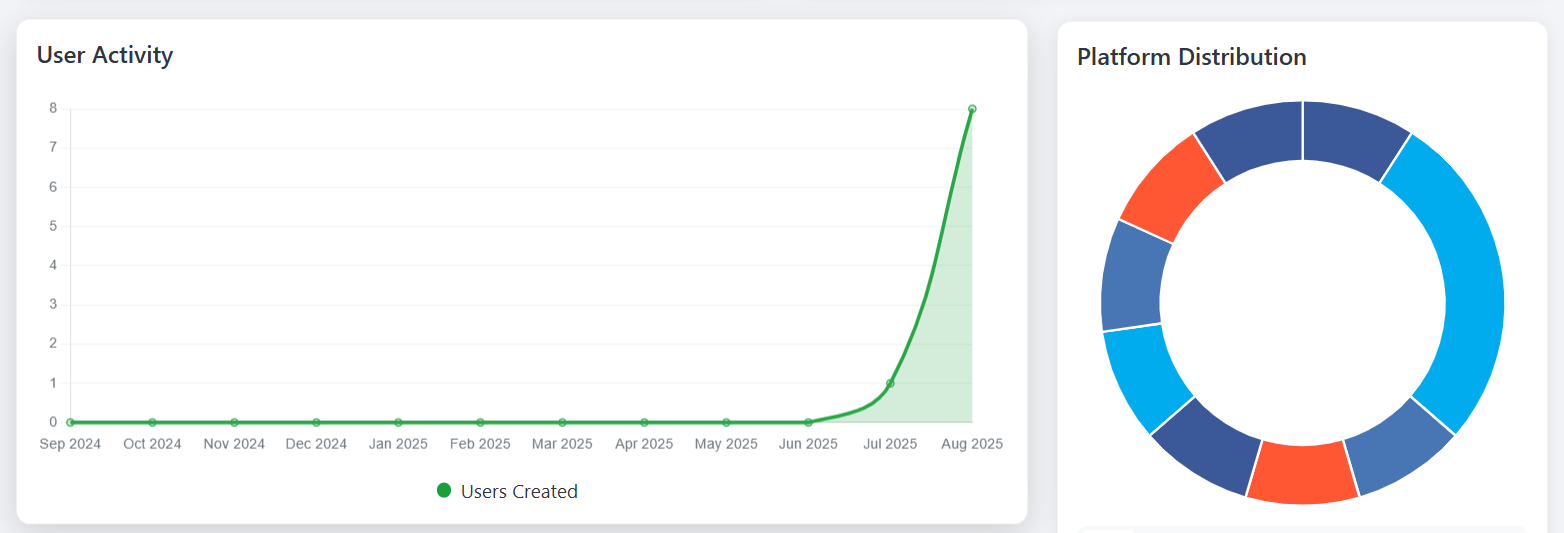
This Dashboard section contains two charts:
- Users Activity: A graph displaying the number of users registered each month.
- Platform Distribution: A summary chart showing the total number of connected social media accounts, categorized by their respective providers (platforms).
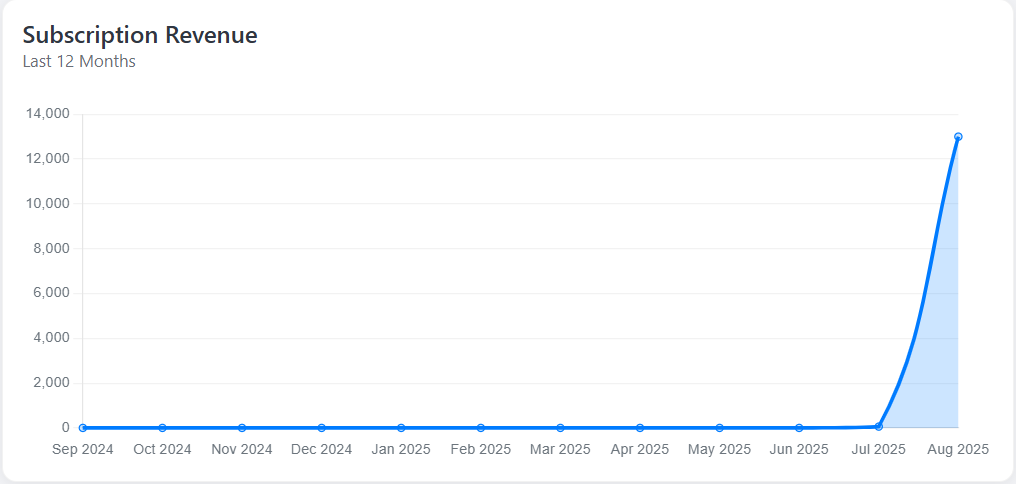
This section of the dashboard shows a graph of the monthly Subscription revenue.
And at the bottom, there's a Recent Subscriptions list where you can view the most recently purchased subscription plans.

Manage User
Follow the steps below to manage users effectively.....
Go to the Admin Panel and click on Manage User.
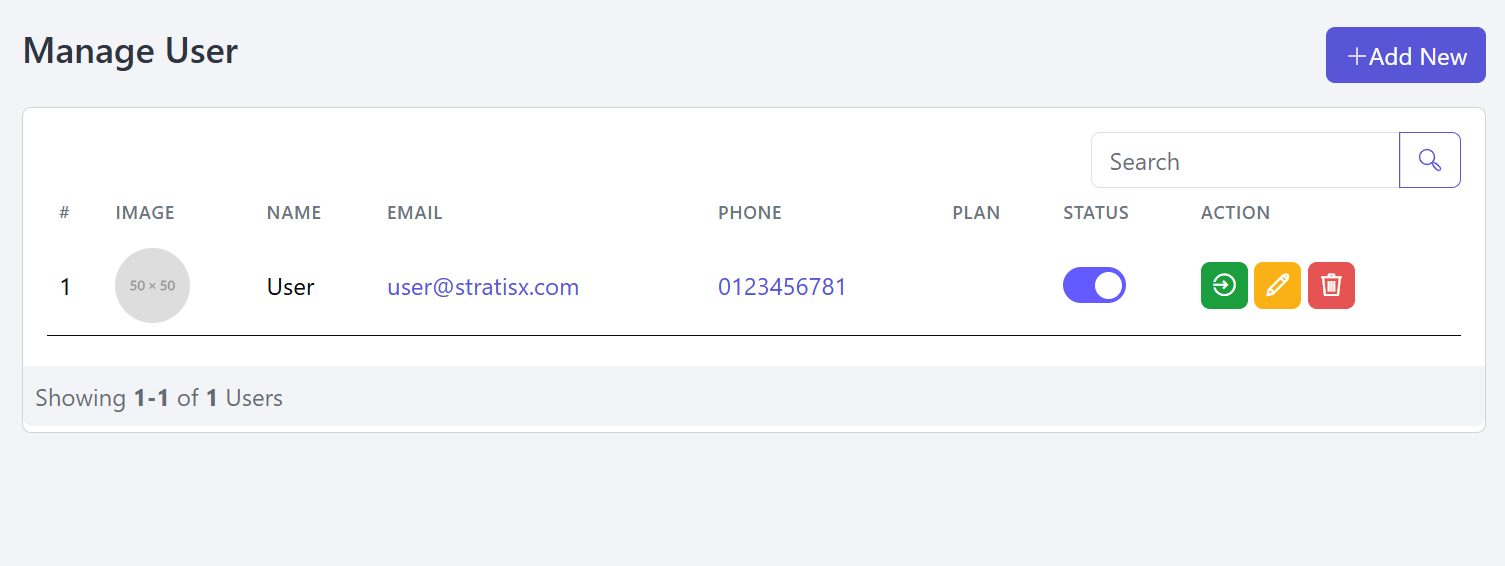
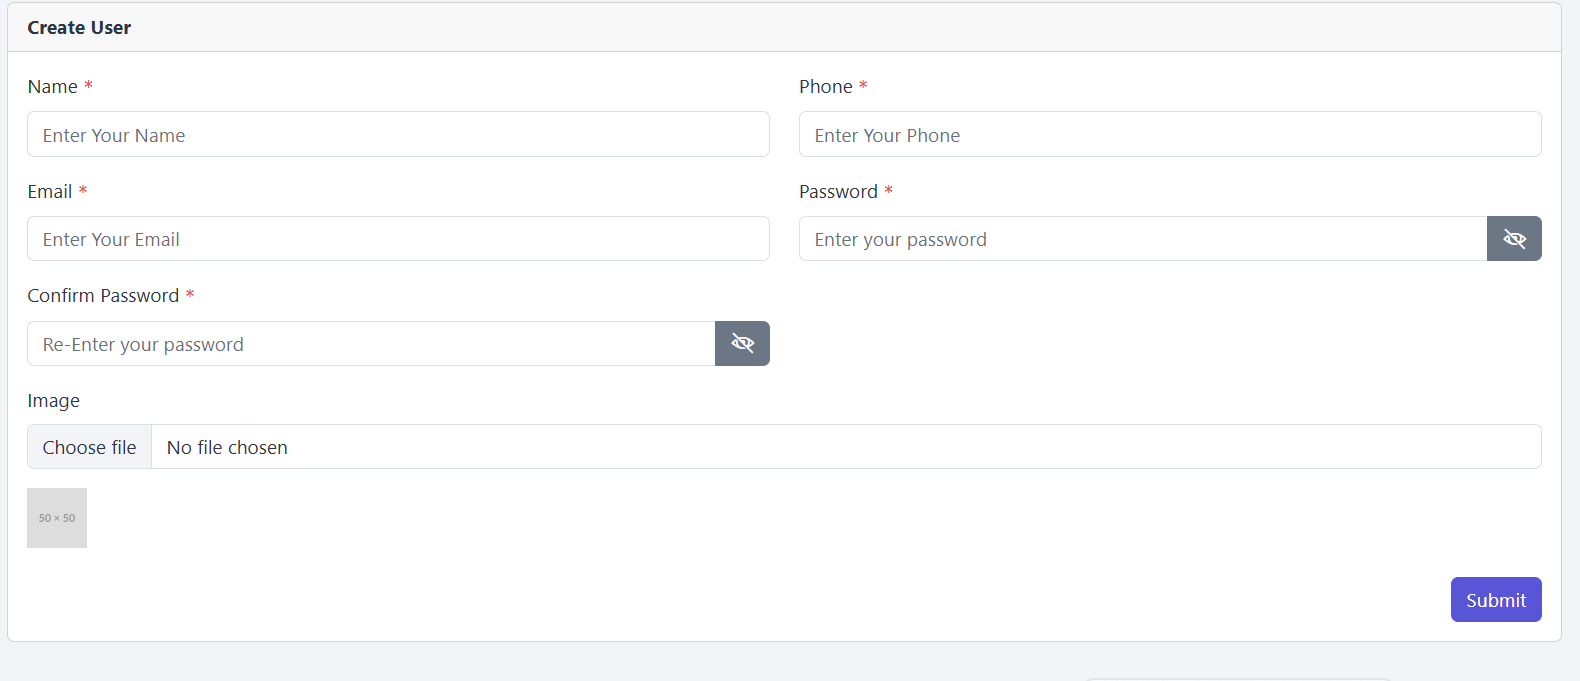
Then, click the "Add New" button at the top right corner to add a new user. You will be able to enter the user's Name, Phone Number, Email, Password, and upload a Profile Image.
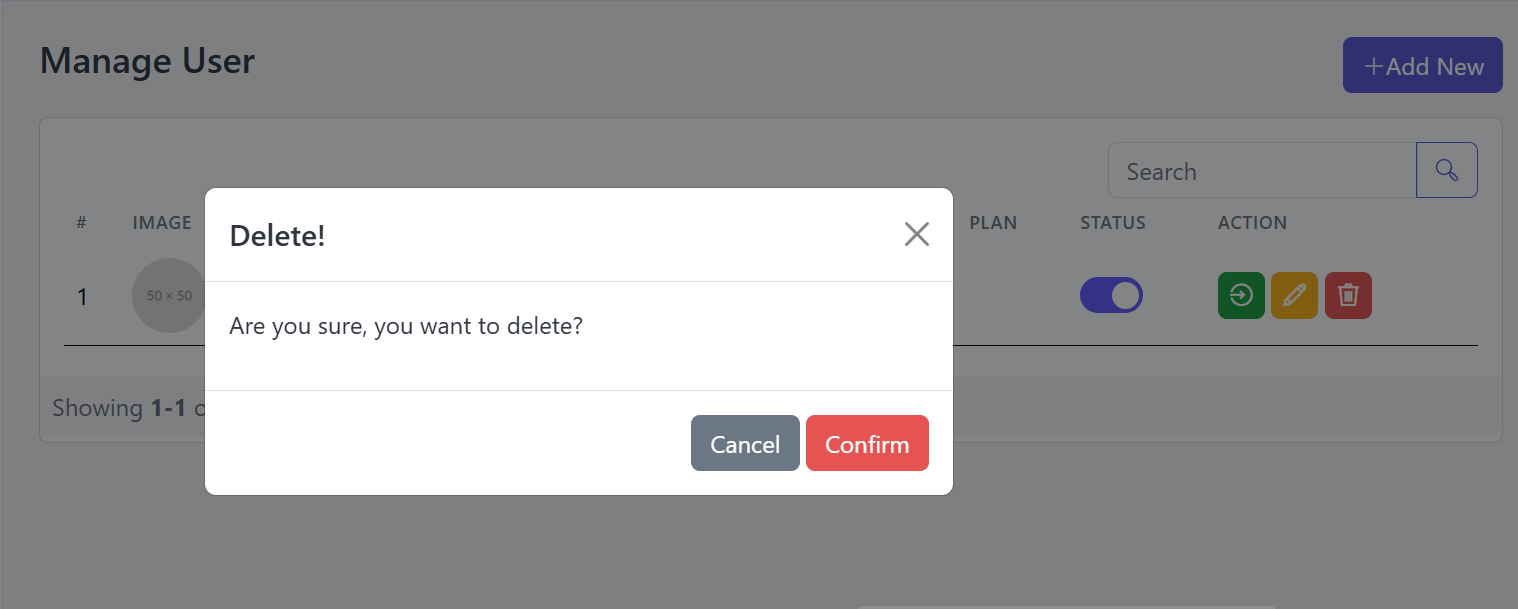
The Delete button in the Action column allows you to remove a user if needed.
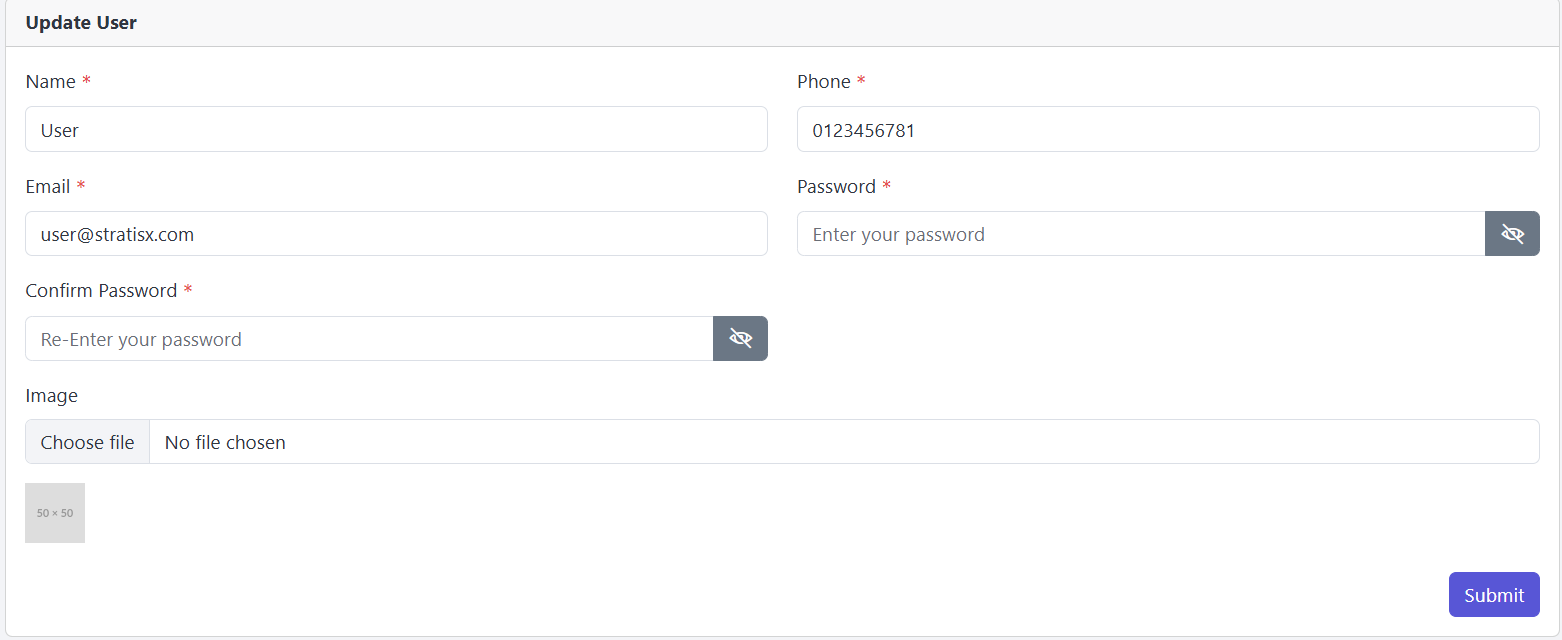
You're able to Update User information.
If needed, you can log in as a user directly from the Admin Dashboard by clicking the red-highlighted button.

Roles & Permissions
To manage Role-related settings in your application, please follow the steps below.
Go to the Admin Panel, click on Manage Staff, and you will see two options: All Staff and Roles & Permissions.
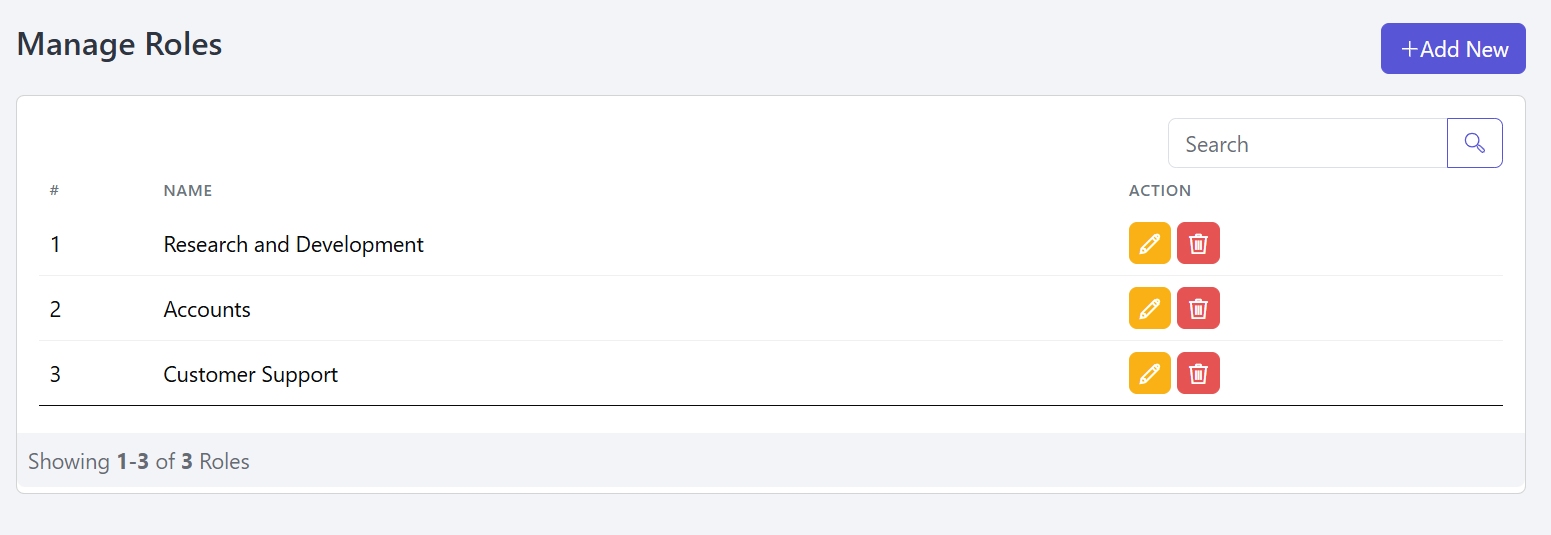
Next, click the "Add New" button in the top-right corner to create a new role for the website.
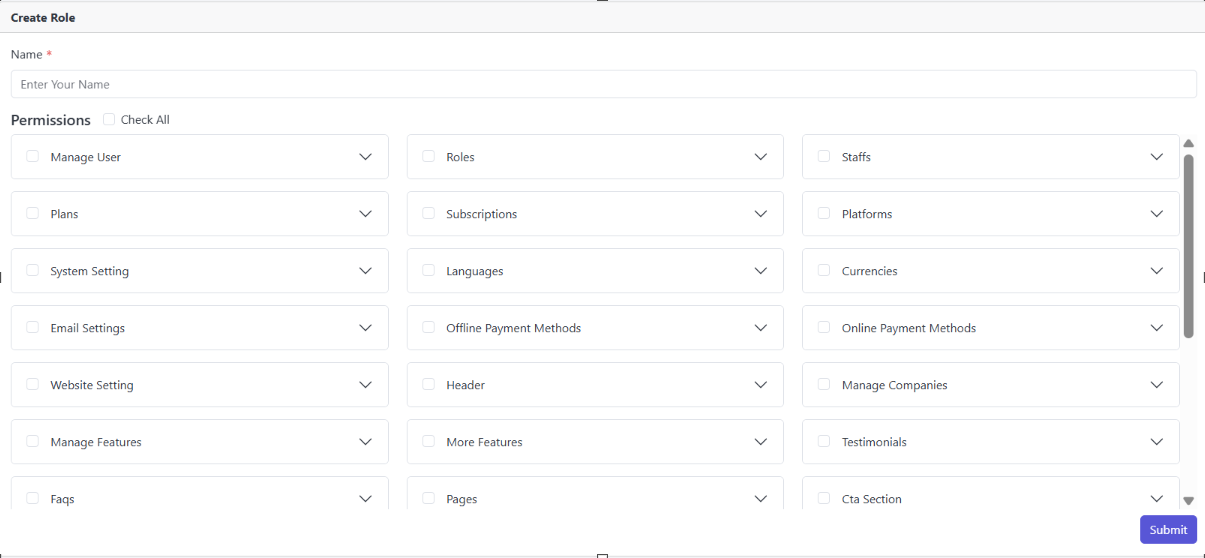
You can easily enable or disable specific Roles as needed like this.
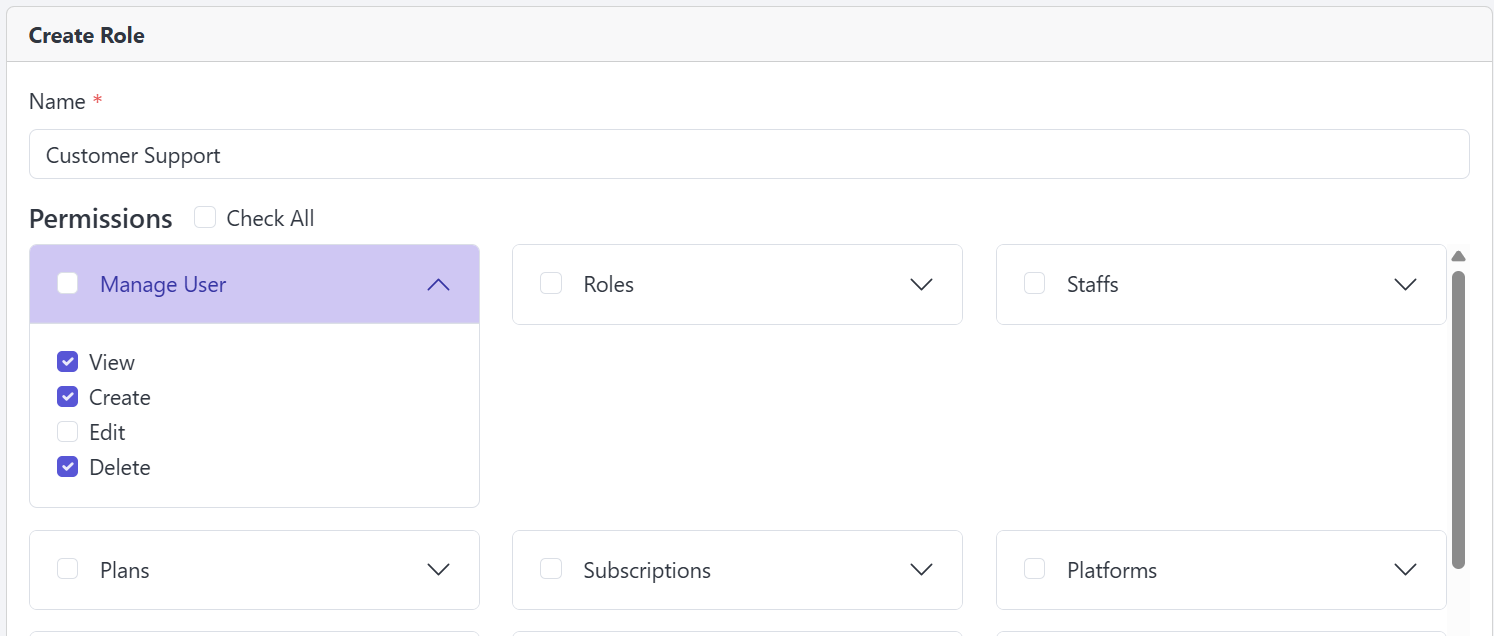
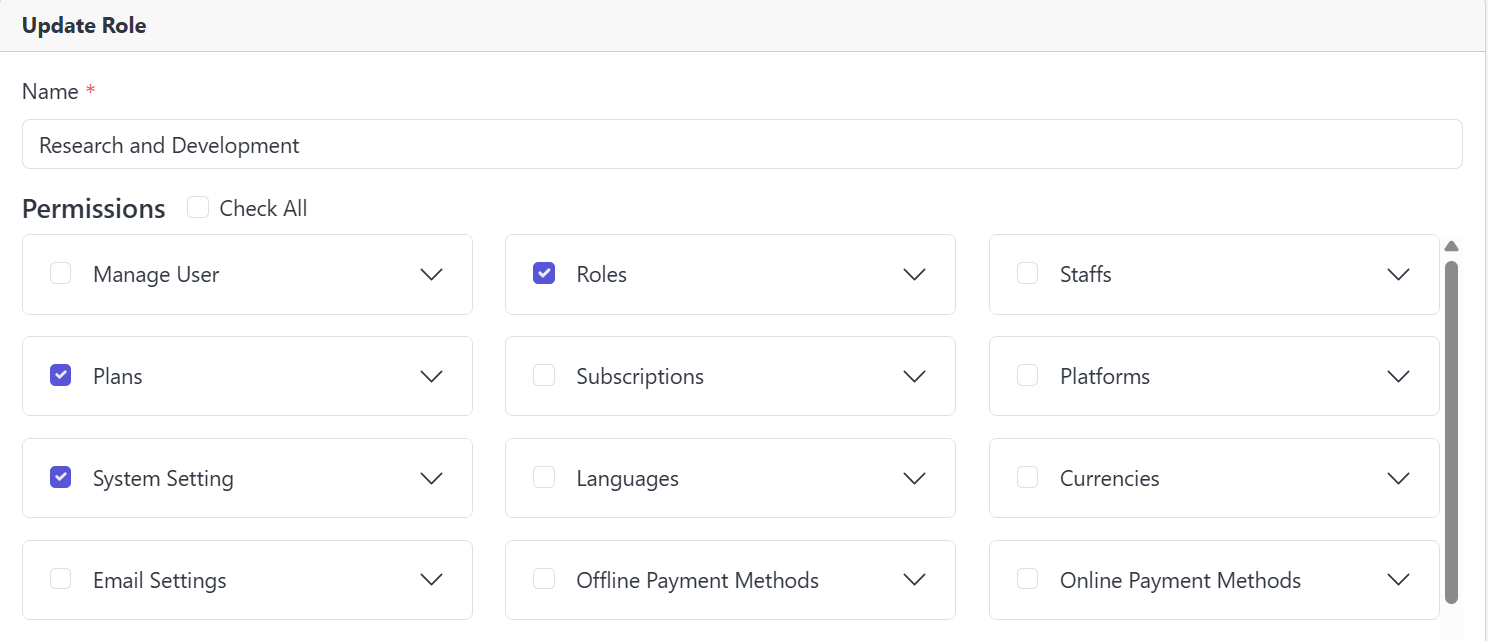
Here, you can easily manage and edit Roles and Permissions.
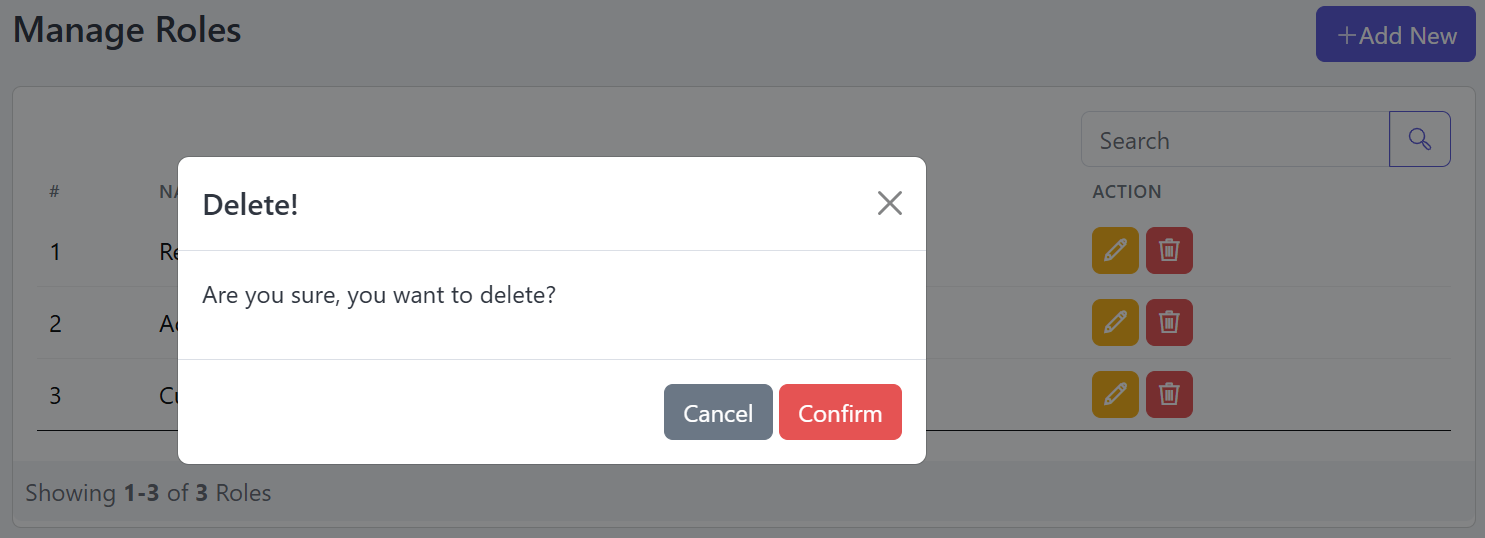
The Delete button in the Action column allows you to Delete a Role If needed.
Manage Staff
From here, you can efficiently manage all your Staff by following the steps below.
Go to the Admin Panel and click on Manage Staff, where you'll find two options: Roles & Permissions and Staff. From the Staff section, you can easily manage all staff members.
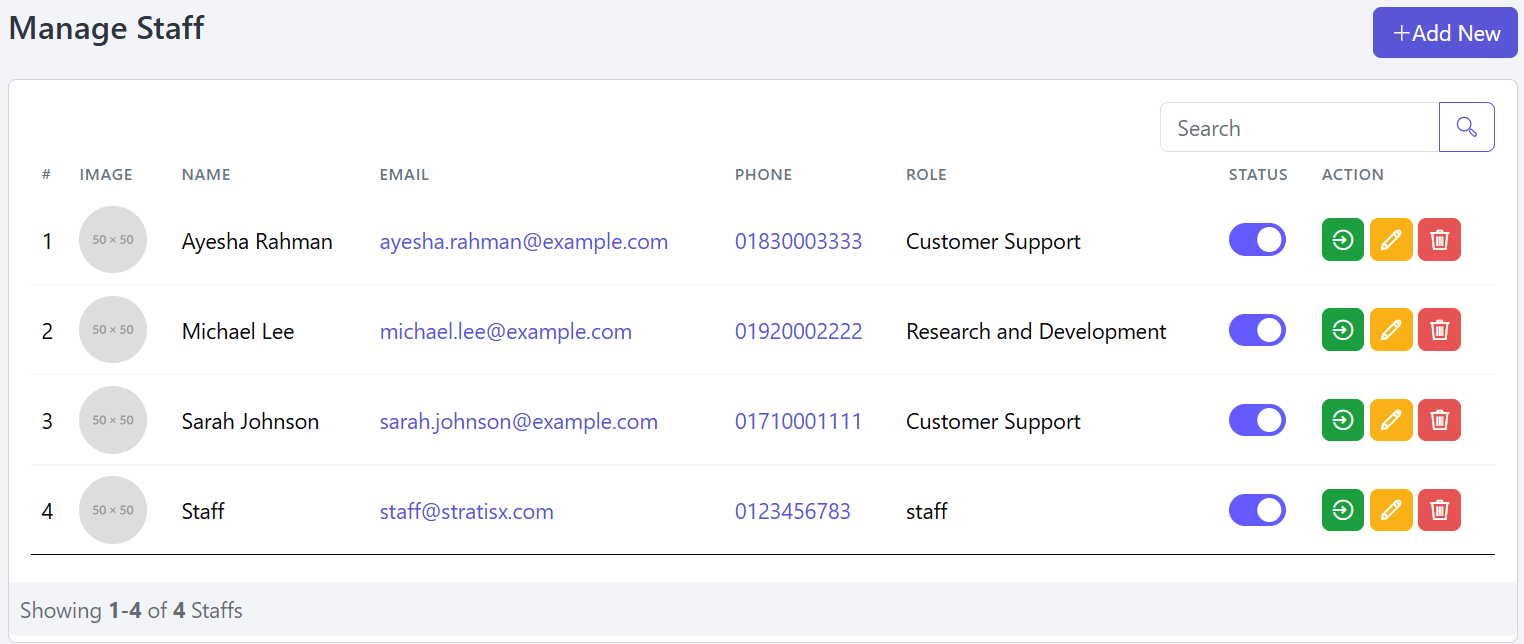
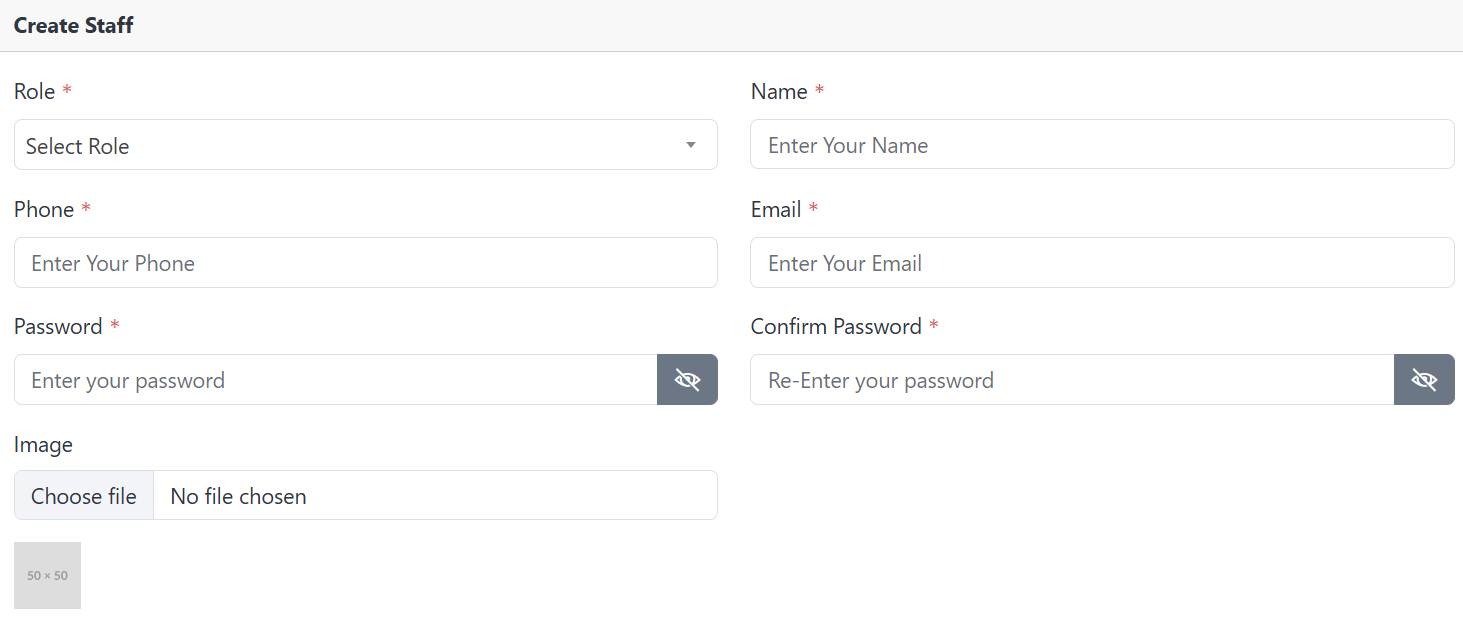
Next, you can Add New staff by entering their First Name, Last Name, Phone Number, Email, Password, Confirm Password, and Profile Photo.
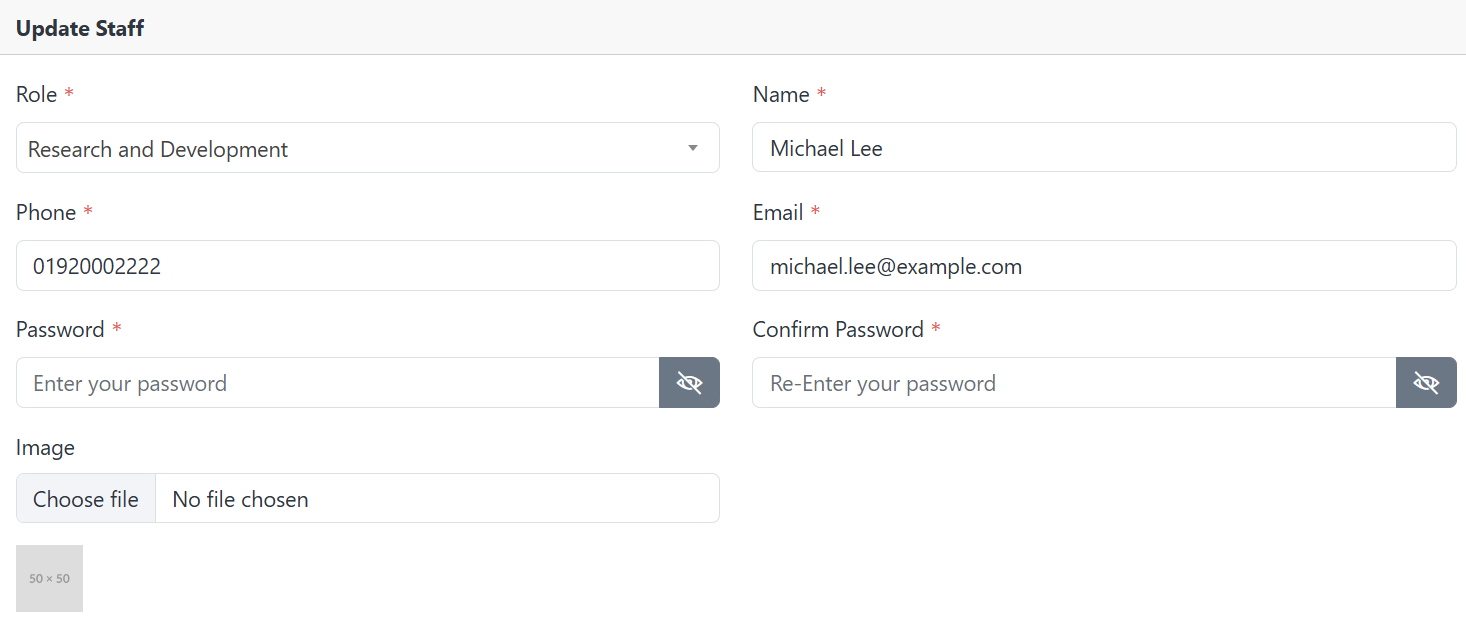
You can update or Edit staff information and details.
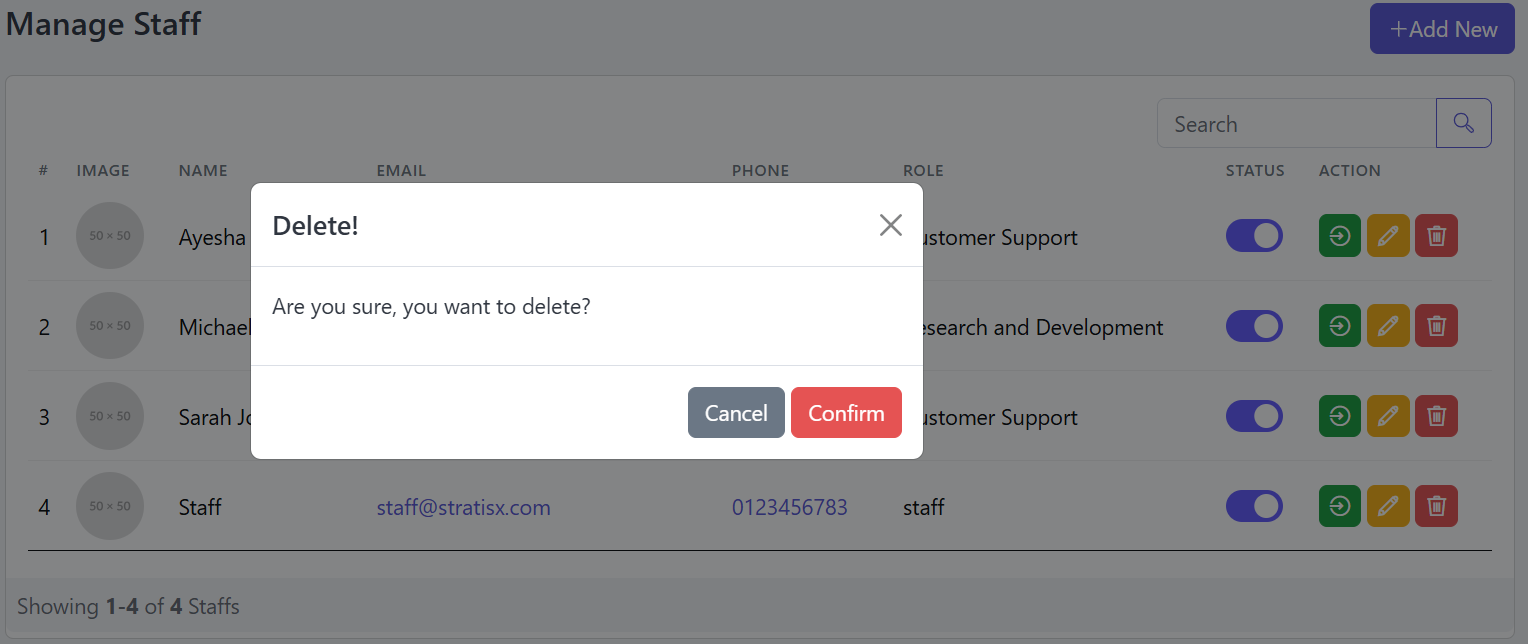
The Delete button in the Action column allows you to remove a Staff if needed.
Manage Plans
To manage the Plans for your Packages, follow these steps…
Go to the Admin Panel, click on Manage Subscription, then select Plan to view all available plans.
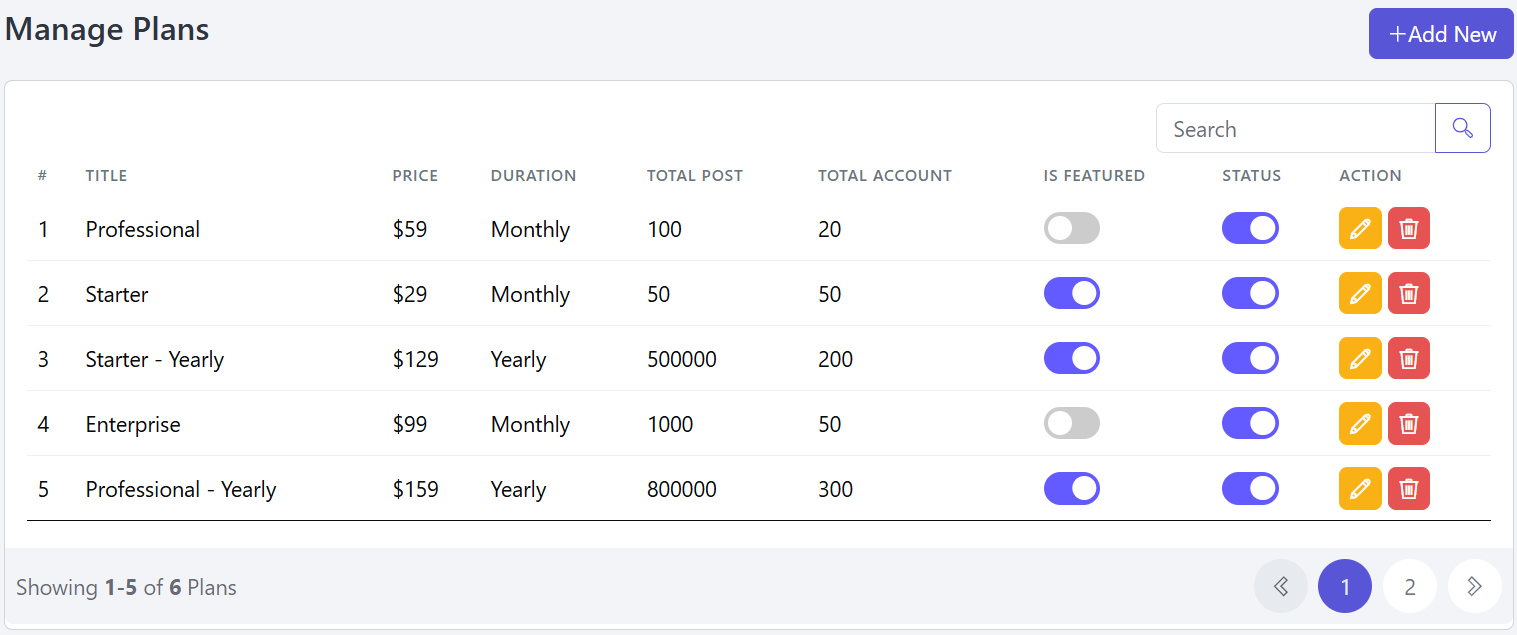
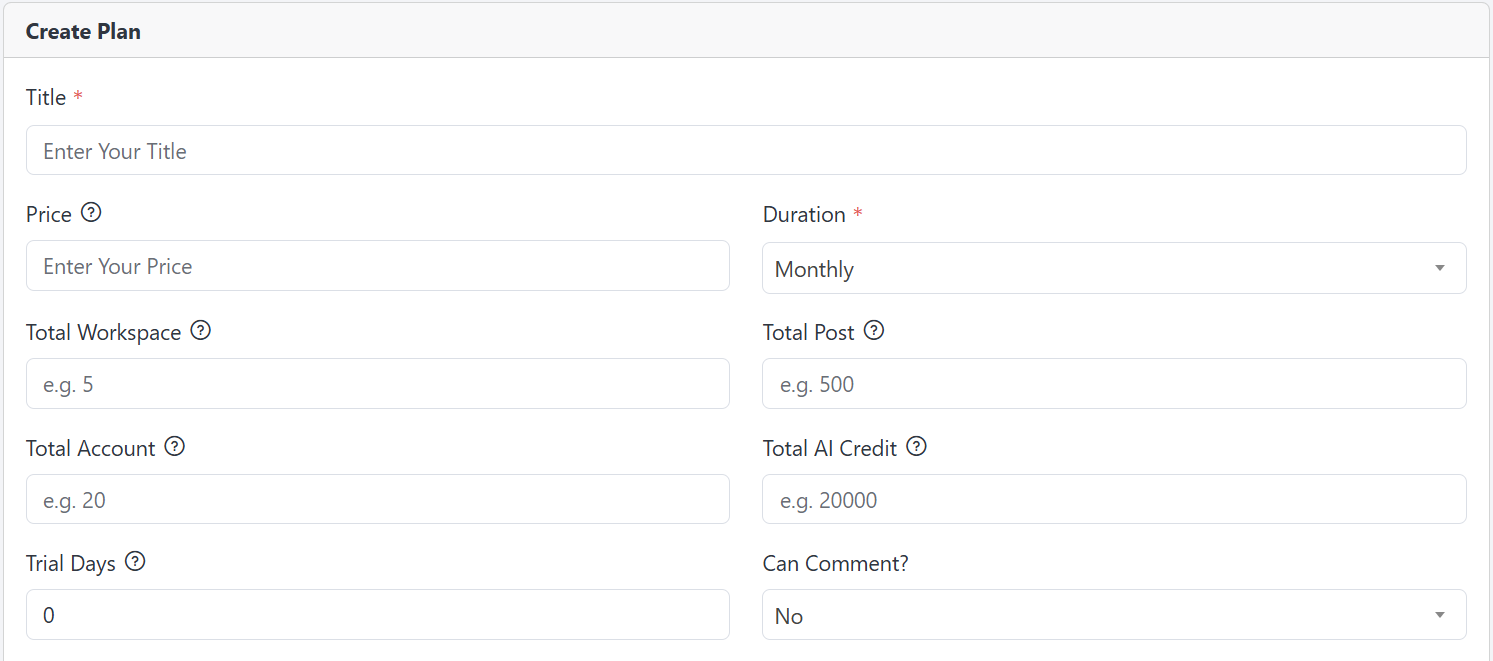
Then you can add a new Plan by filling in all details.
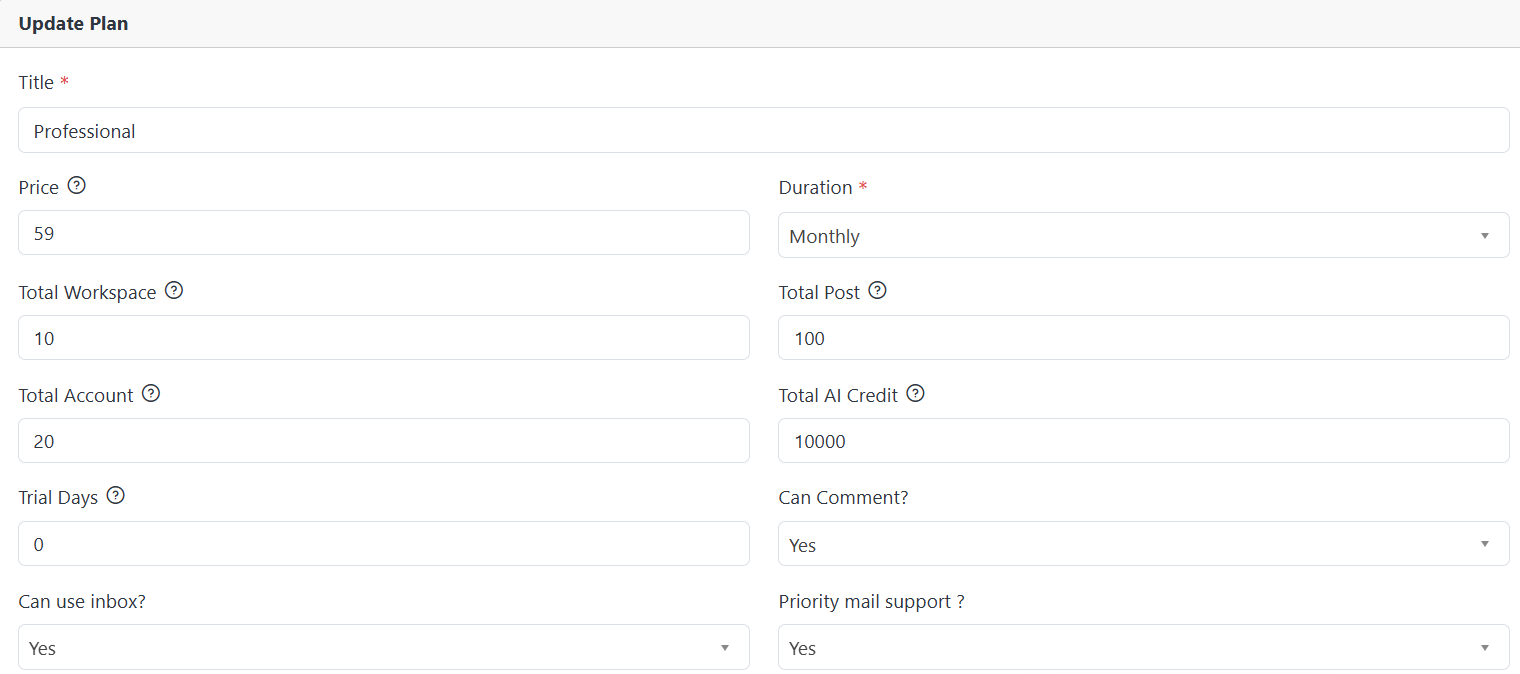
You can update the Plan details by clicking the Edit button in the Action column.
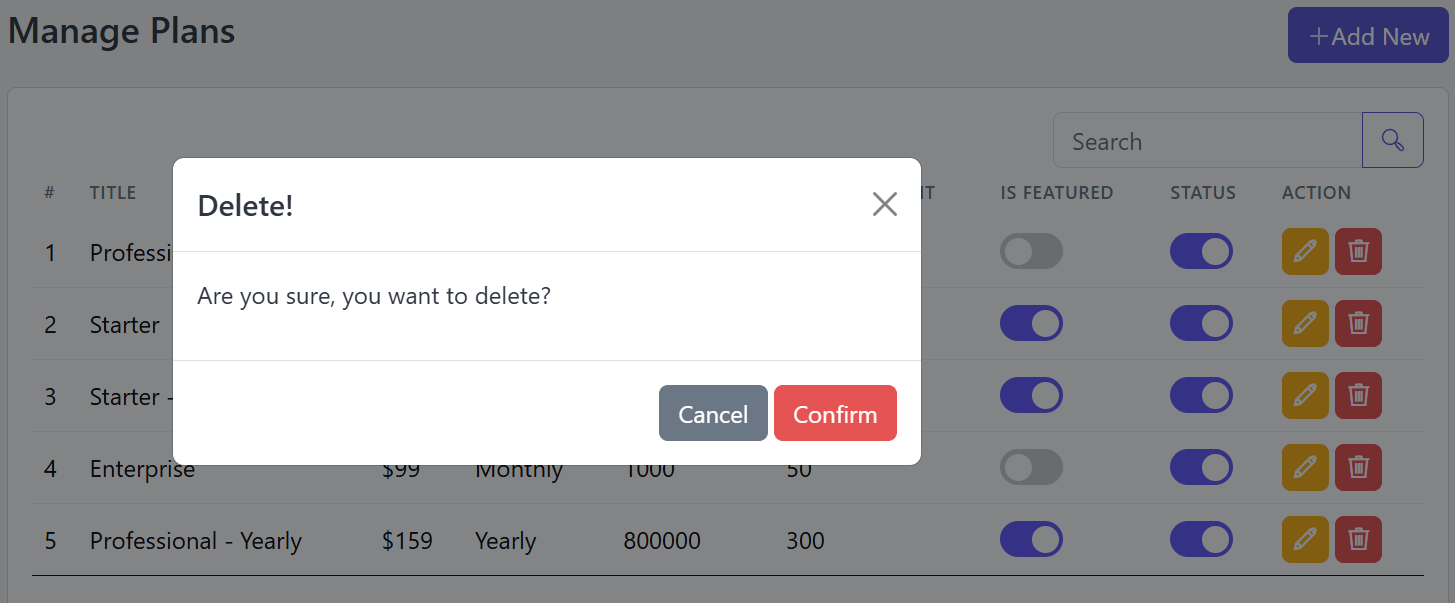
You can Delete a Plan from the list or disable a specific one if needed.
Subscriptions
Easily manage user Subscriptions by following these steps.
Navigate to the Admin Panel, click Manage Subscription, then choose Subscriptions to view the full list.

You can directly purchase a Plan for your user from the Admin Panel if needed.
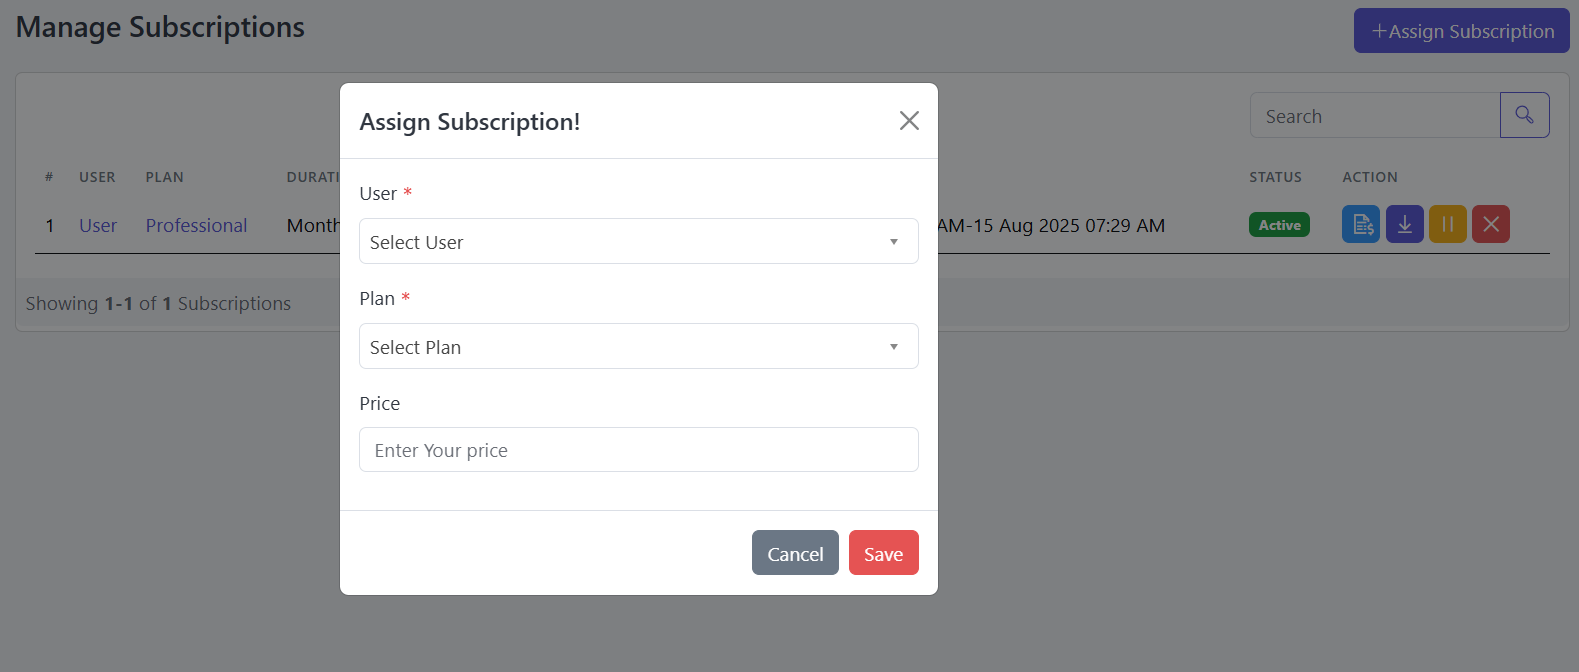
In the Action column of this list, you'll find several options. Clicking the first one on the left will show the user's Subscription history.

Clicking the Second option will allow you to Download the user's subscription invoice.

Also, using the Third option, you can Pause the user's active subscription plan.

Finally, the Last option allows you to Cancel the user's active subscription plan.

Social Platform
In this section, we’ll explore the Social Media platforms supported by Socilo for posting.
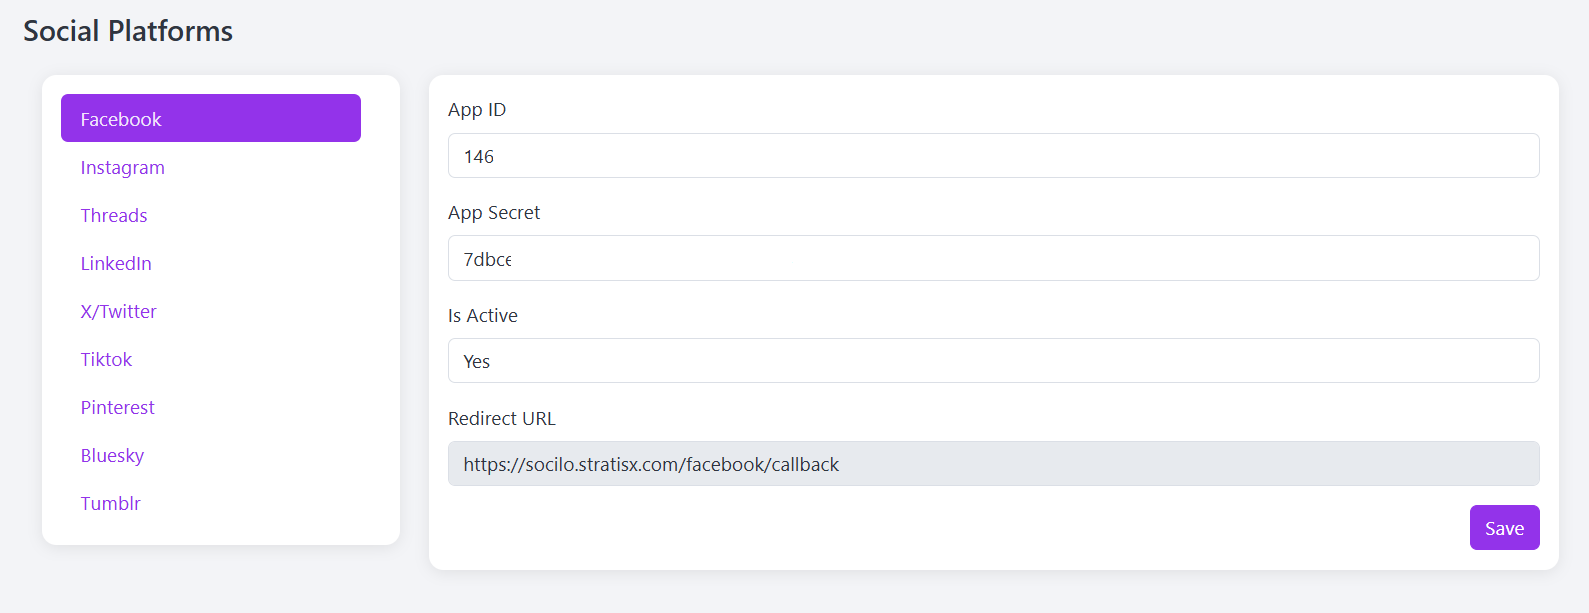
Based on the configuration settings, Facebook appears first, so we’ll begin with that.To use any of the social platforms for posting through Socilo, proper configuration is required. In the following documentation, we’ll guide you through the steps needed to configure each platform for seamless publishing.
1.Facebook
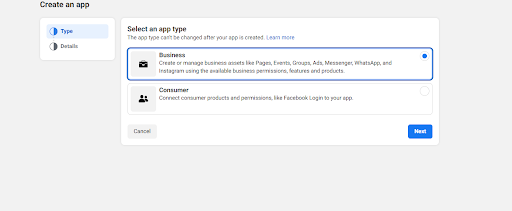
To configure Facebook, we need the App ID and App Secret Key. To get these, we must first create a Facebook App. Go to Facebook for Developers, log in with your Facebook account, click on “My Apps” in the top-right corner, then click on “Create App”.

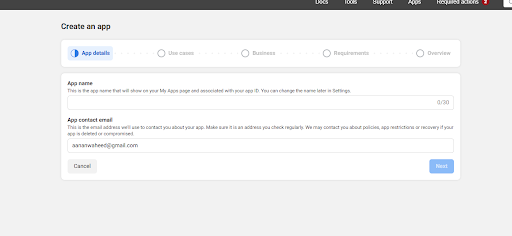
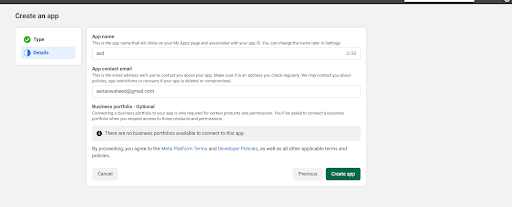
Then set the App details and click on Next.
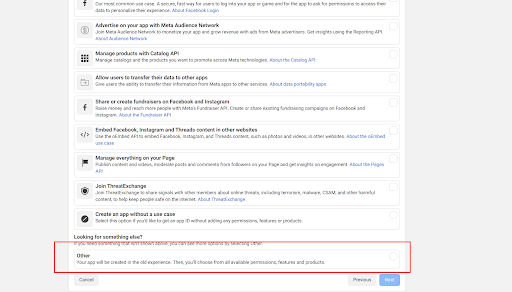
After completing the app details, go to the Use Case section, select the Other option, and proceed to the next step.
After completing the Use Case section, go to the Business option and select the appropriate Business Type, as shown in the image.
Then complete the required details and click on Create App to finish the app creation process.
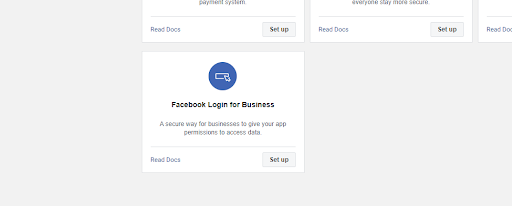
After creating the app, select Facebook Login for Business and click Set Up.
Then go to the Settings option, where you will see a field like the one marked in the image below.
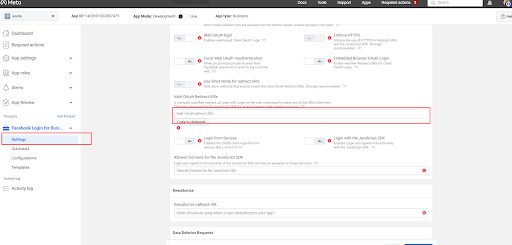
In the Redirect URL section, paste the URL provided in the Facebook section of Socilo. Copy that URL from Socilo and paste it here. An image of the Facebook section is shown below for reference.
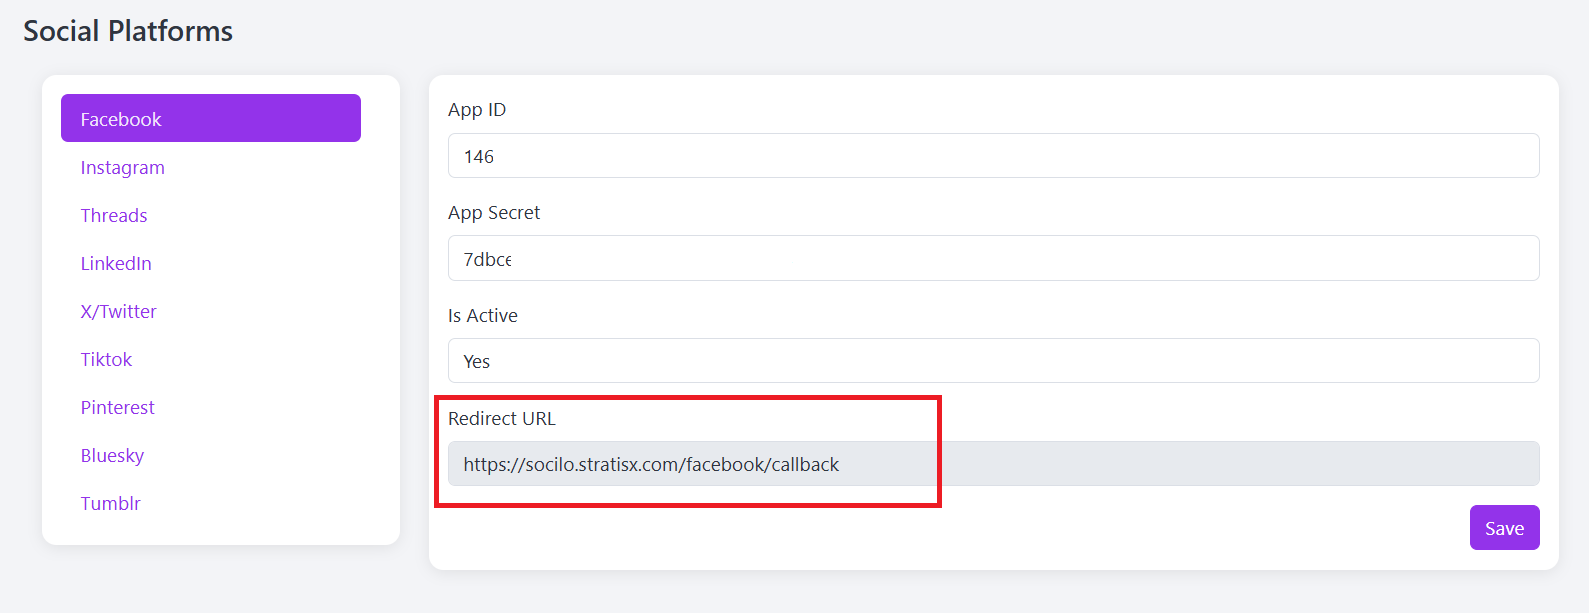
Next, go to the Basic tab under App Settings, where you’ll find the App ID and App Secret. Copy these credentials and use them in the Facebook section of Socilo.

2.Instagram
For Instagram integration, we’ll use the same Facebook App. To do this, click on “Add Product” in the sidebar and select Instagram from the list.
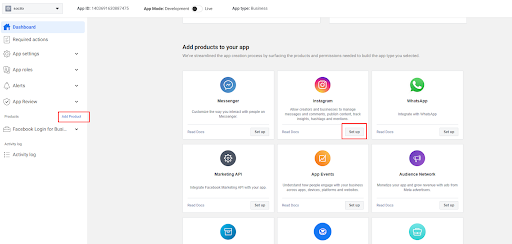
After clicking on Set Up, you’ll be taken to the next screen.
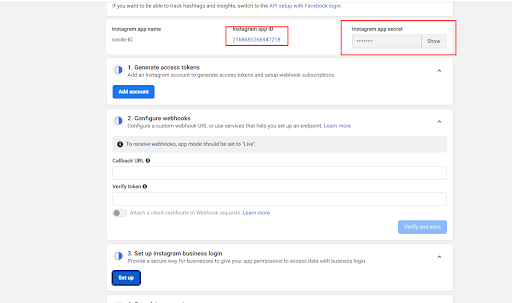
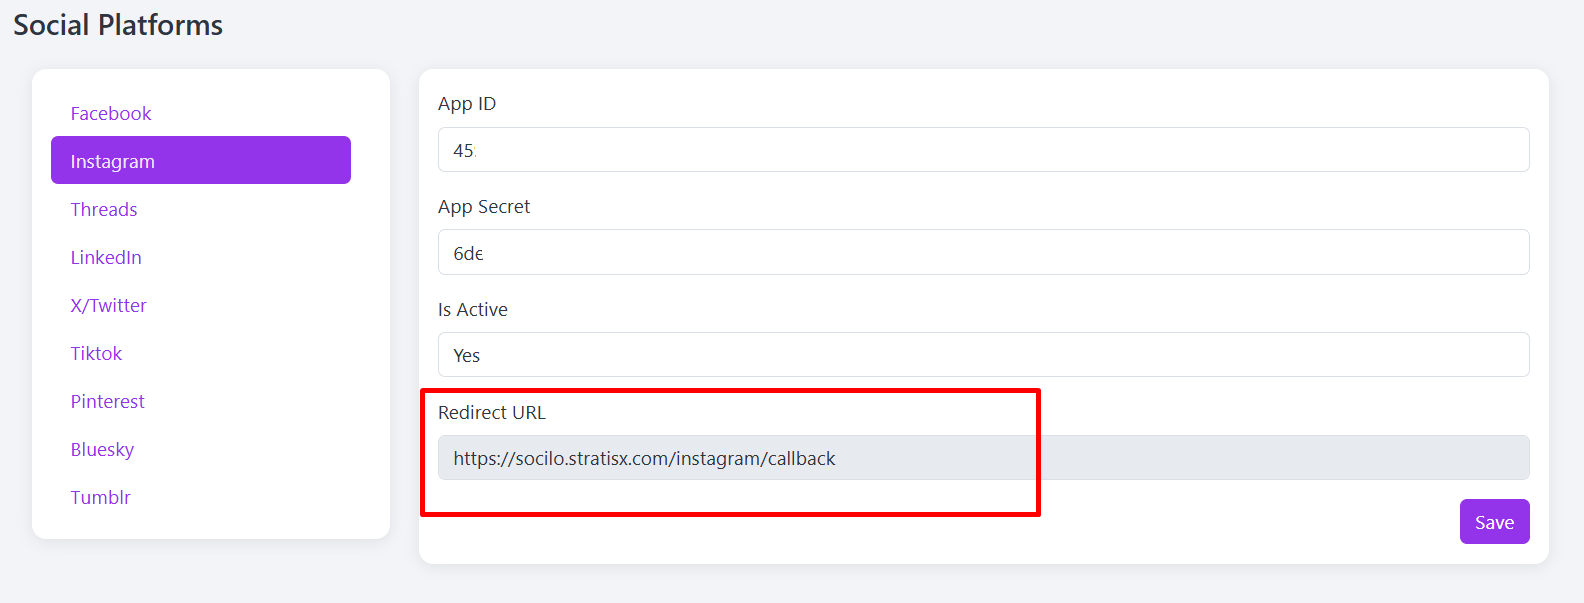
Take note of the Instagram App ID and App Secret.When you click on Set Up, you’ll see the Redirect URL field—paste the URL provided below into that section.
3.Threads
For Threads, you need to follow the same steps as Facebook to create an app.However, at the second stage, make sure to select “Access the Threads API” as the use case.
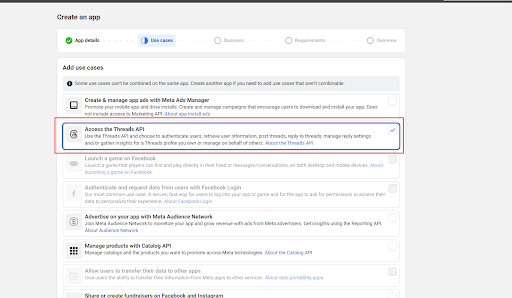
After creating the product, follow the steps below.

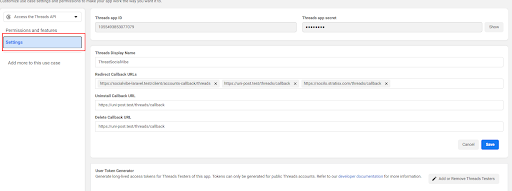
On the next screen, click on Settings and take note of the keys.Then copy the Redirect URL from the configure screen and paste it here.
4.Linkedin
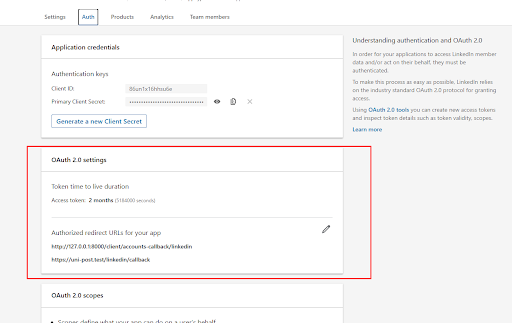
In Socilo, to enable LinkedIn integration, we need to create a LinkedIn app.There, we will use the Client ID and Client Secret.
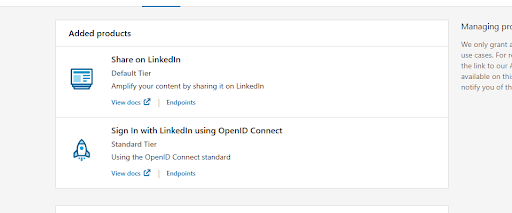
After creating the app, you need to add three products Share on LinkedIn, Sign in with LinkedIn using OpenID Connect, and Page Data Portability API.

5.Twitter
Go to the Twitter Developer Portal, log in with your Twitter account, click on Projects & Apps from the top menu, then click + Create App or select an existing project.
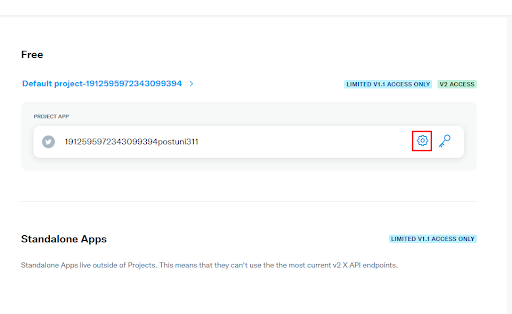
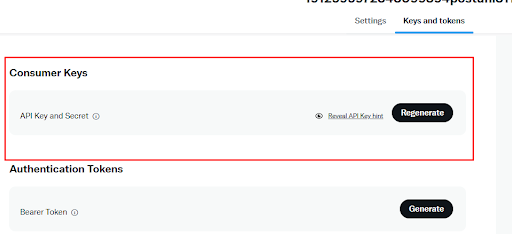
Once the app is created, go to the Keys and Tokens section, where you’ll find the Client ID and Client Secret under the OAuth 2.0 section.
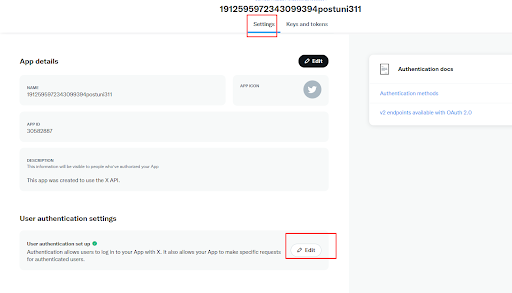
Next, go to the Settings option and edit the User Authentication Settings.
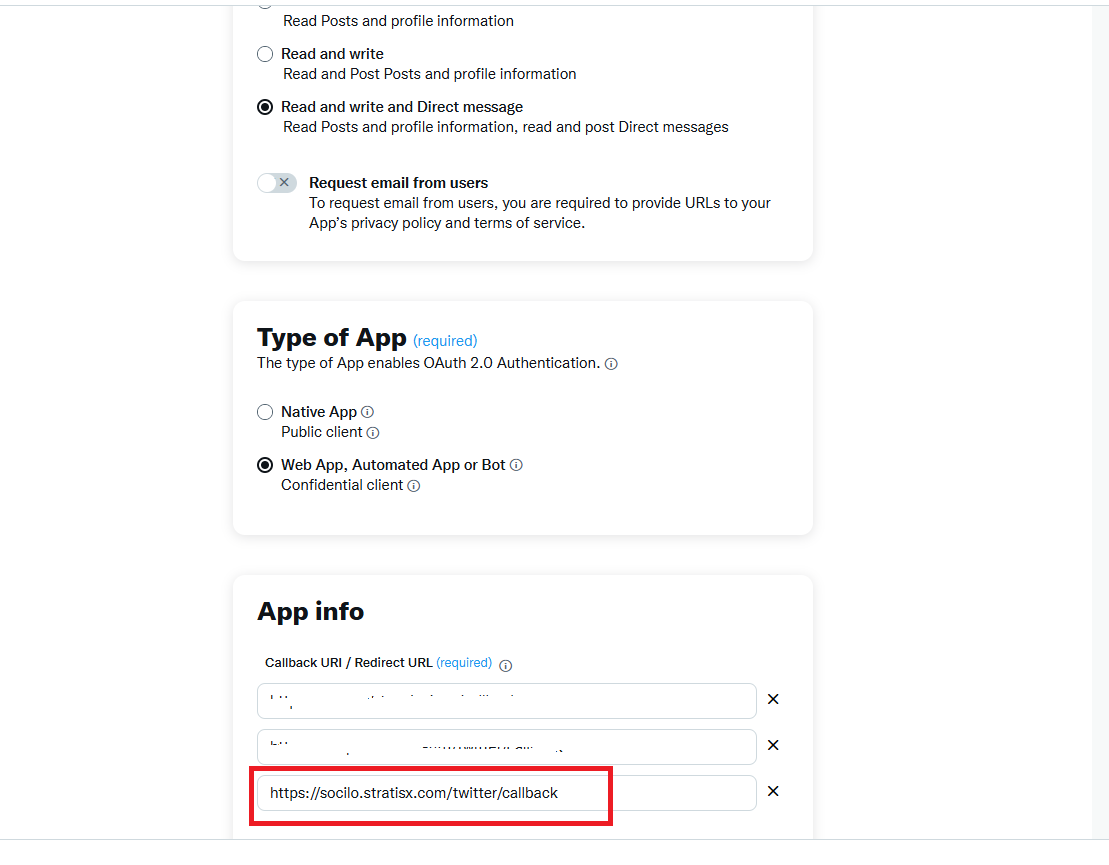
Go to Edit, and there you will add the Redirect URL.
6.Tiktok
First, create an organization in the TikTok for Developers portal.Once the organization is set up, you can proceed to create an App from there.
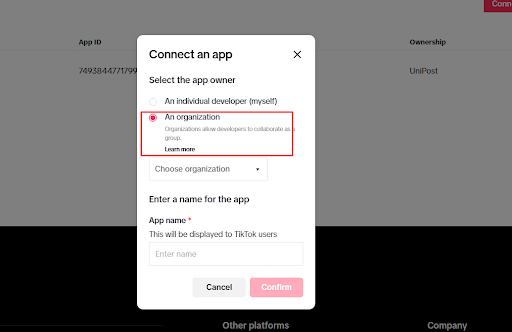
Select your organization from the available options, then click on the app and take note of the keys provided.

7.Pinterest
On Pinterest Developers, you can easily create an App by just providing a name and some basic details.
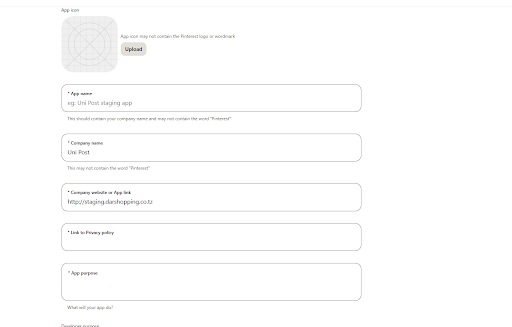
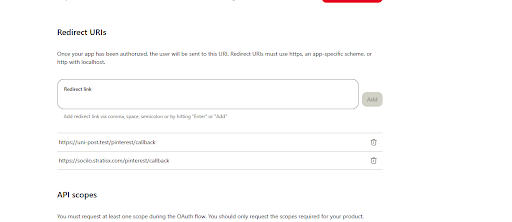
Next, make sure to note down the keys and add your redirect URL in the designated field.
8.Blusky
There's no need to use any third-party applications.
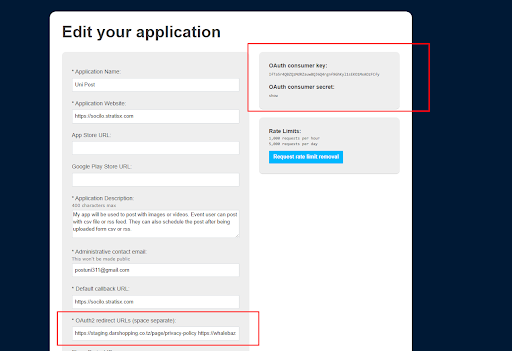
9.Tumblr
Register an application on Tumblr. Once registered, add the redirect URL and make a note of the provided keys.
General settings
Follow the steps below to configure the General Settings.
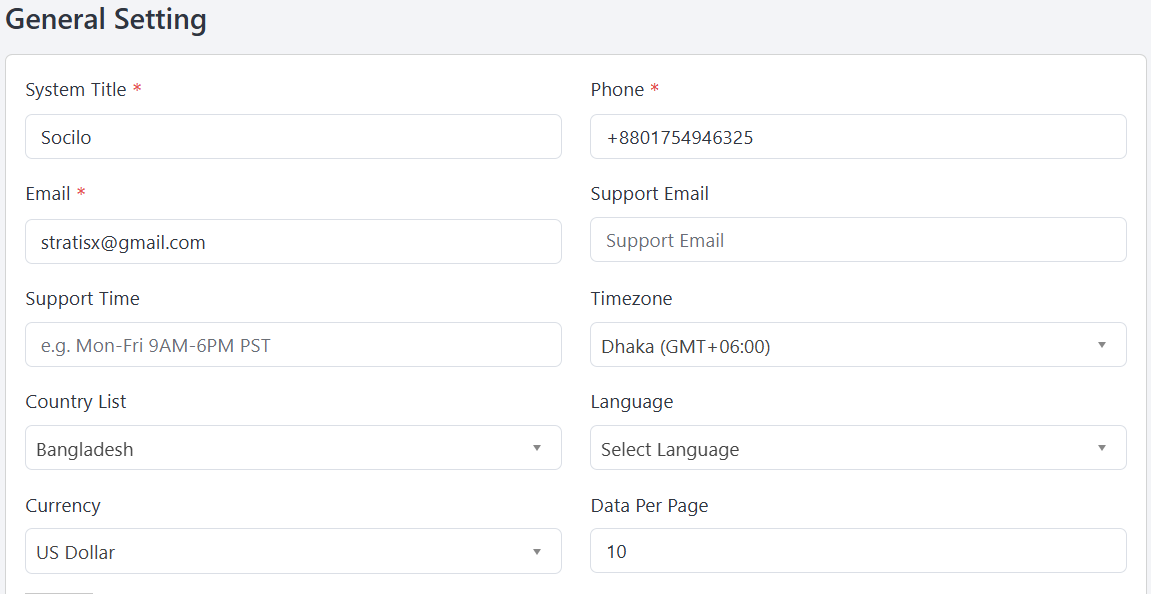
- Go to the Admin Panel and click on System Settings.
- Then go to General Settings, where you can configure the System Title, default language, currency, phone number, email, support time, country, address, and more
Storage Setting
Follow the steps below to configure the Storage Settings.
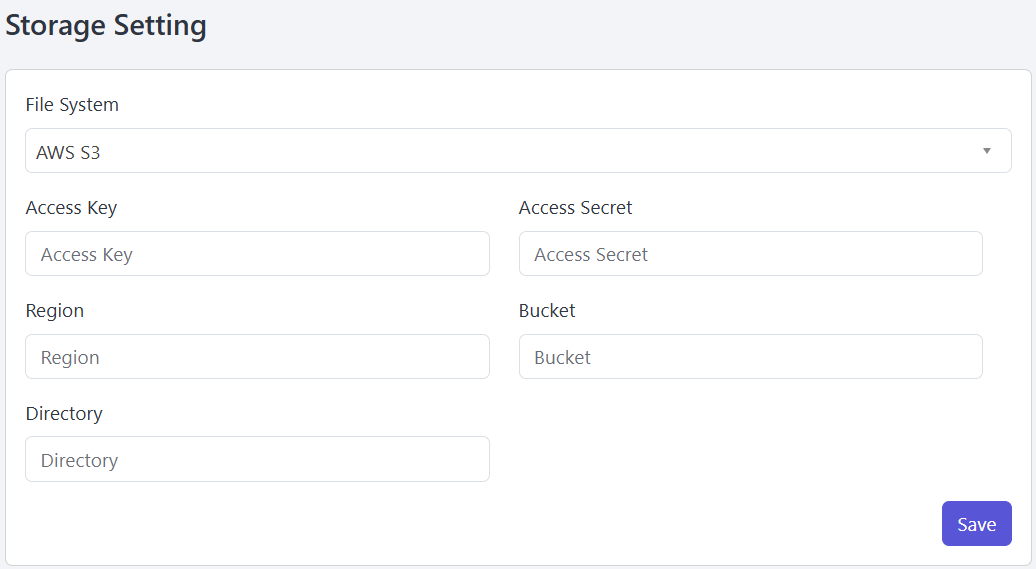
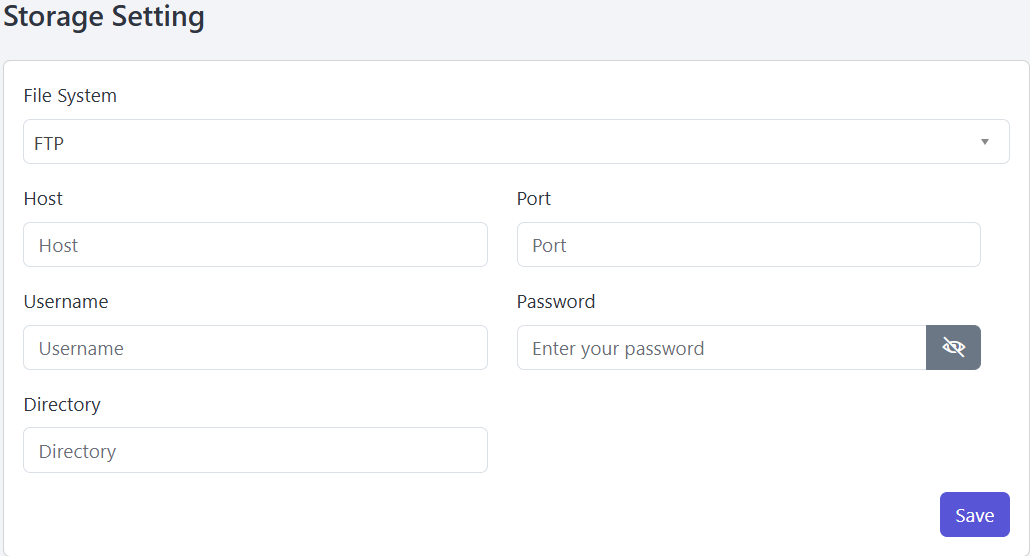
Socilo supports local storage as well as Amazon S3, DigitalOcean, FTP, and SFTP for managing storage. You can choose any of these options for your storage needs.
For AWS S3 and DigitalOcean, you need to provide the required credentials. Details are provided below.
For FTP and SFTP, you need to provide the required credentials. Details are provided below.
Ai Setting
Follow the steps below to configure the Ai Settings.
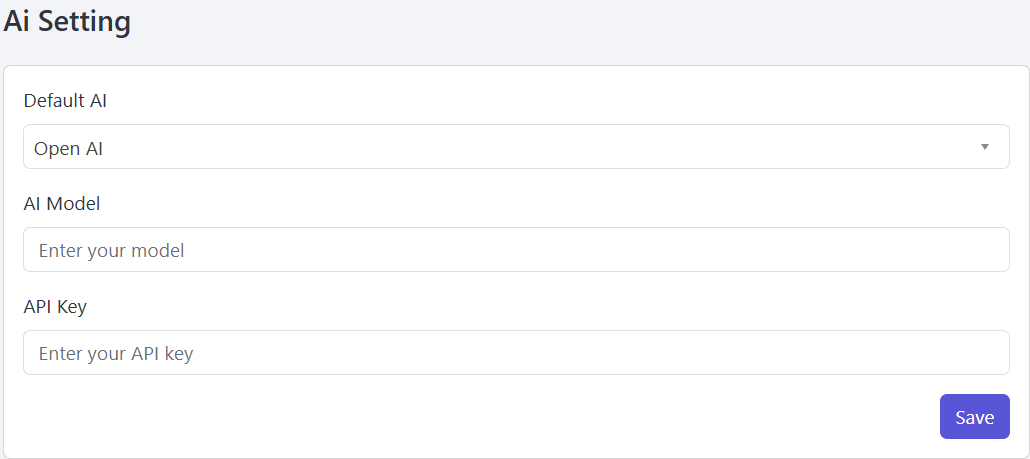
Socilo supports both OpenAI and DeepSeek for AI features. You can choose either option based on your AI setting preferences.
For OpenAI and DeepSeek, you need to provide the necessary credentials. The details are given below.
Firebase Setting
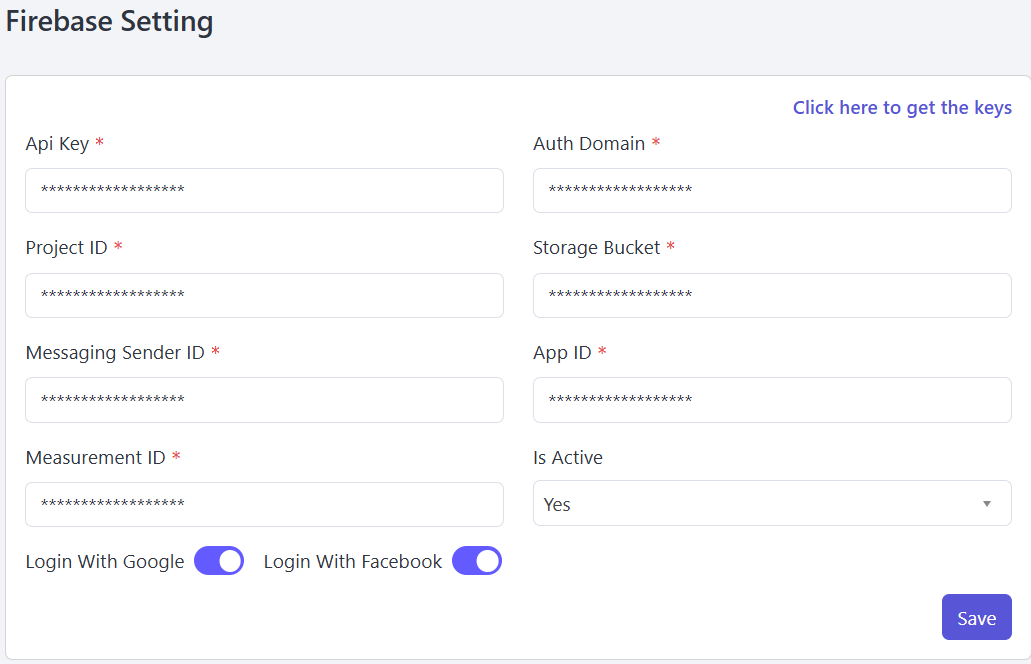
Follow the steps below to configure the Firebase Settings.
Go to Admin Panel & click System Settings
Go to Firebase Settings, where you can set up Google and Facebook integrations, as well as enter the API Key, Auth Domain, Project ID, Storage Bucket,
Messaging Sender ID, App ID, Measurement ID, and other details.
Recaptcha Setting
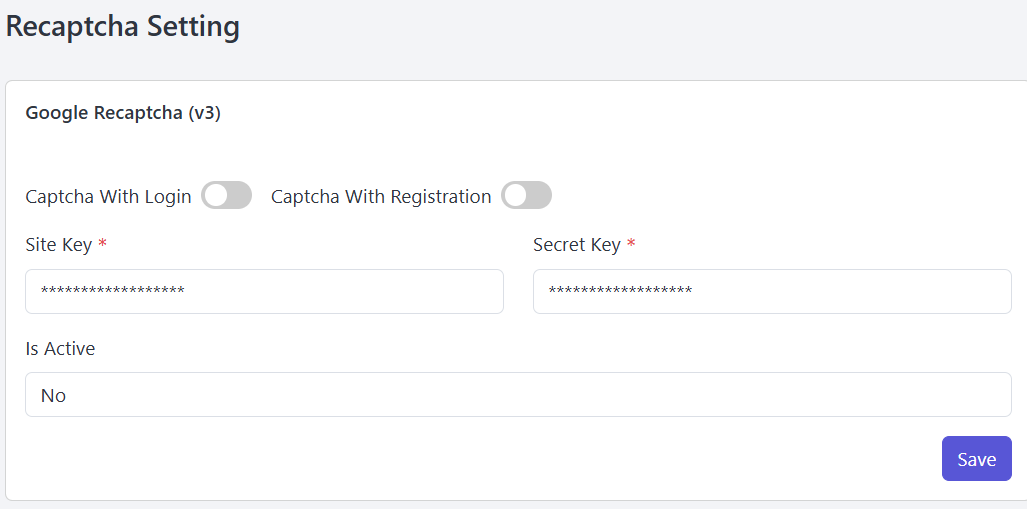
Please follow the steps below to set up the Recaptcha settings.
Open the Admin Panel and select System Settings.
Go to Recaptcha Settings, To configure Recaptcha, please enter the necessary credentials. The details are provided below.
Admin Panel Setting
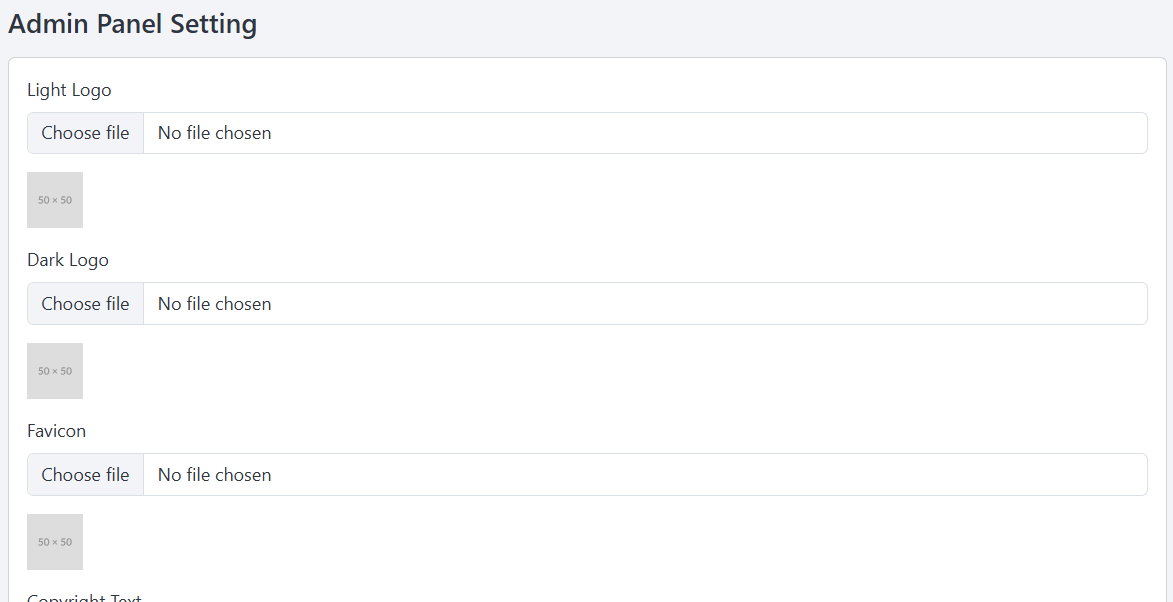
Please follow the steps below to set up the Admin Panel Setting.
Go to Admin Panel & click System Settings
Next, open the Admin Panel Settings, where you can configure the Light Logo, Dark Logo, Favicon, Copyright Text, Powered By Text, and more.
Manage Languages
Please follow the steps below to Manage Languages.
Go to the Admin Panel and click on Languages.
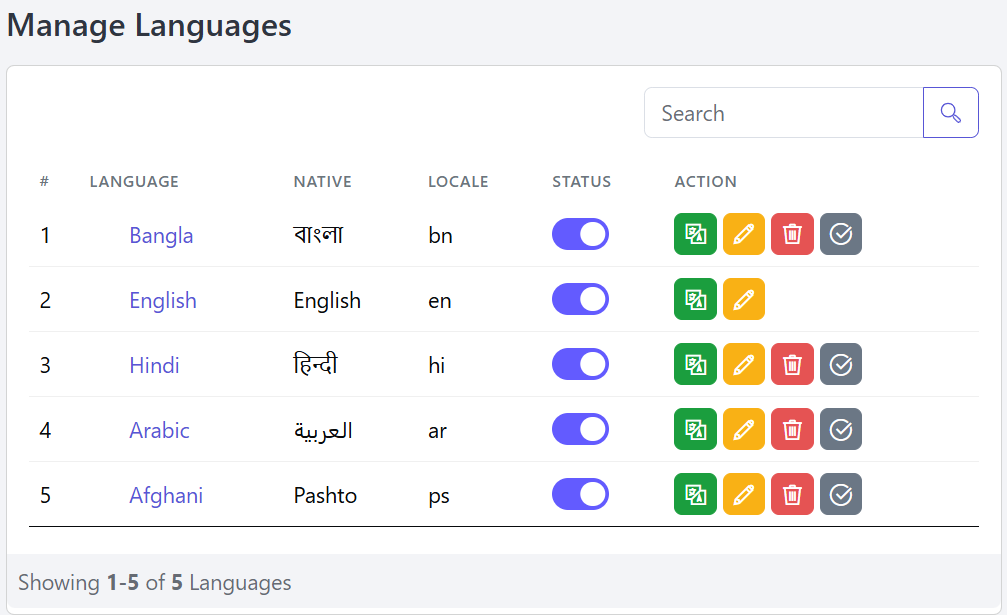
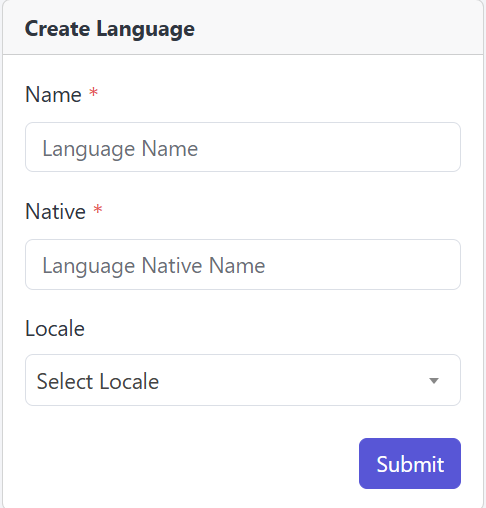
You can also add a new language from here by providing the required information.
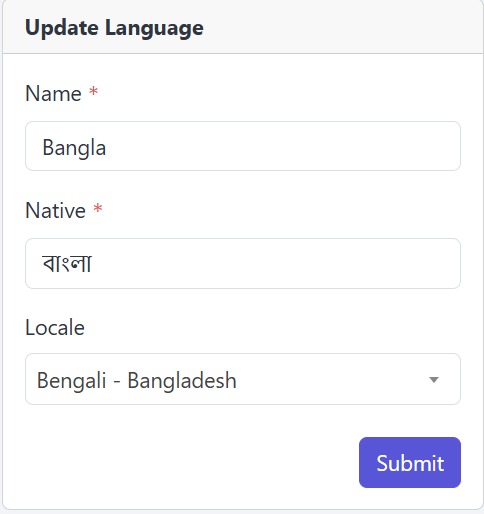
You're also able to Edit language information.
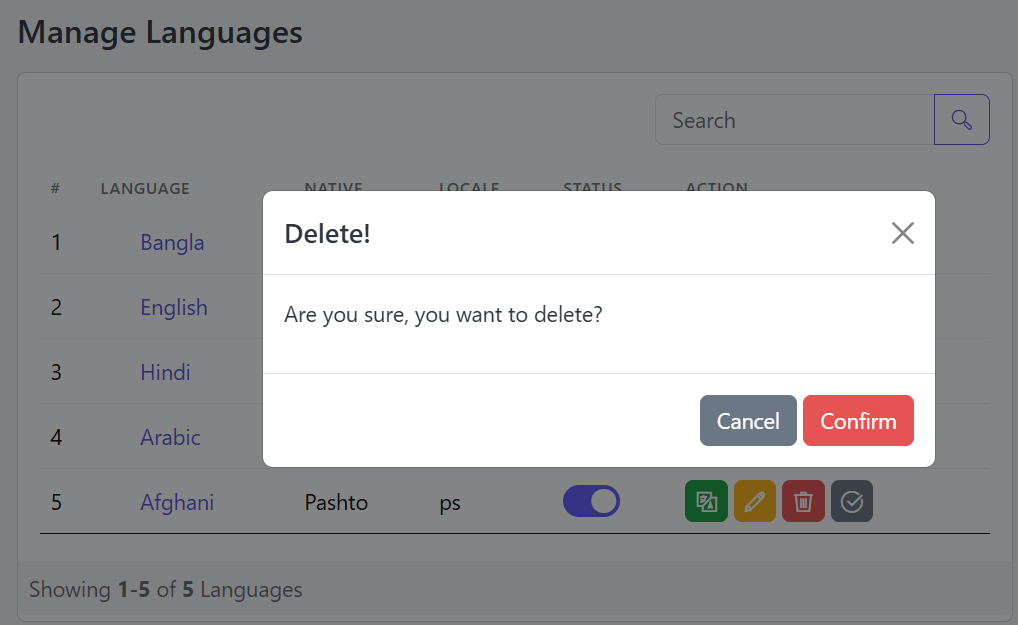
You can use the Delete button in the Action column to remove a language when necessary.
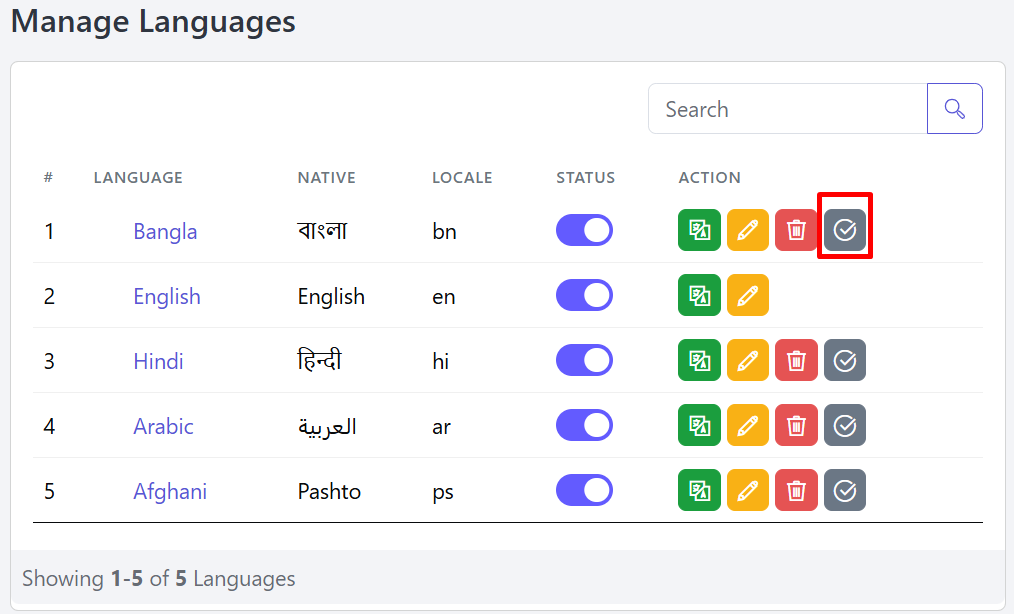
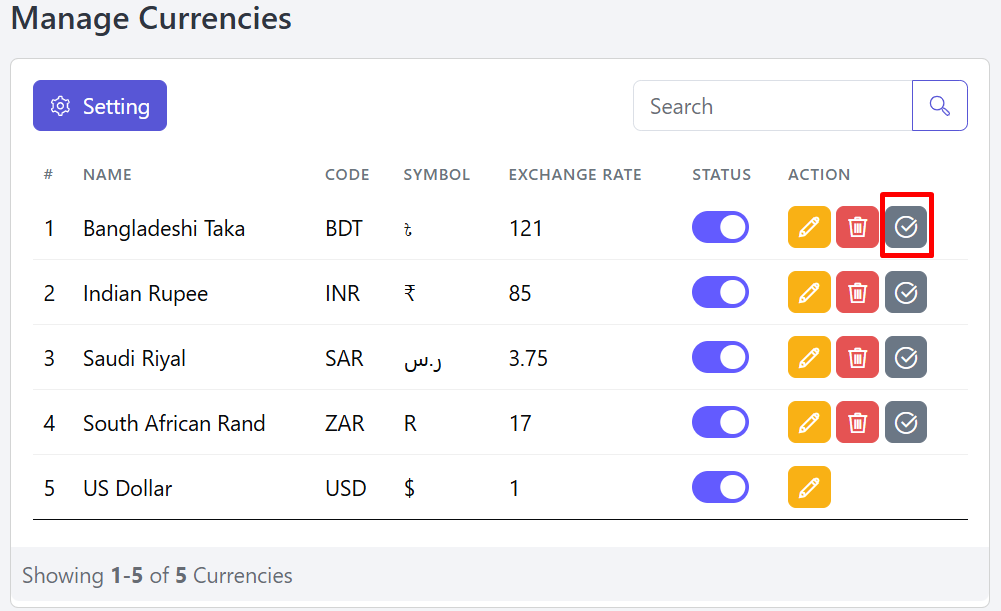
You can set the Default Language using the button marked in red.
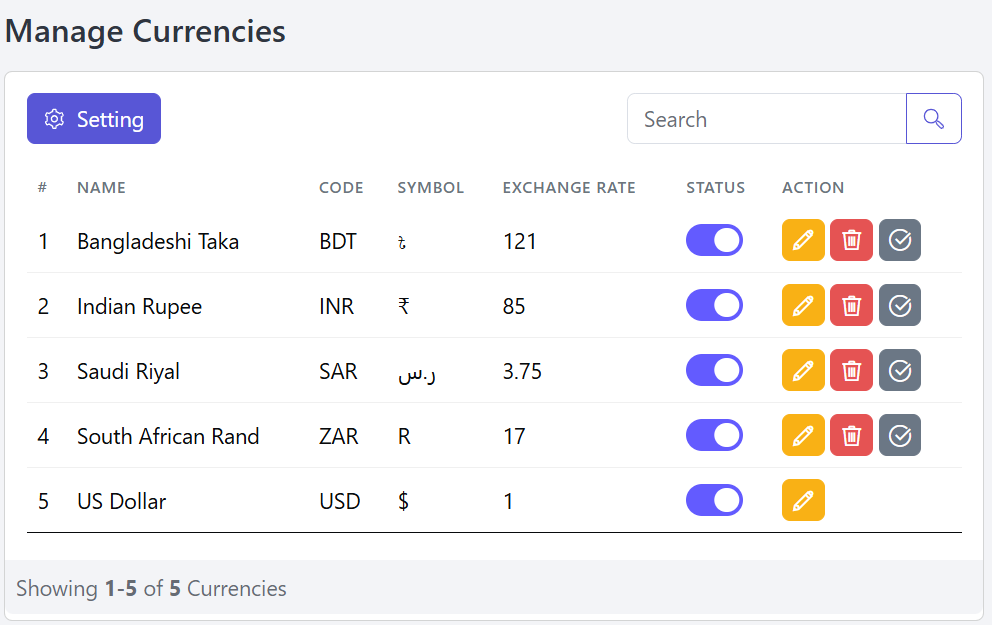
Manage Currencies
Follow the steps below to Manage currencies.
Go to the Admin Panel and click Currencies.
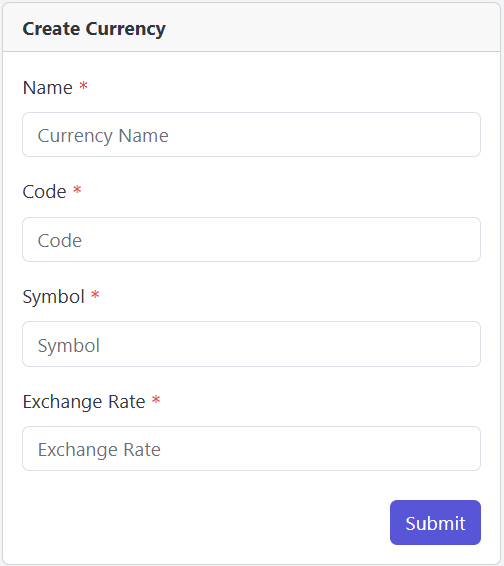
You can add a new currency here by entering the required information.
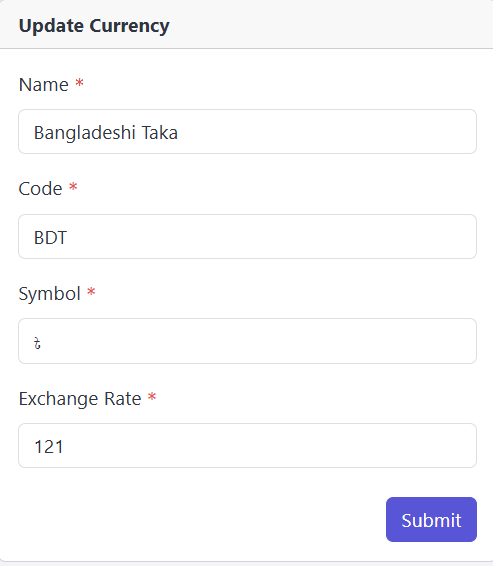
You're also able to Update currency information.
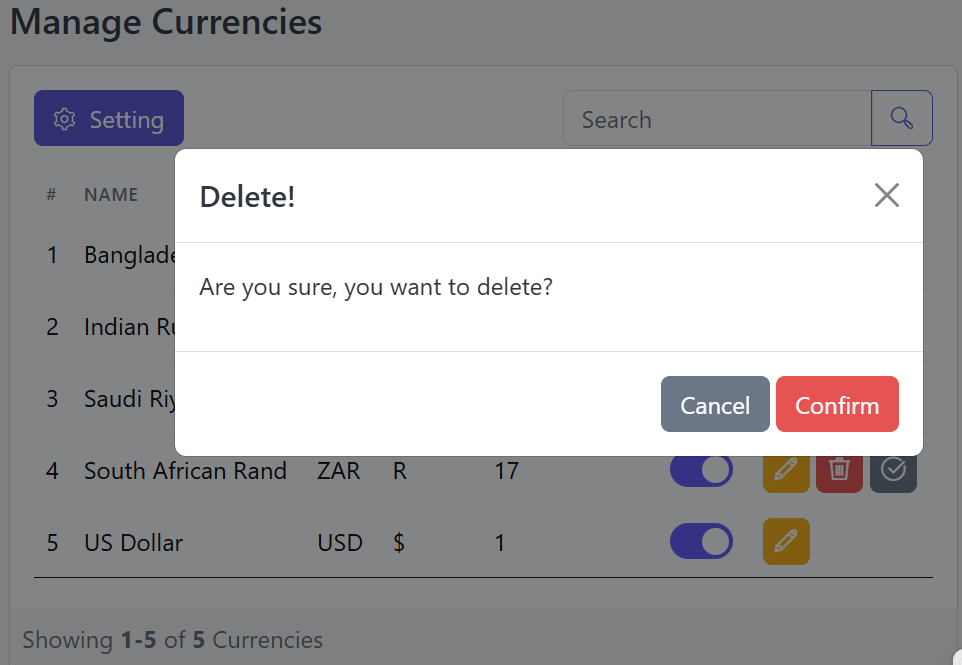
Use the Delete button in the Action column to remove a currency if needed.
You can set the Default Currency using the button marked in red.
Email Configuration
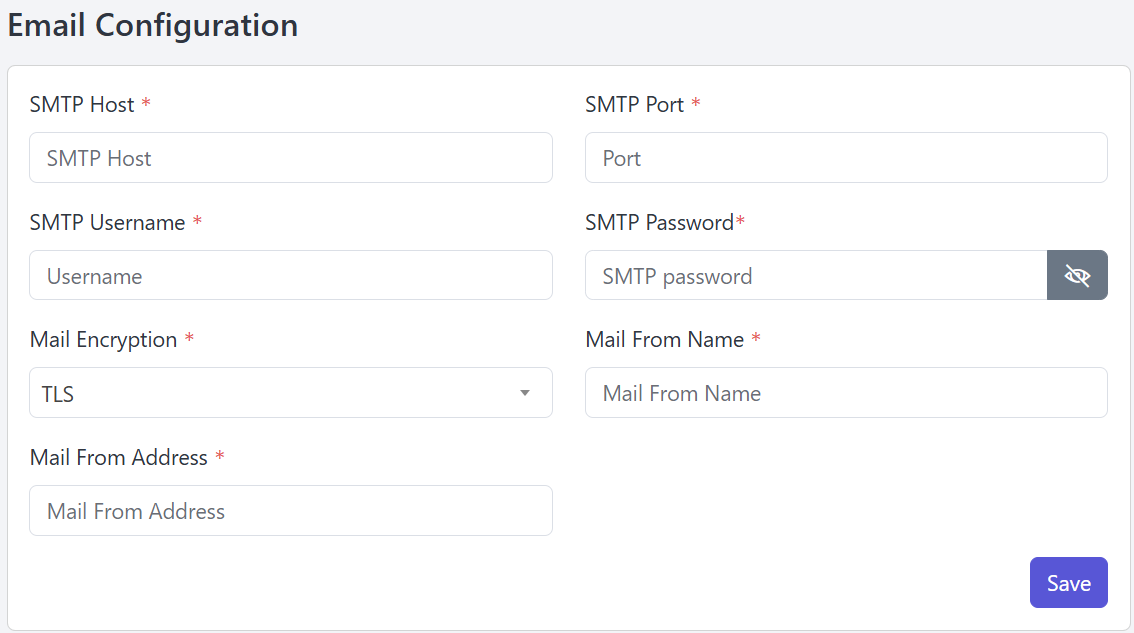
Follow these steps to manage your Email Configuration.
Open the Admin Panel and select Email Settings. Then go to the Configuration tab, where you can set up your email settings.
Offline Methods
Here you can list all the local payment methods that Socilo doesn't provide as Online Method. You can use any wallet or Bank. Take a look at the below pic for more clear vision.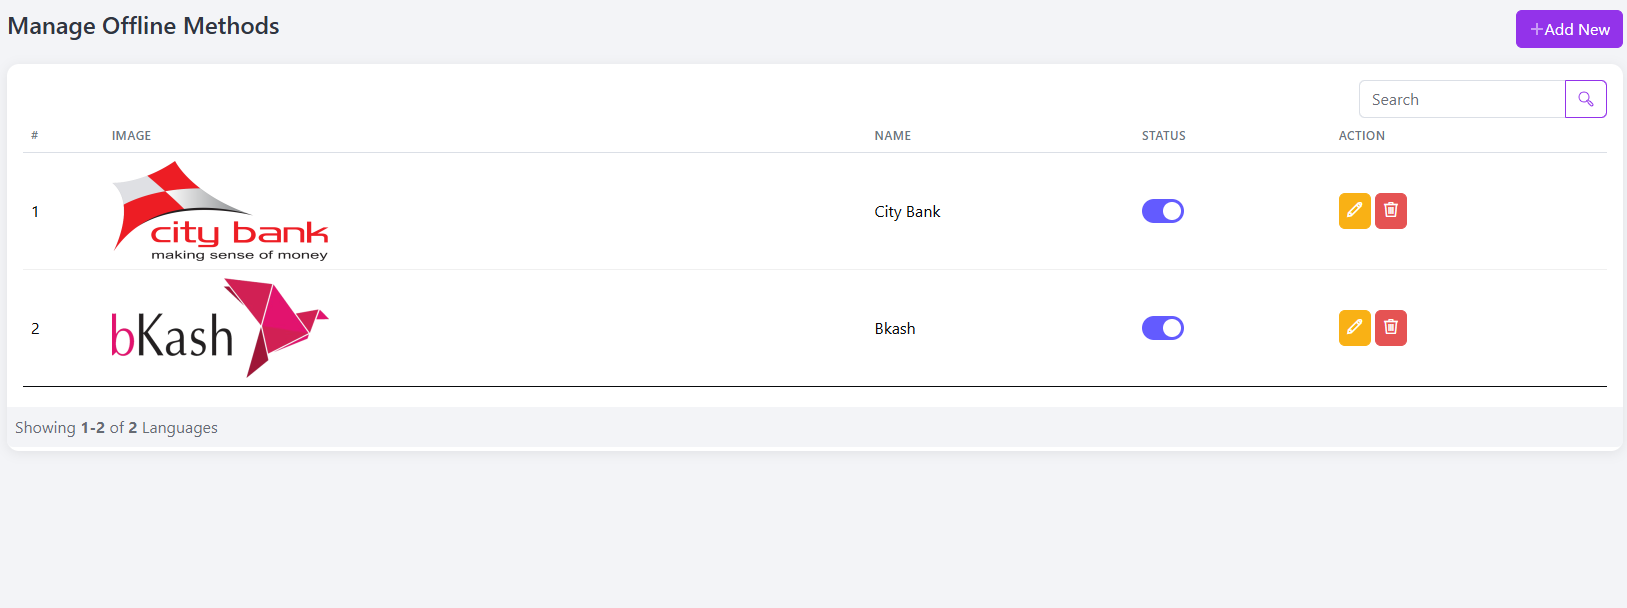
Online Payment Methods
Here we'll see the available Online Method that Socilo supports and can be used as recurring payment method. So we'll start form Stripe as we can see that according to our config page Stripe comes first.
- Stripe
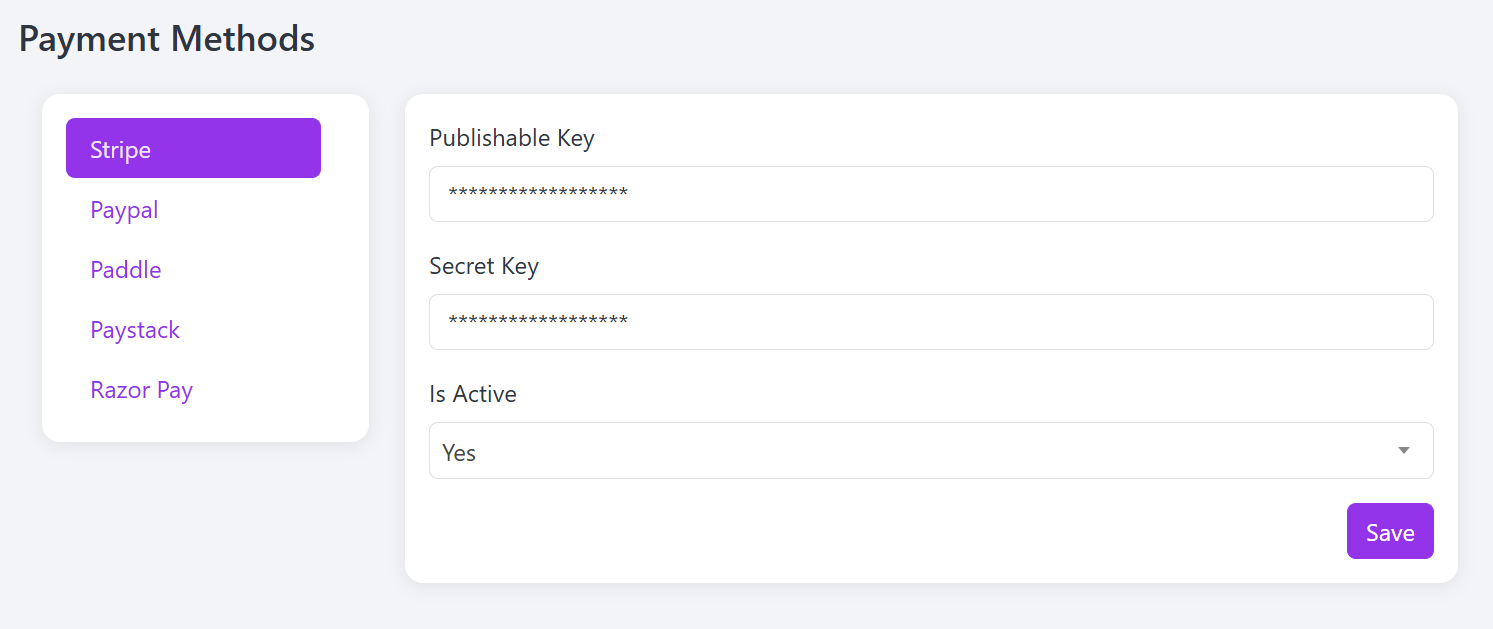
To get started with Stripe, first log in to your Stripe Dashboard. From the left sidebar, click on Product catalog. There, you’ll need to create a new product by filling in the required information. This step is important before setting up your payment keys.
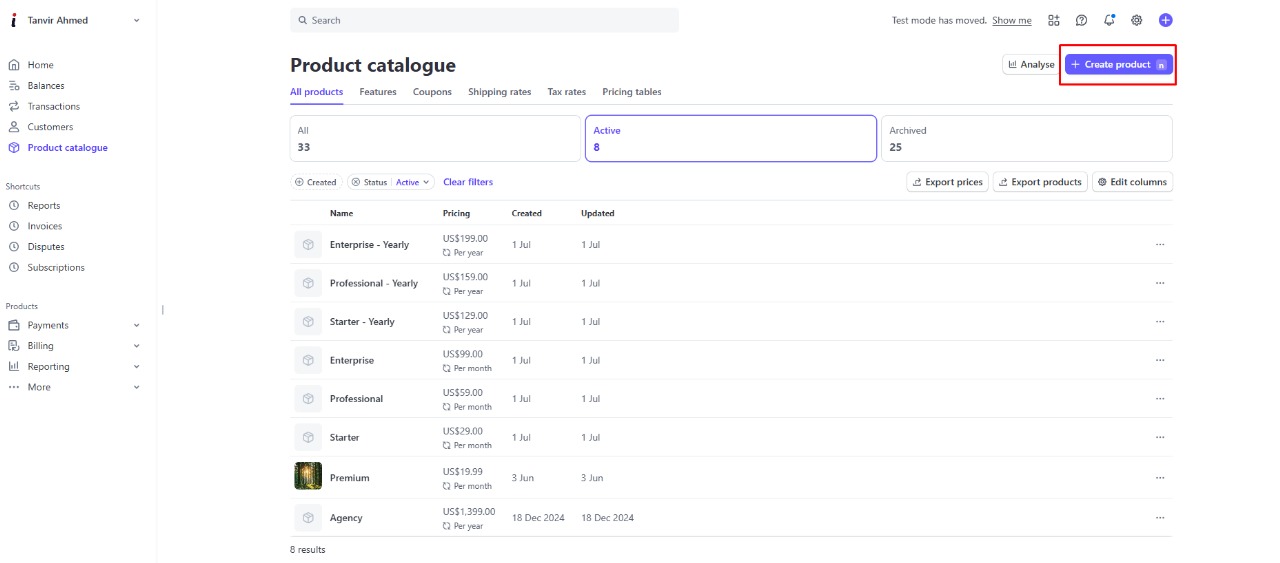
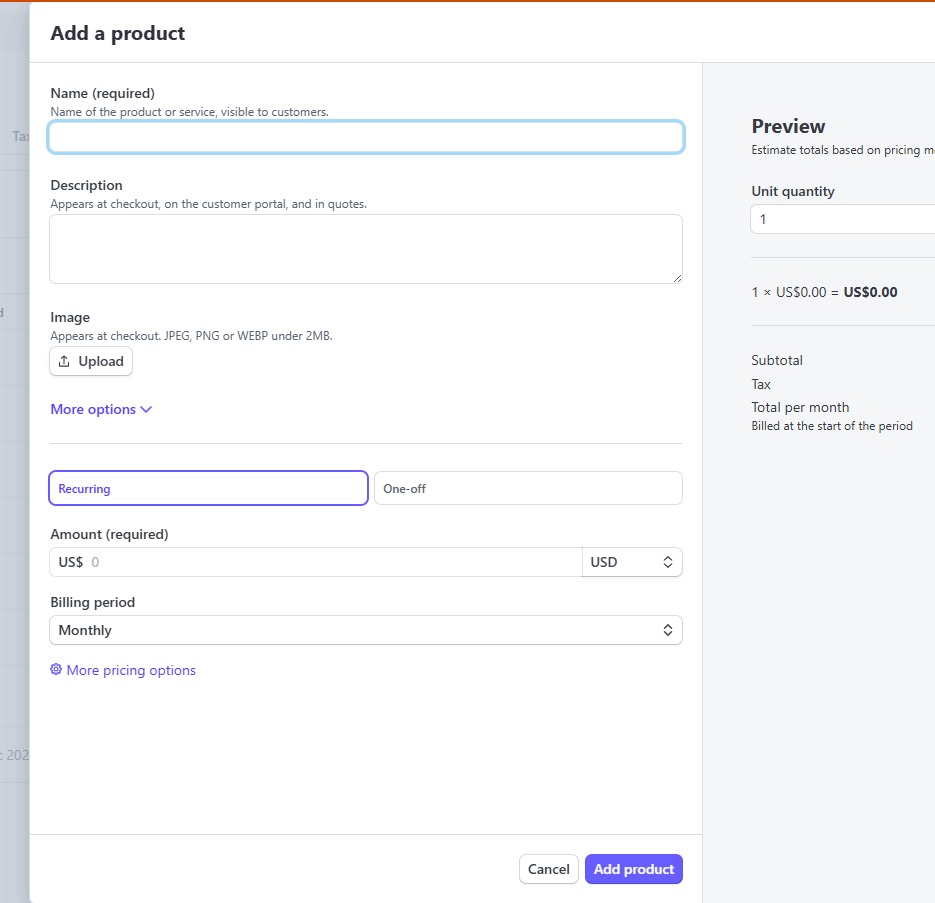
Then you need to use this information to create the product.
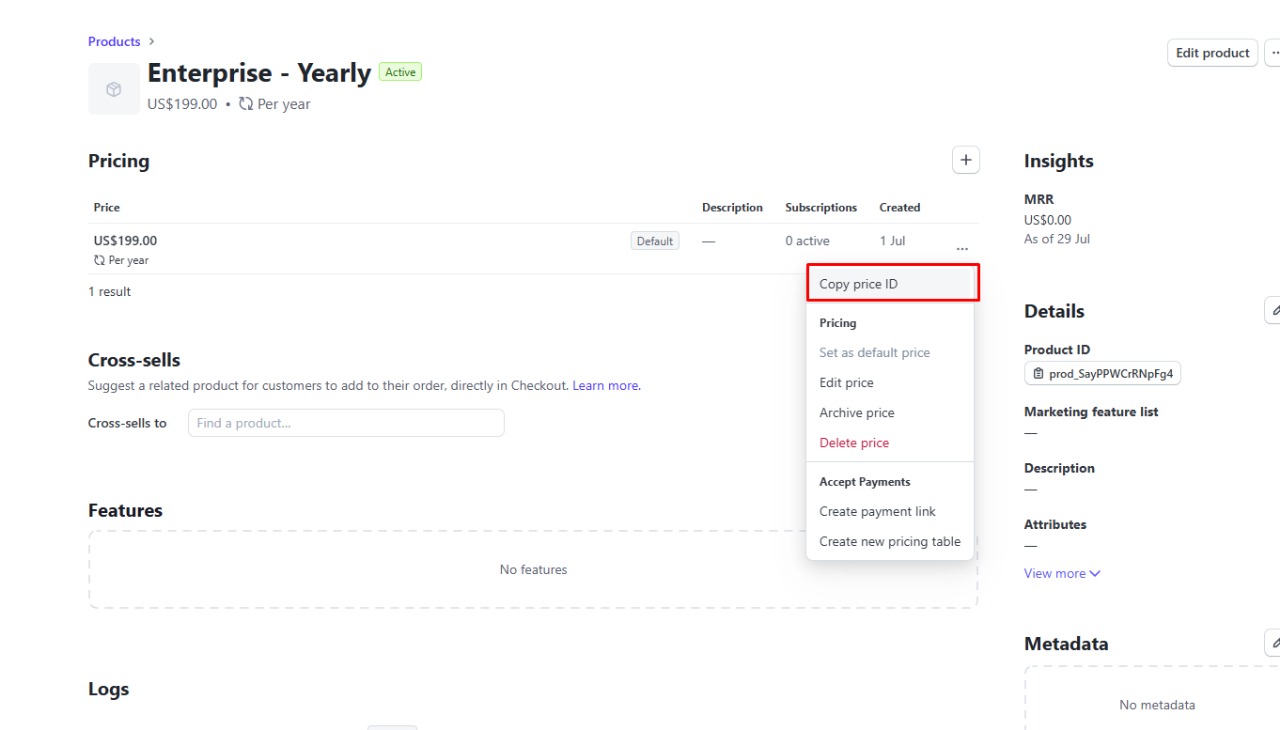
After creating the product, you'll see it listed in the product list. On the right side of the product, you'll find three dots click there and copy the Price ID.
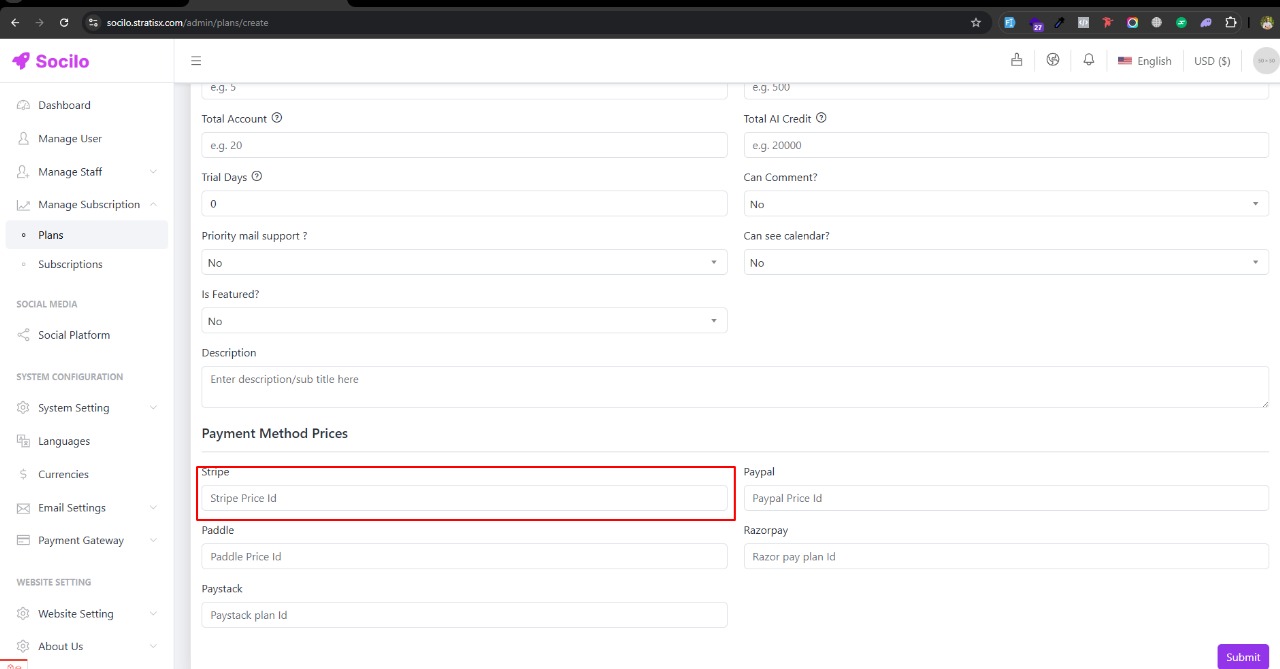
The copied Price ID needs to be used while creating the plan, just like shown in the image below.
Once you've completed those steps, scroll to the bottom left of the page and click on Developer and then click on API Keys, see the below picture to get more clear vision
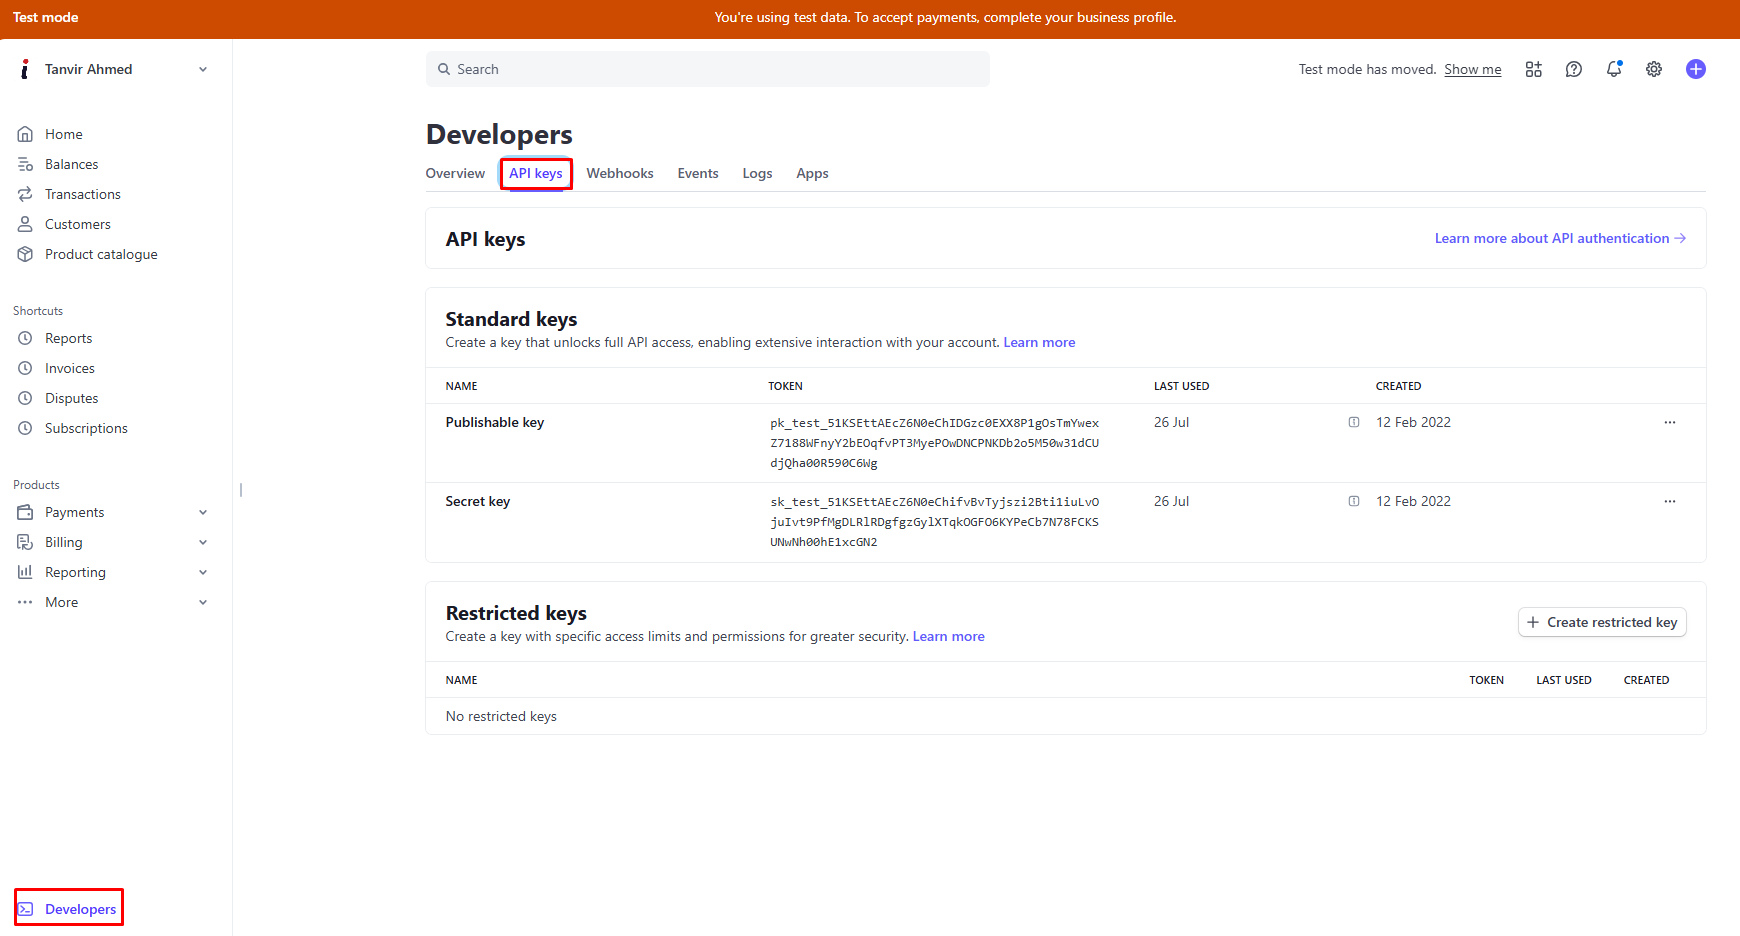
Copy the keys and paste into our Socilo,
2. Paypal
Now get started with Paypal, first log in to your Paypal Dashboard. Then, from the sidebar, select Subscription Plans and create a new plan by filling in all the required information.
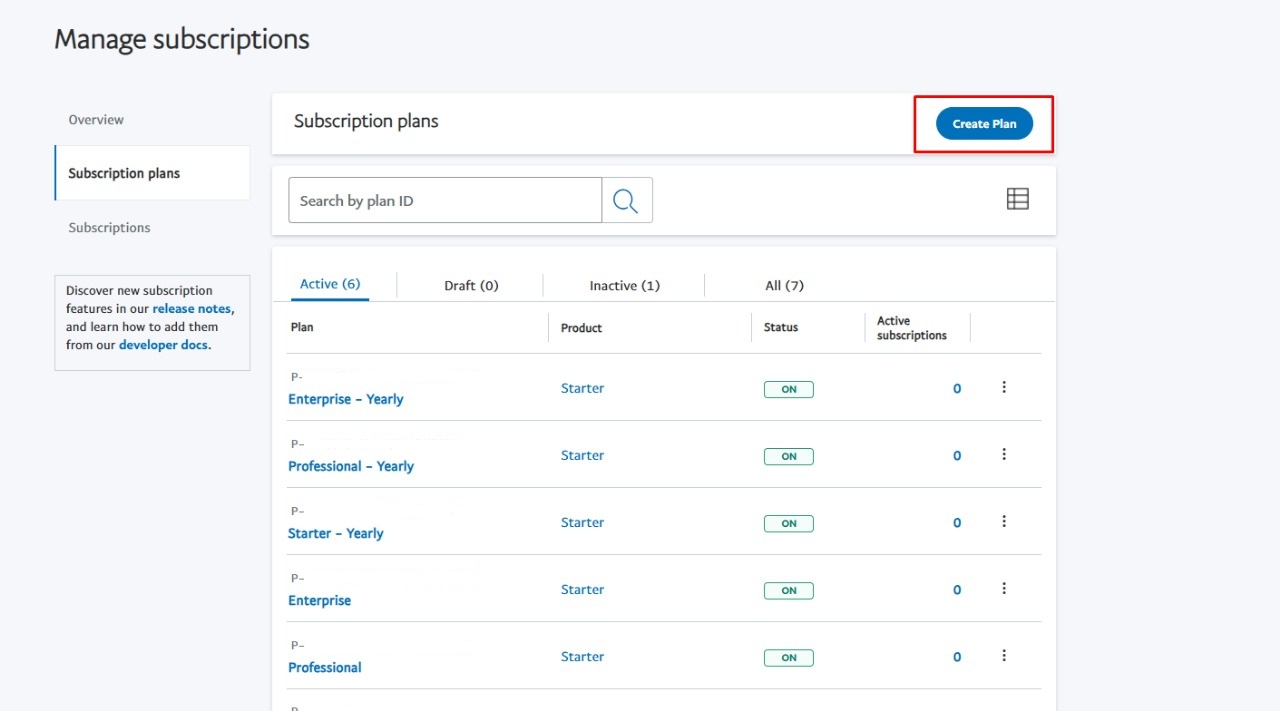
After creating the Plans, you'll see it listed in the Plans list. You need to copy the Plan ID from the list of plans.
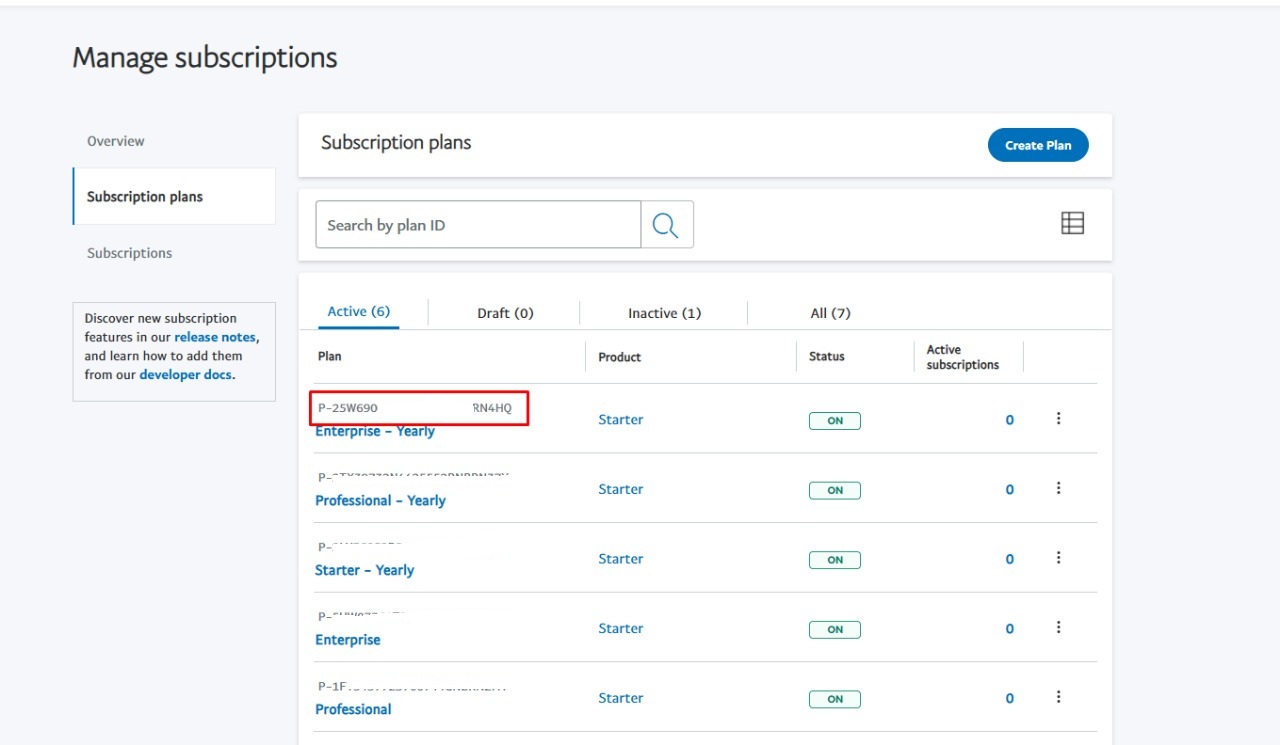
The copied Plans ID needs to be used while creating the Plan, just like shown in the image below.
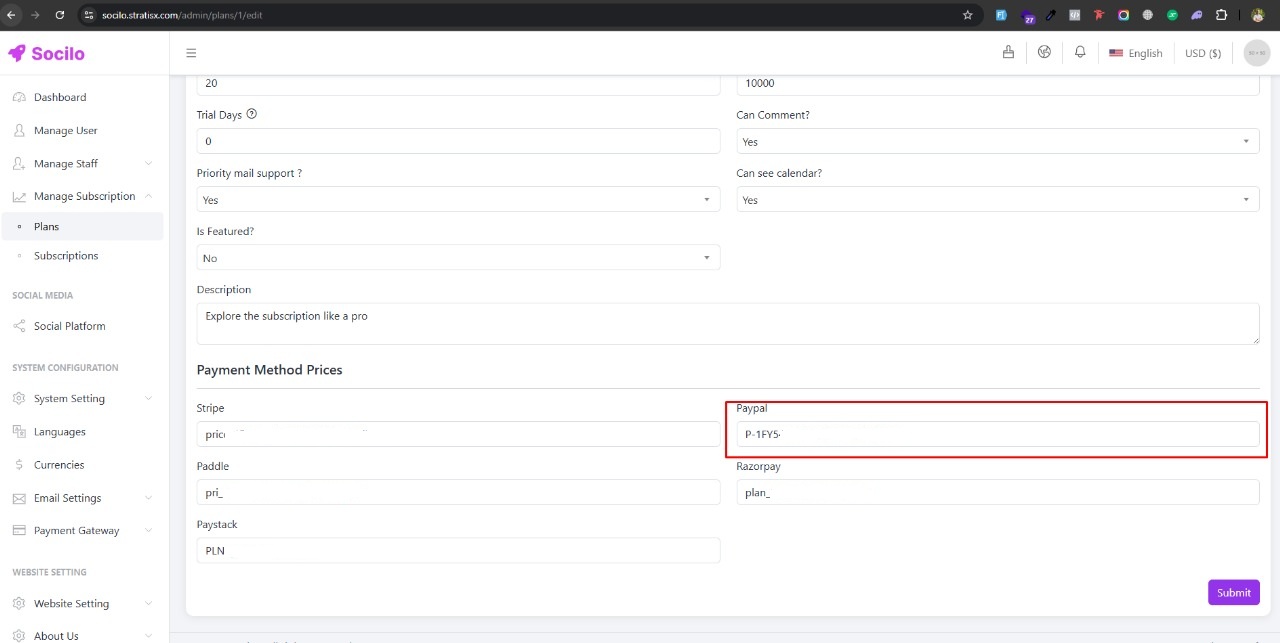
After completing this process, Next, click the Developer button at the top right corner of the page (as shown in the image).
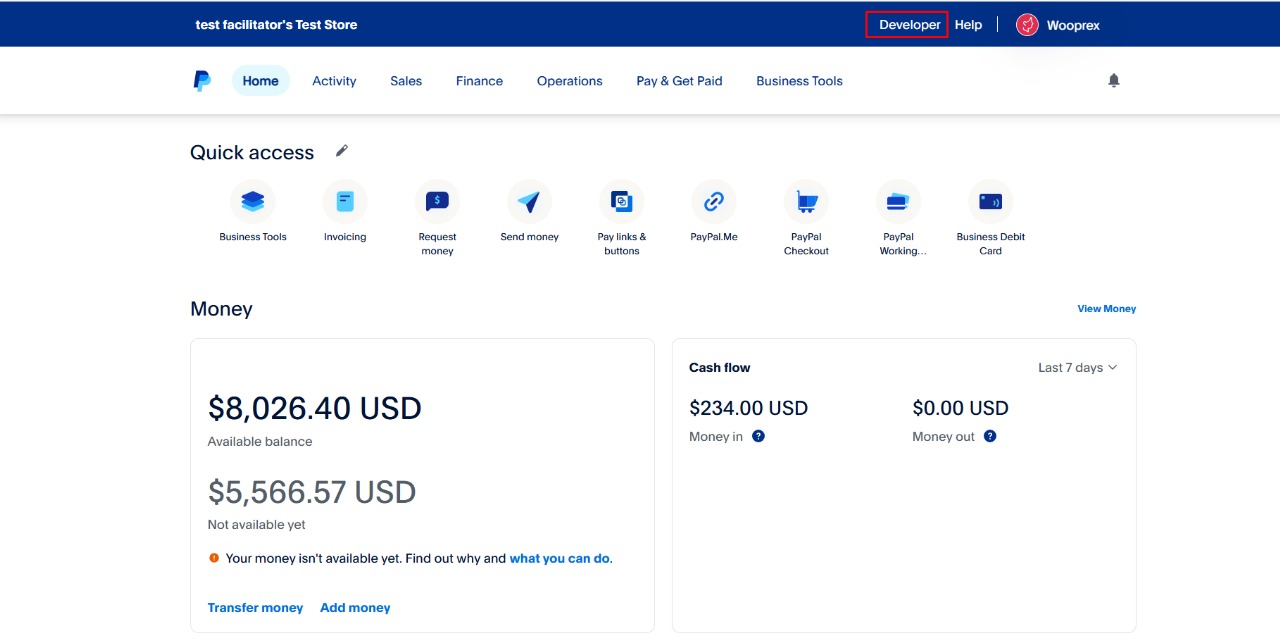
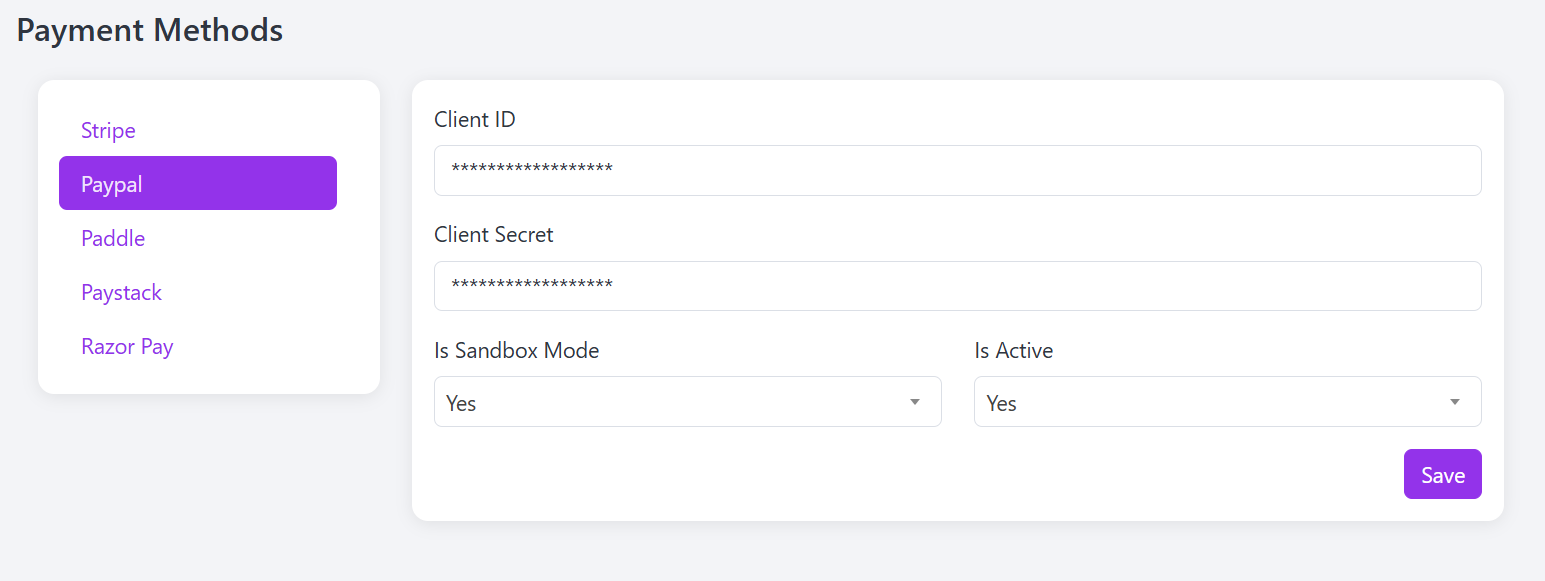
Than Get the API key. This key will then need to be used in Socilo for integration.
3. Paddle
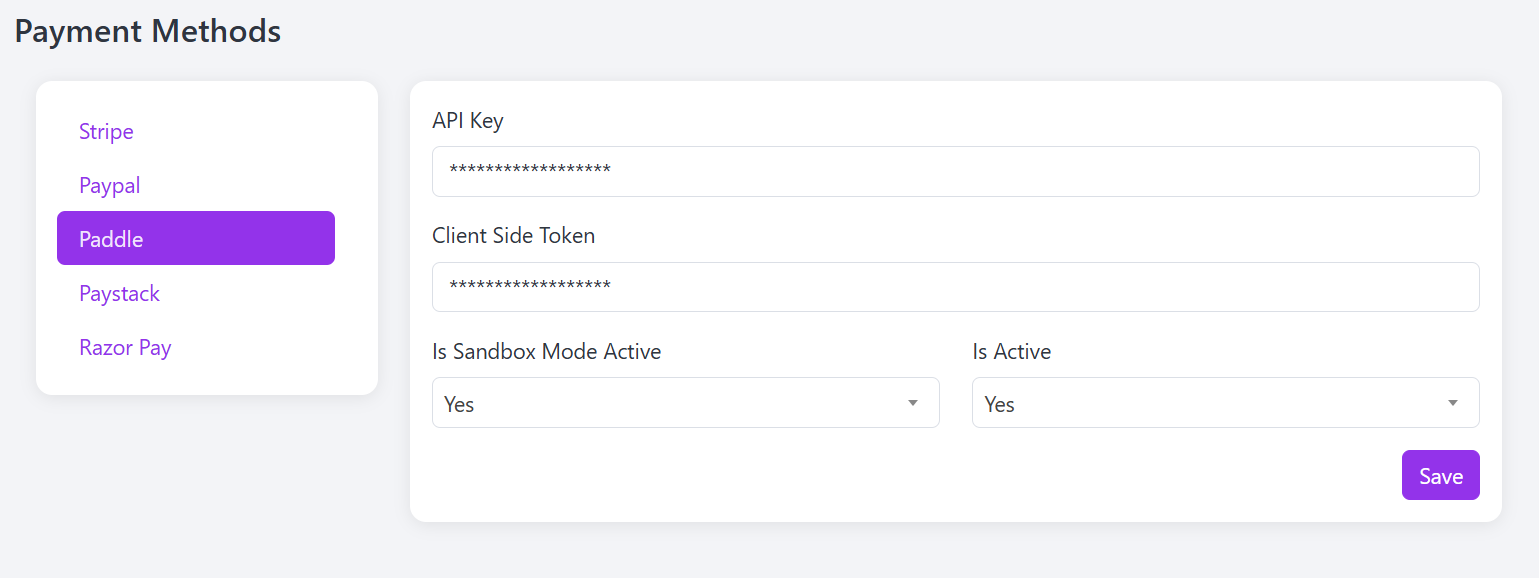
Now let's get started with Paddle. First, log in to your Paddle Dashboard. Next, from the sidebar, go to the Catalog menu and click on Products. Then, click the New Product button and fill in the required information to add your product just like shown in the image below.
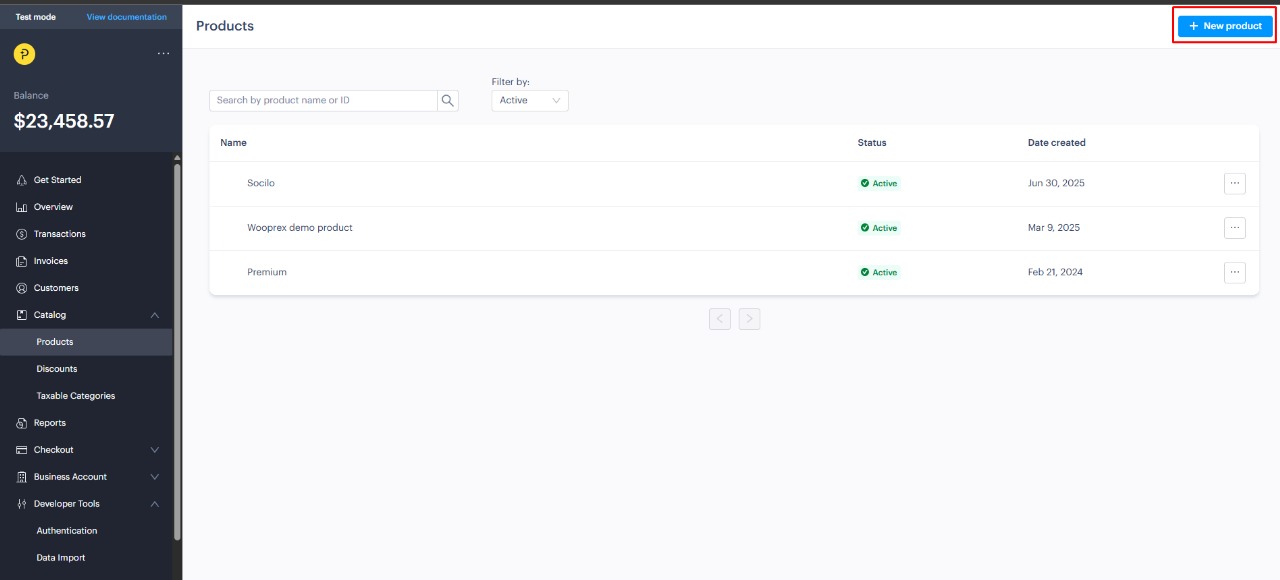
Once the product is added, go to the product list and click the three dots on the right side of the product. From there, add a price. After adding the price, copy the Price ID.
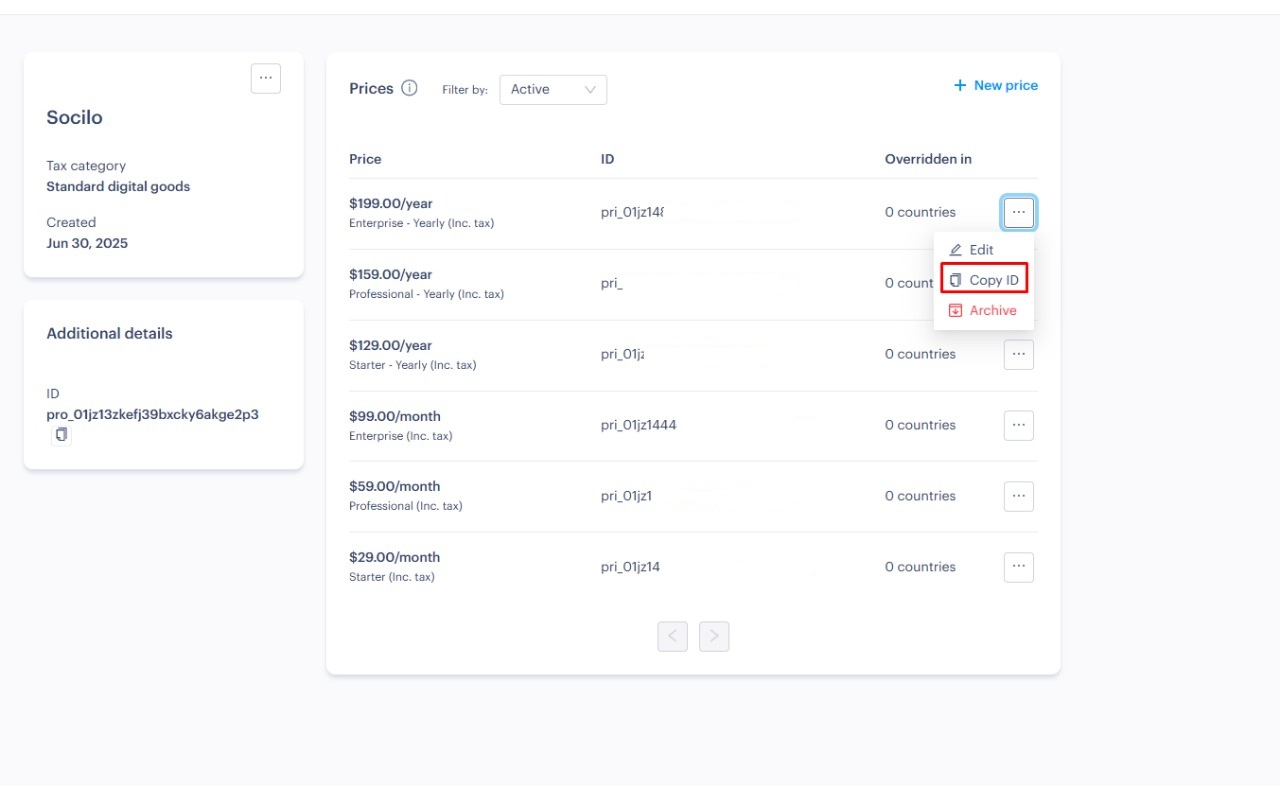
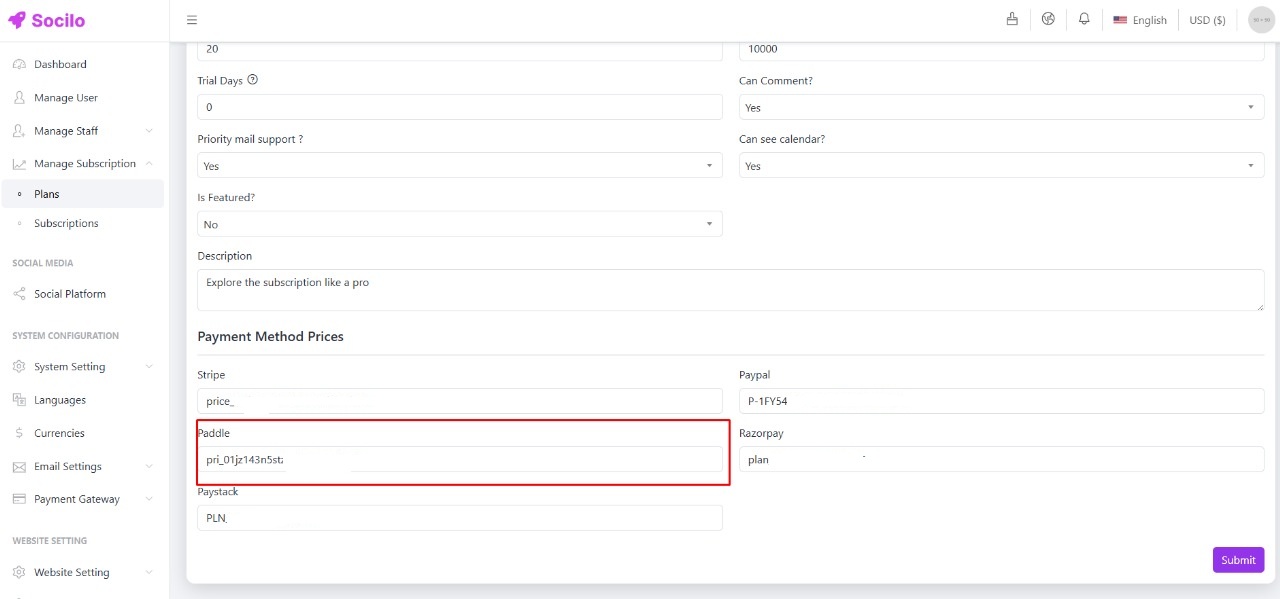
The copied Price ID will need to be used when creating a plan in Socilo.
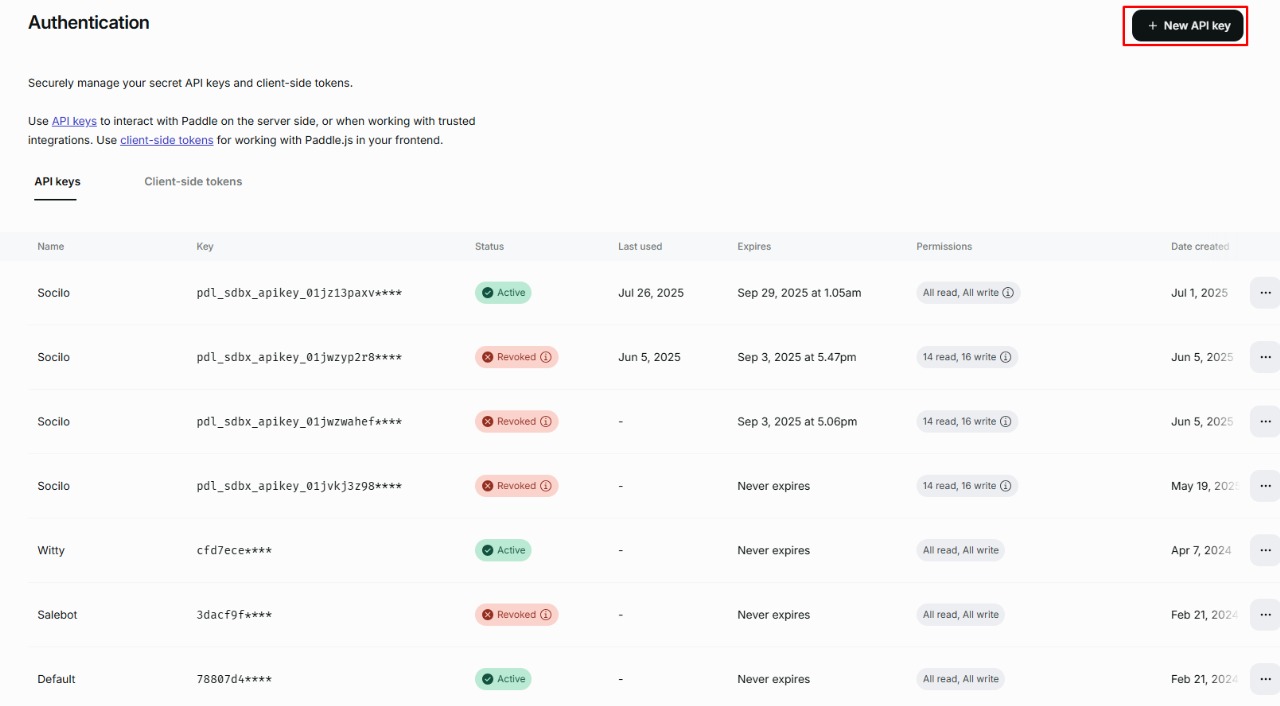
After completing this process, generate the API key. This key will then need to be used in Socilo for integration.
4. Paystack
To get started with Paystack, first log in to your Paystack Dashboard. Next, you'll need to create a plan there. After creating the plan, you'll get a Plan Code.
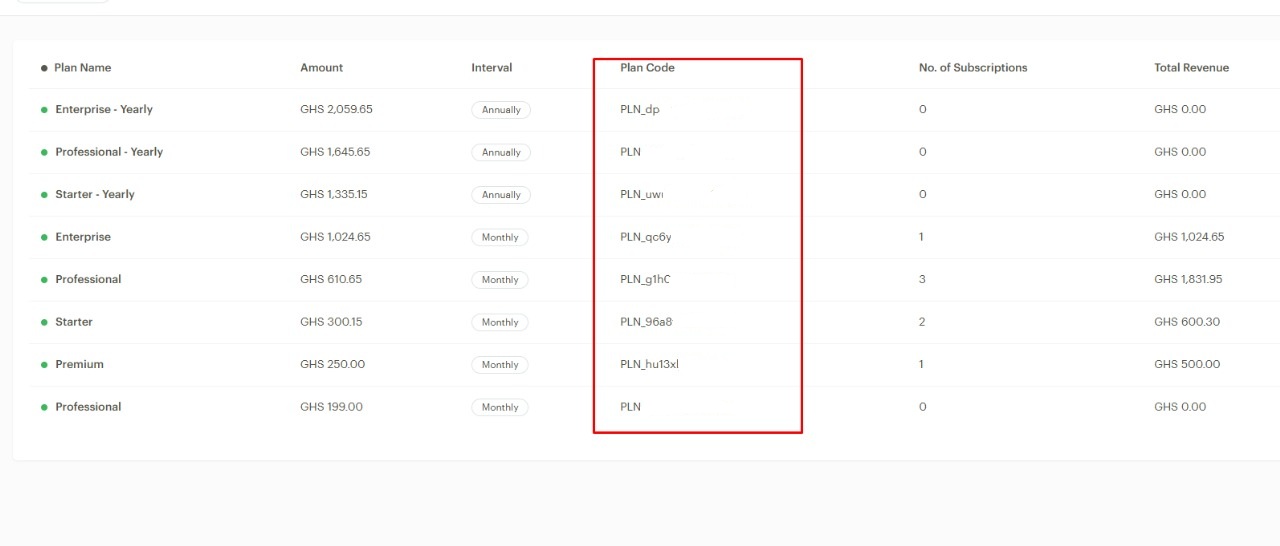
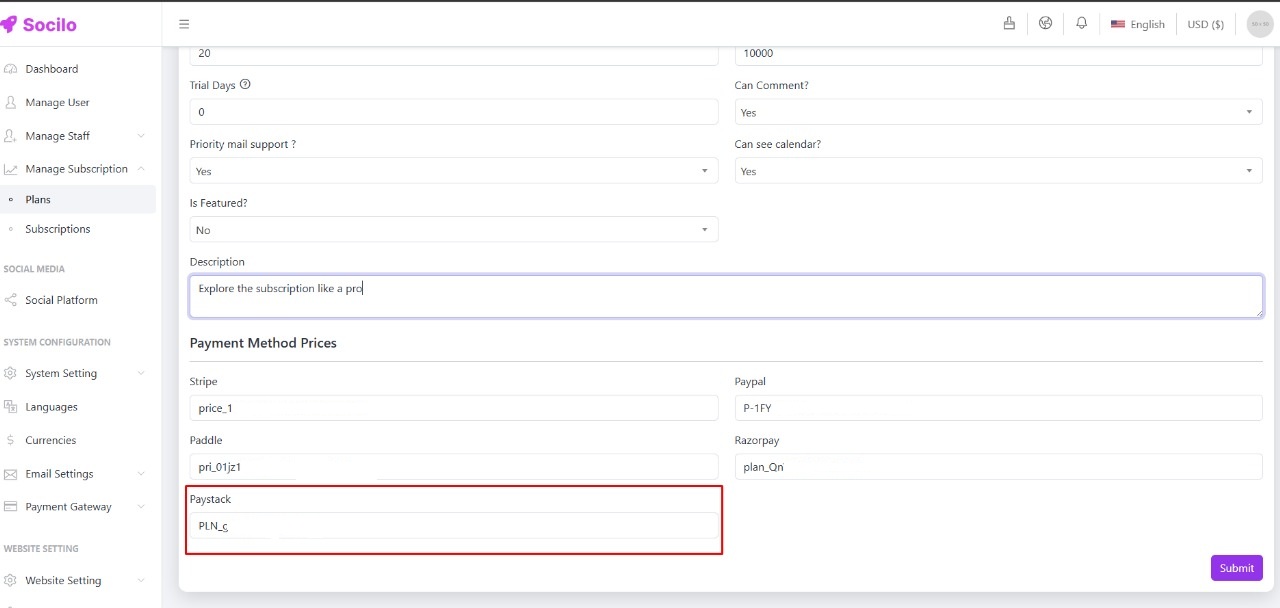
The copied Plan Code will need to be used when creating a plan in Socilo.
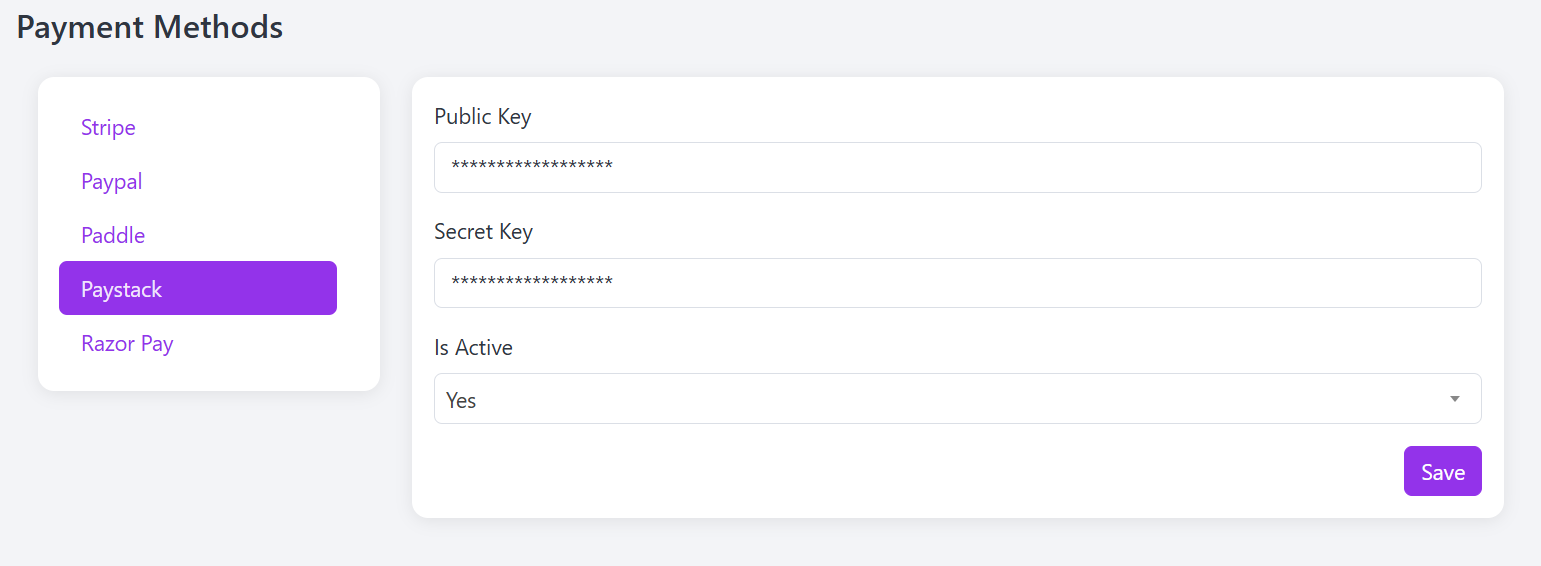
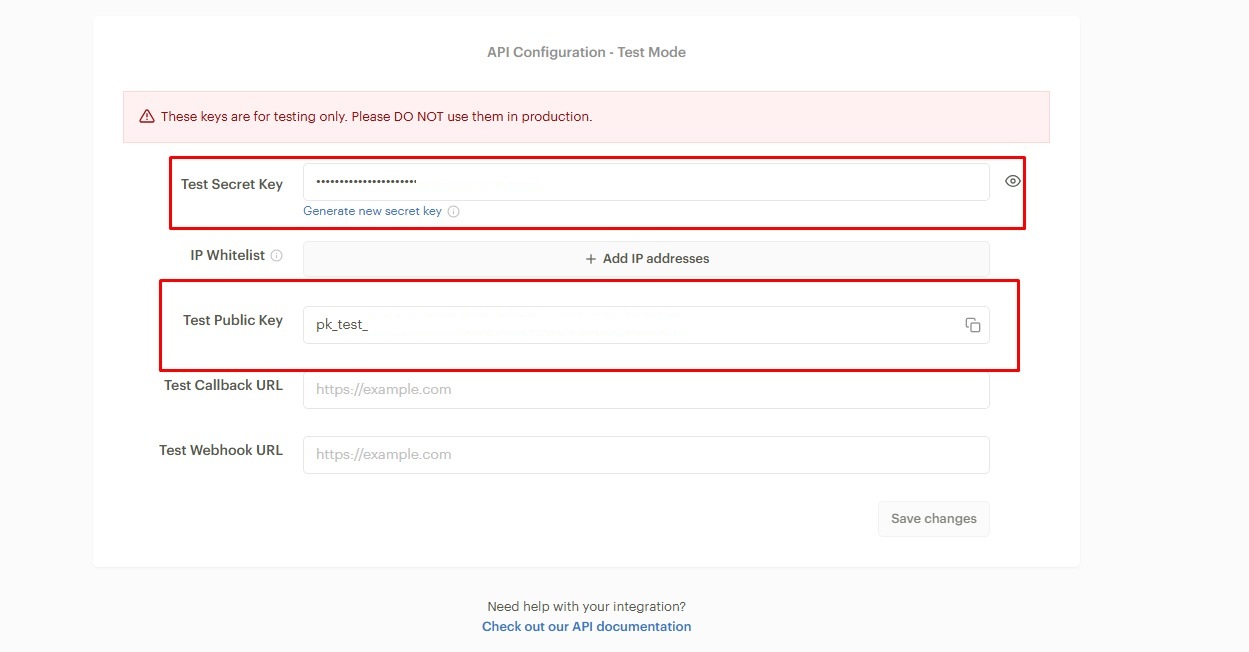
After completing this process, generate the API key. This key will then need to be used in Socilo for integration.
5. Razorpay
Now let's get started with Razorpay. First, log in to your RazorPay Dashboard. Then click on New Plan to create a plan. After creating the plan, you’ll get the Plan ID, which will be required when creating plans in Socilo.
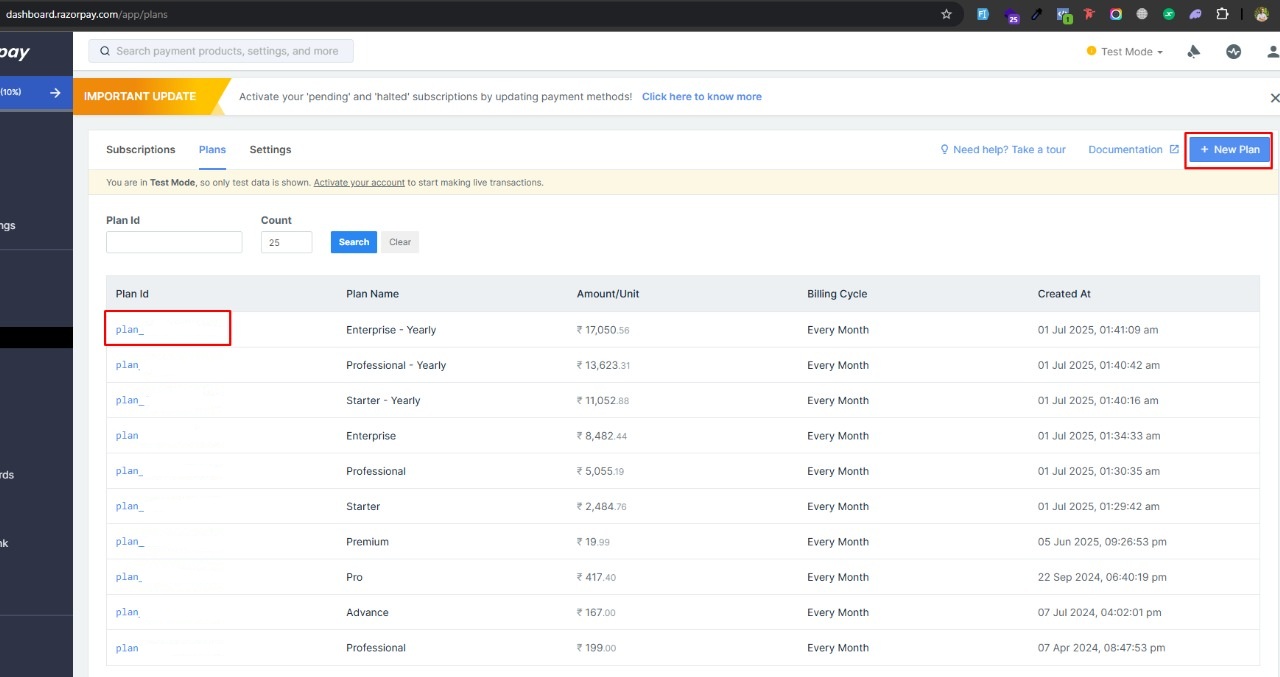
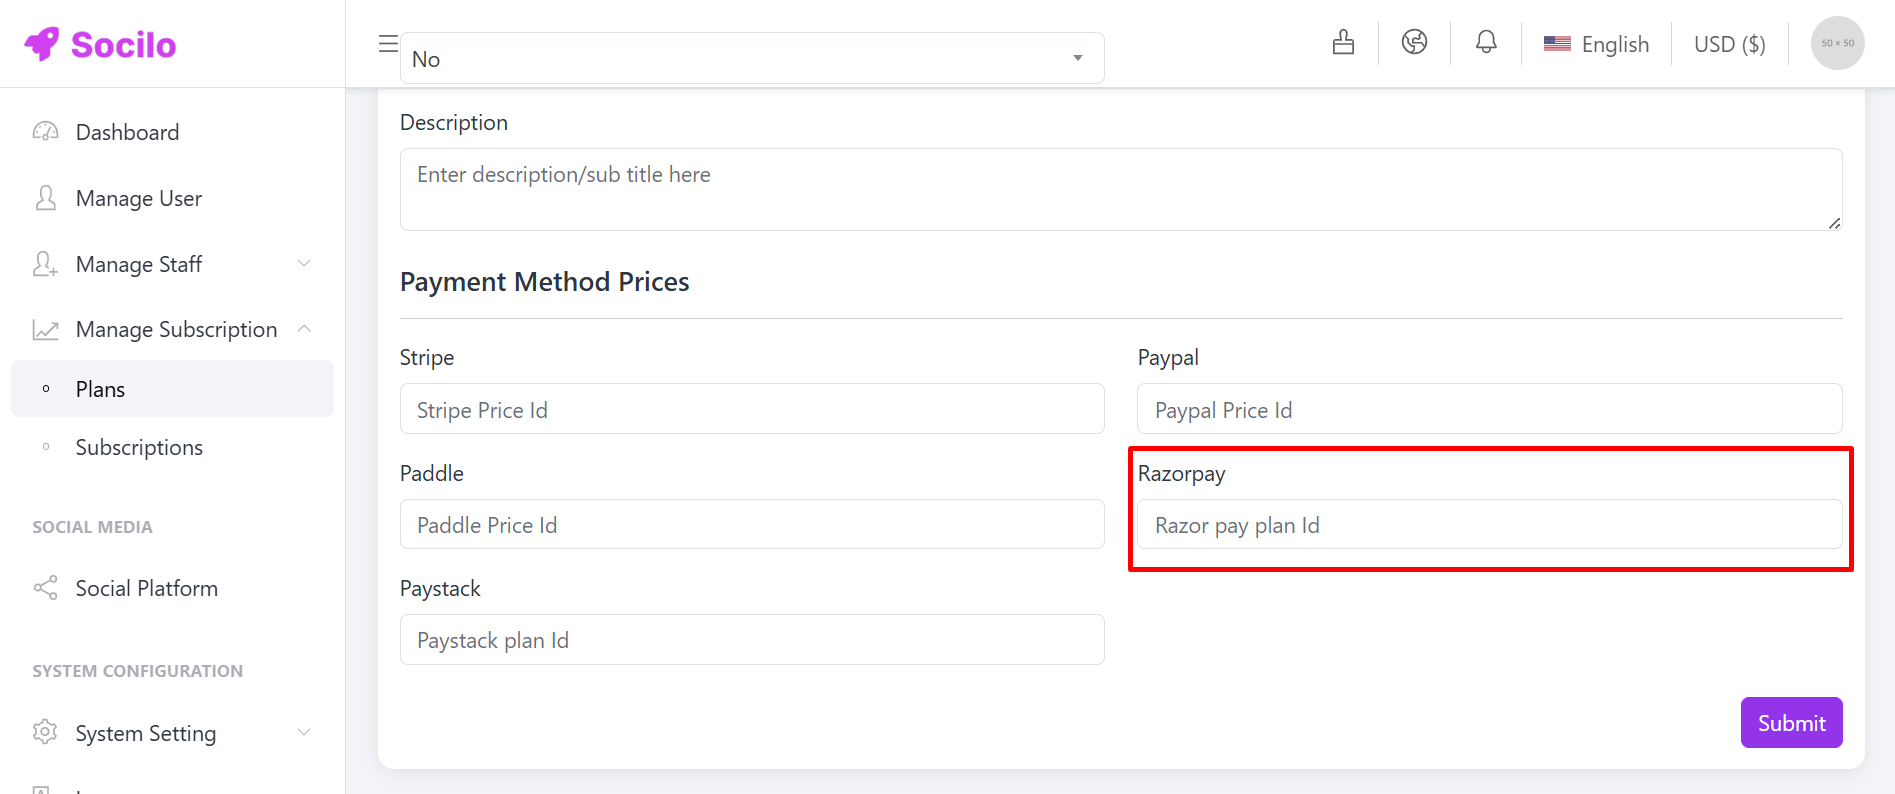
The copied Plan Id will need to be used when creating a plan in Socilo.
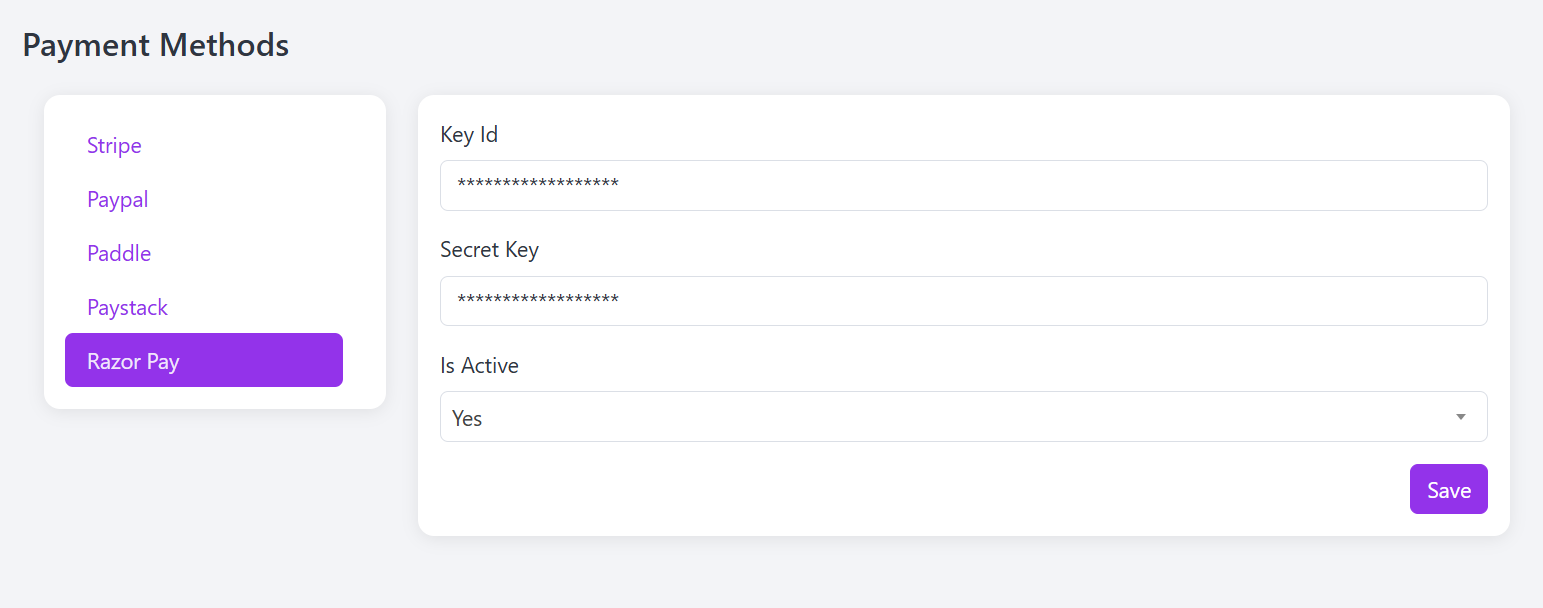
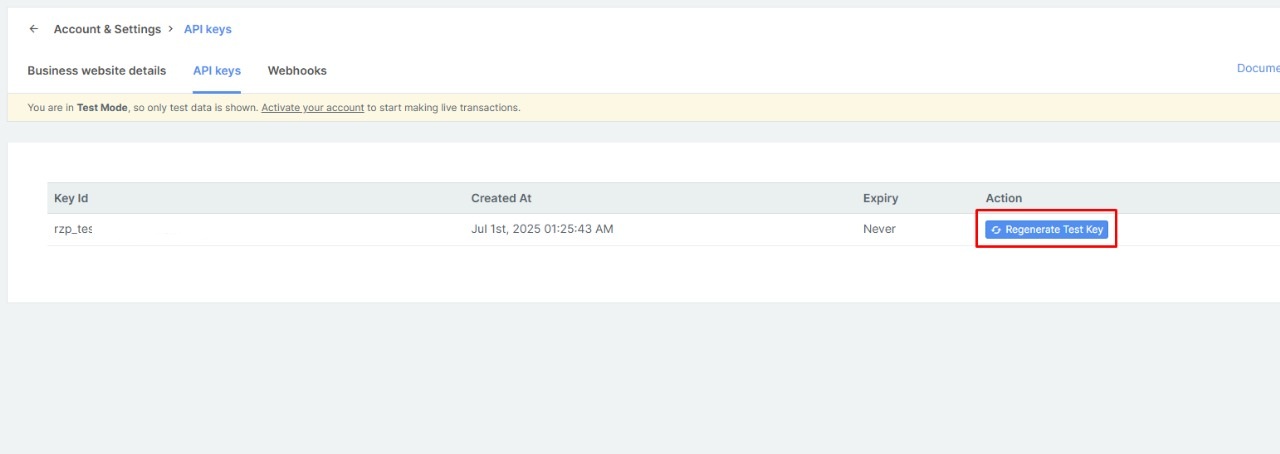
Then go to Account & Settings and generate the API keys. These keys will be used for integrating with Socilo.
Section Title Subtitle
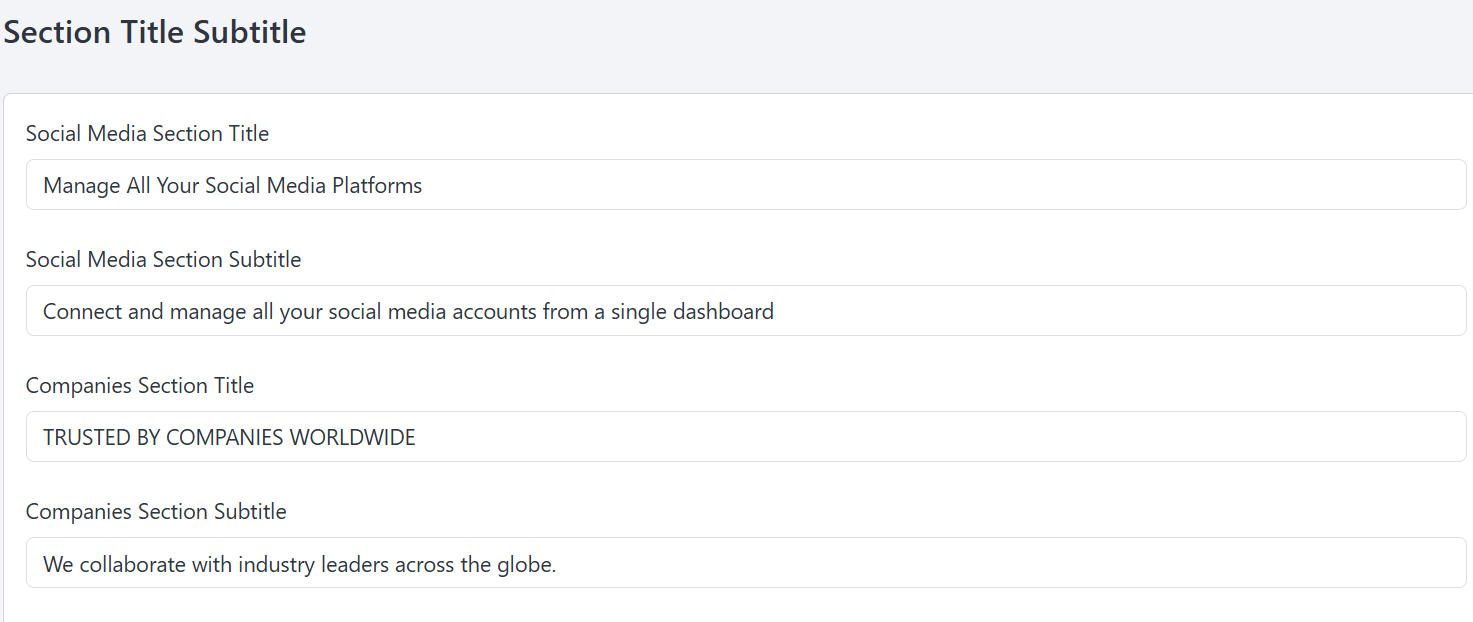
Follow these steps to manage your Title & Subtitle for your Wabsite.
Open the Admin Panel and select Website Settings. Then go to the Section Title Subtitle tab, where you can set up Title & Subtitle.
Manage Header
Follow these steps to manage your Header settings.
Go to the Admin Panel and click on Website Settings. Then, open the Header Section tab to manage the header menu.
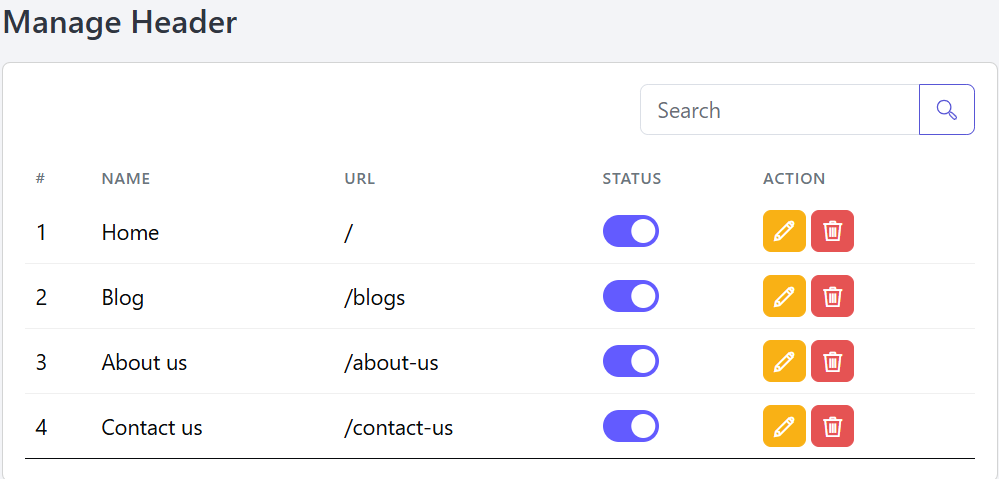
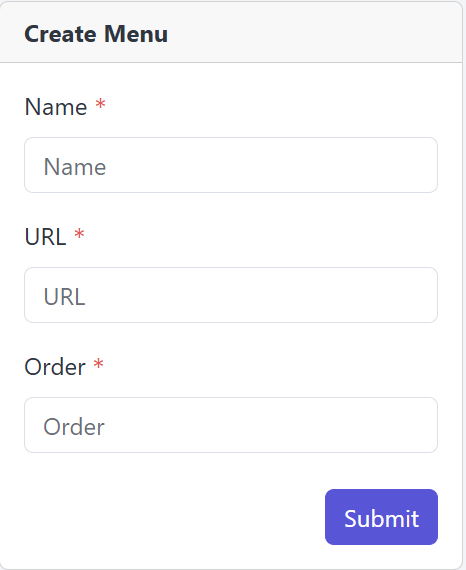
You can add a new Header Menu here by entering the required information.
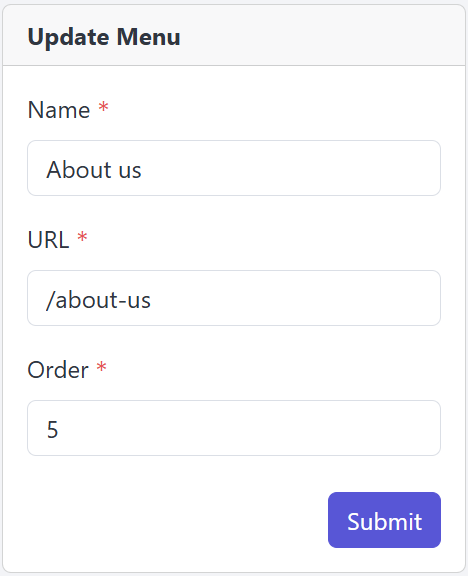
You’re allowed to modify the Header Menu information as needed.
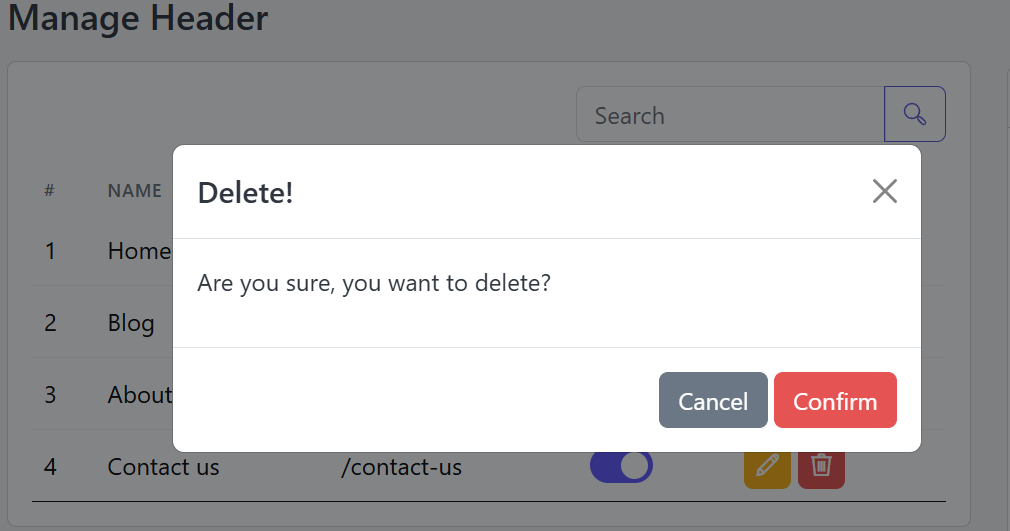
To remove a Header Menu, click the Delete button in the Action column.
Hero Section Content
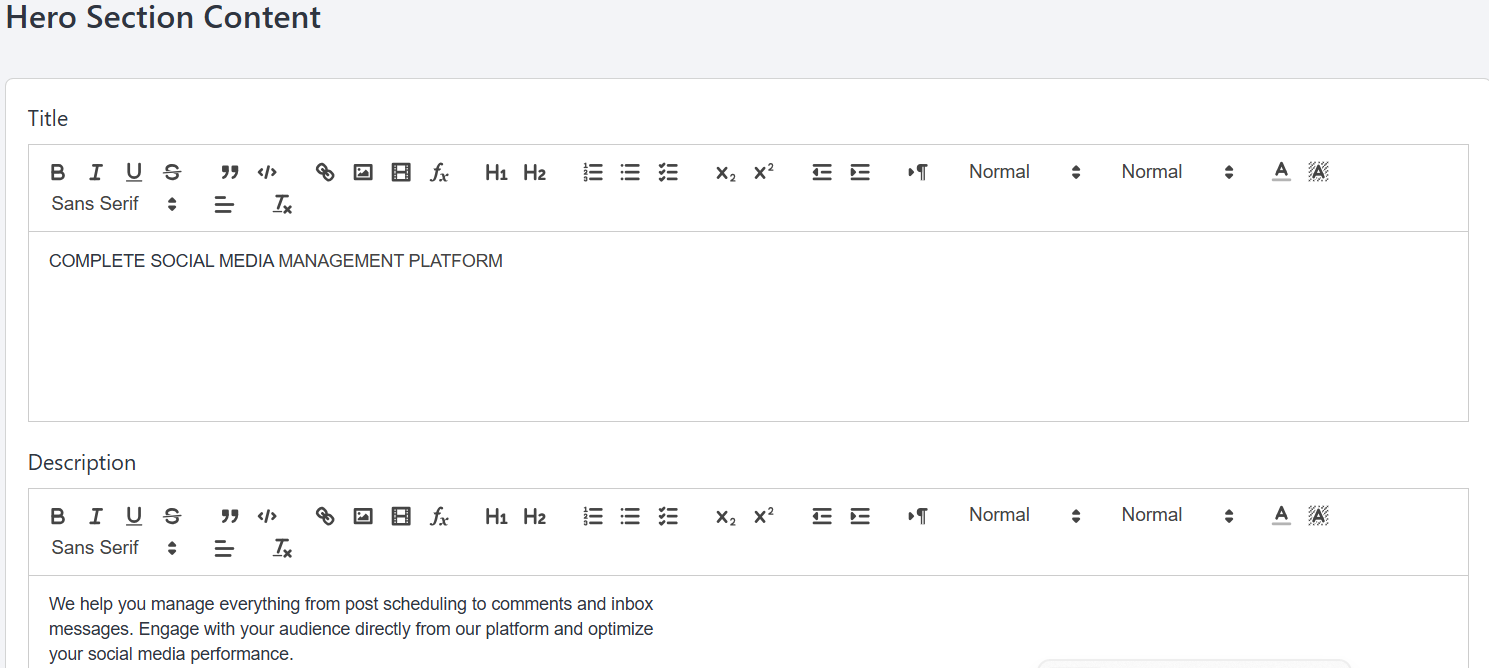
Follow these steps to manage your Hero Section.
Open the Admin Panel, click on Website Settings, and then go to the Hero Section tab to set up the content.
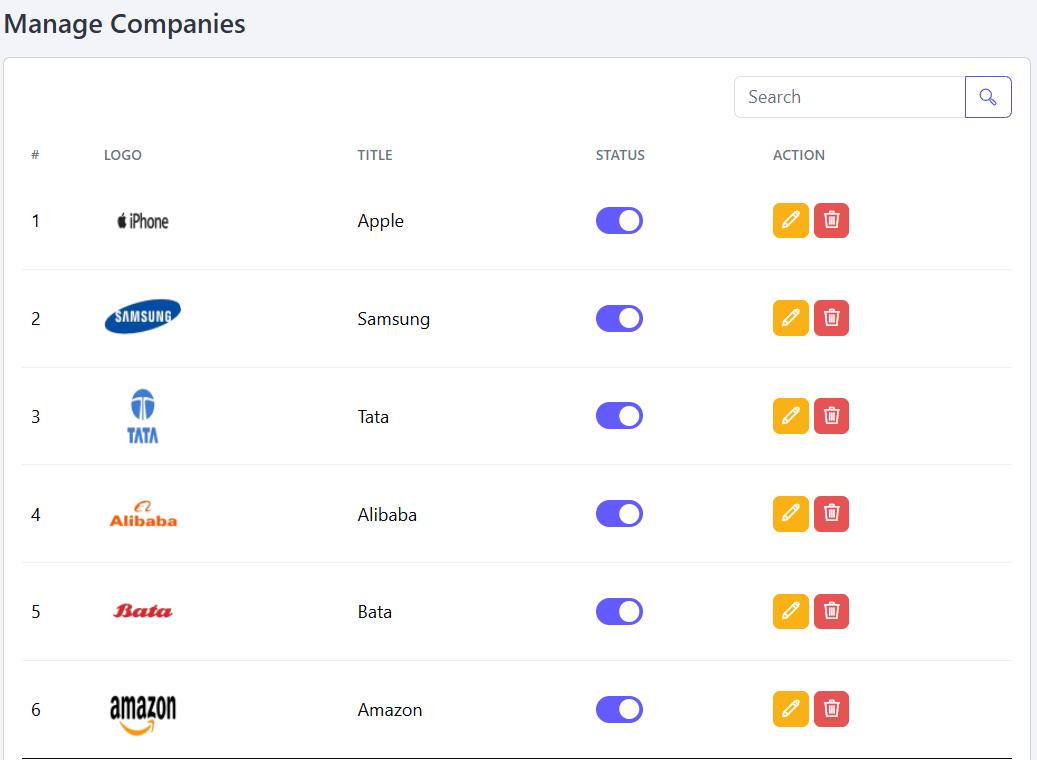
Manage Companies
Follow these steps to manage your Trusted Companies.
From the Admin Panel, go to Website Settings and open the Trusted Companies tab to manage them.
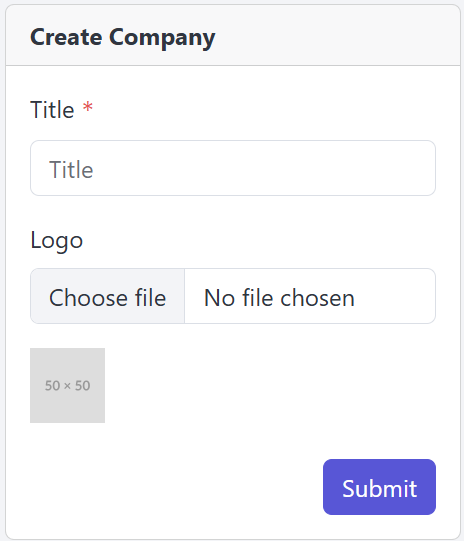
Enter the required information to add a new company here.
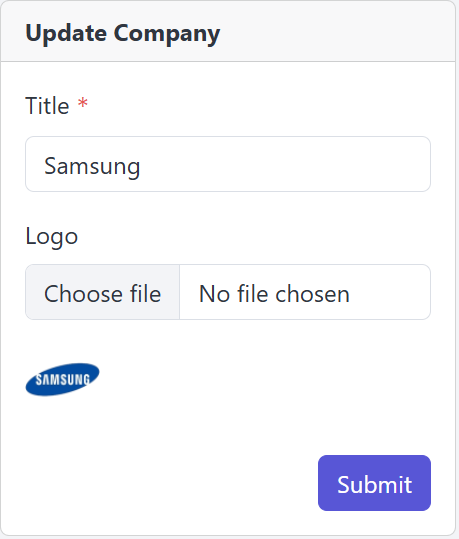
You can Update the company information whenever needed.
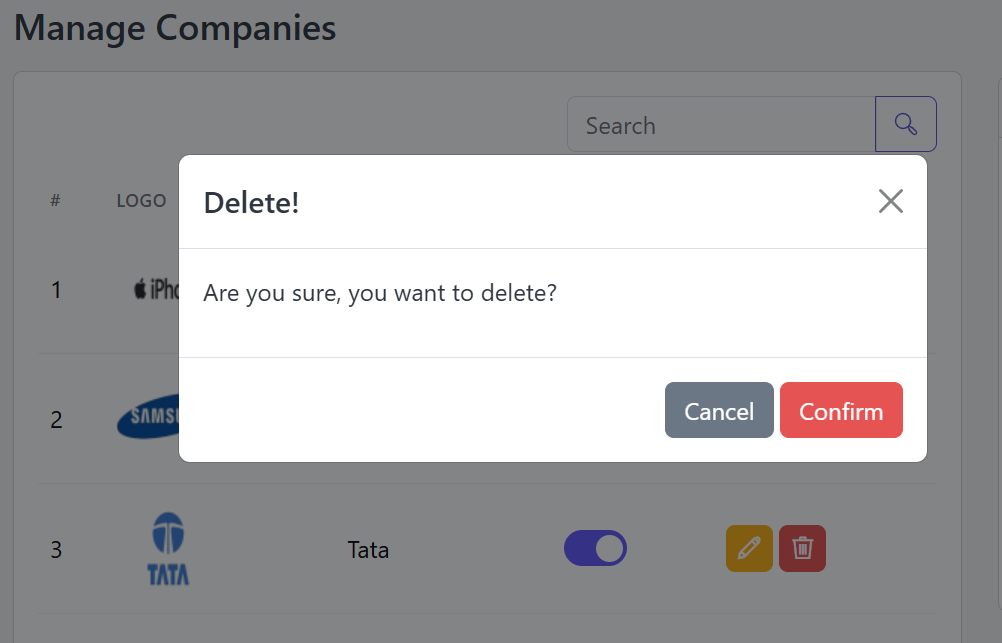
Click the Delete button in the Action column to remove a company.
Manage Features
Follow these steps to manage your Features Section.
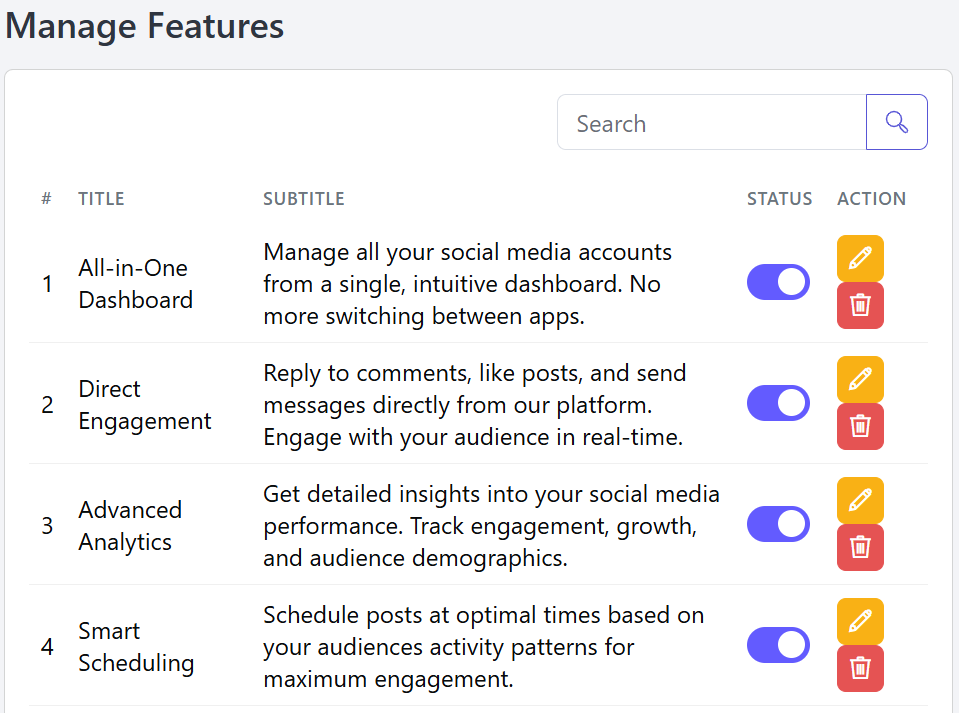
From the Admin Panel, go to Website Settings and open the Features tab to manage them.
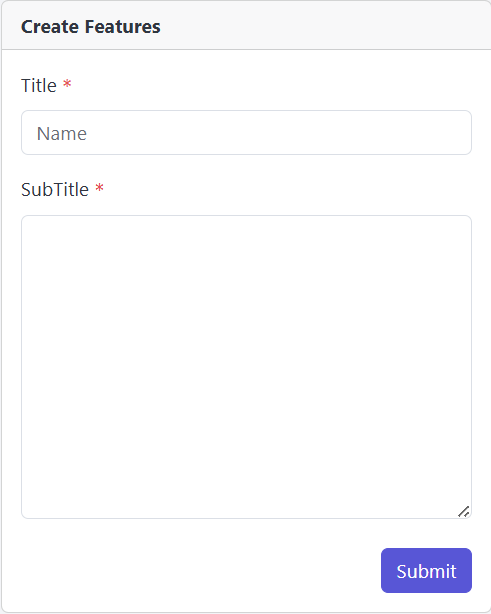
Enter the required information to add a new Features for your Wabsite.
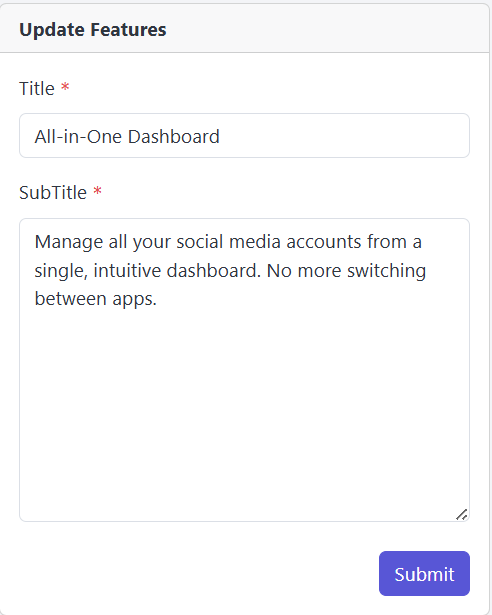
You can Update the Features information whenever needed.
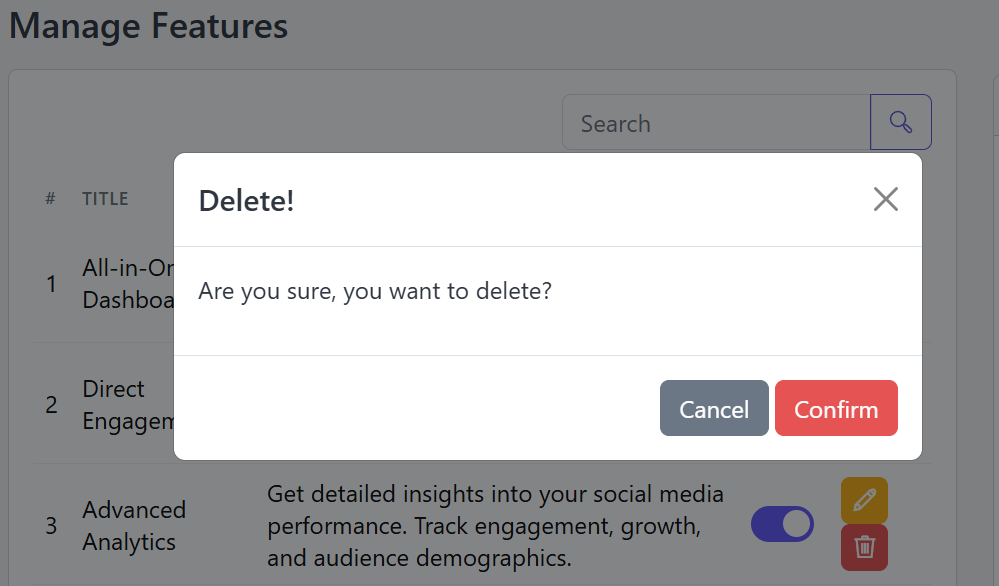
Click the Delete button in the Action column to remove a Features.
More Features
Follow these steps to manage your More Features Section.
From the Admin Panel, go to Website Settings and open the More Features tab to manage them.
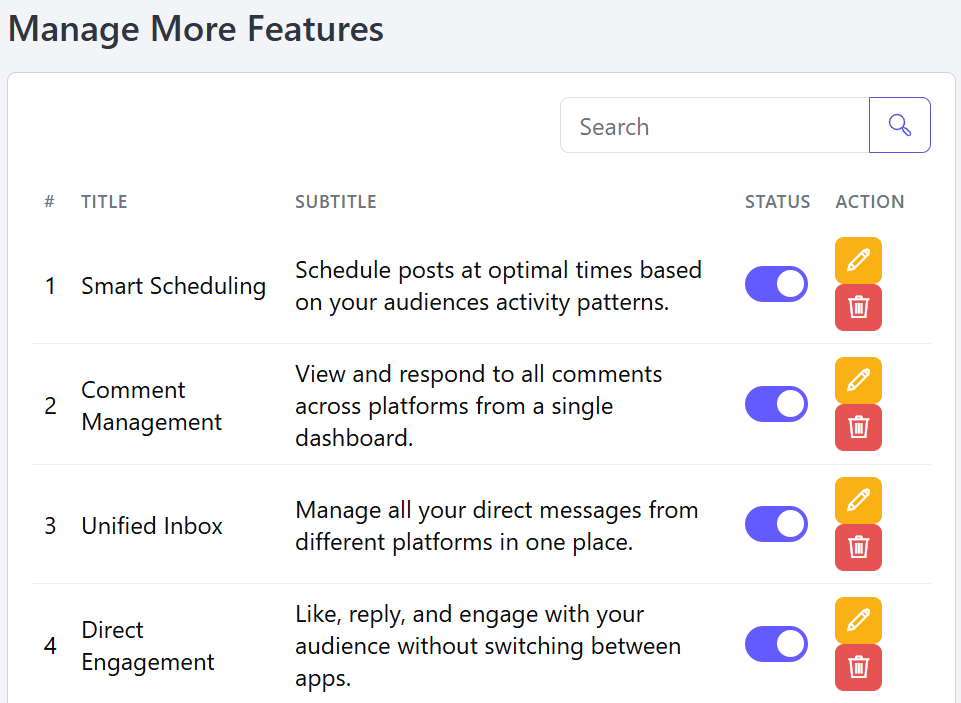
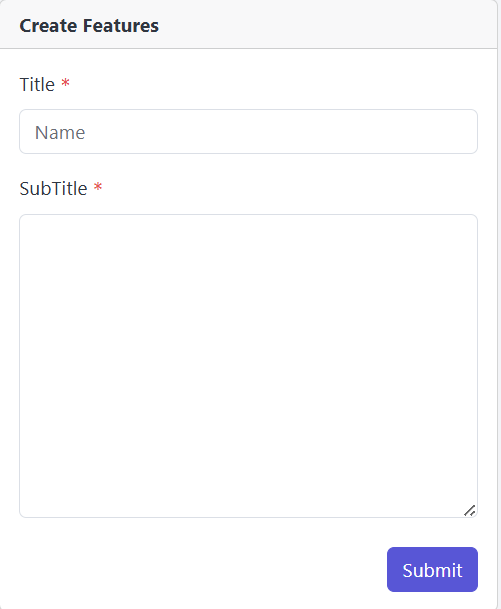
Enter the required information to add a new More Features for your Wabsite.
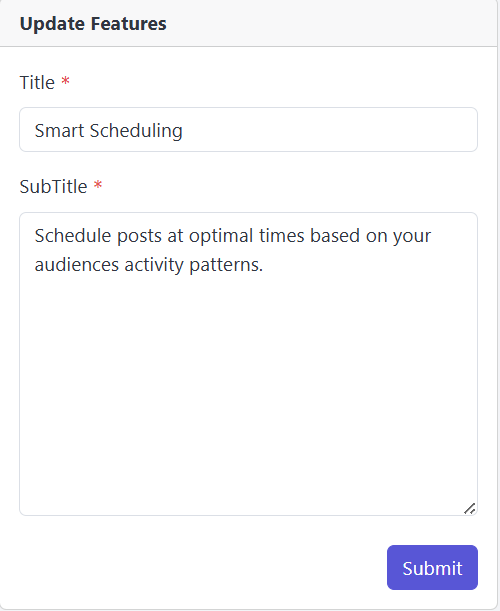
You can Update the More Features information whenever needed.
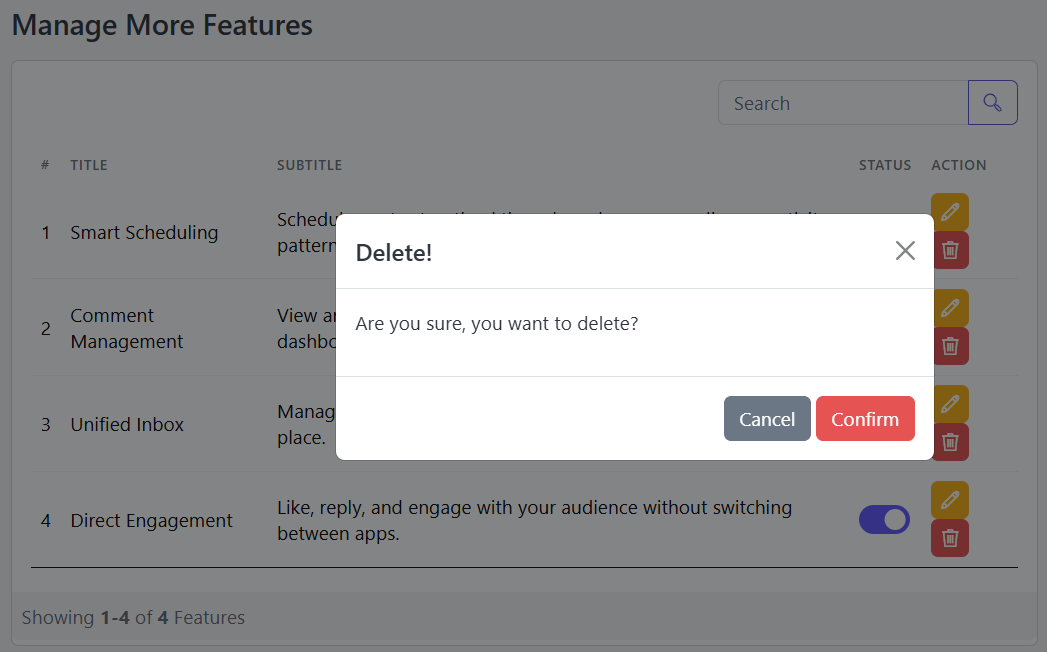
Click the Delete button in the Action column to remove a More Features.
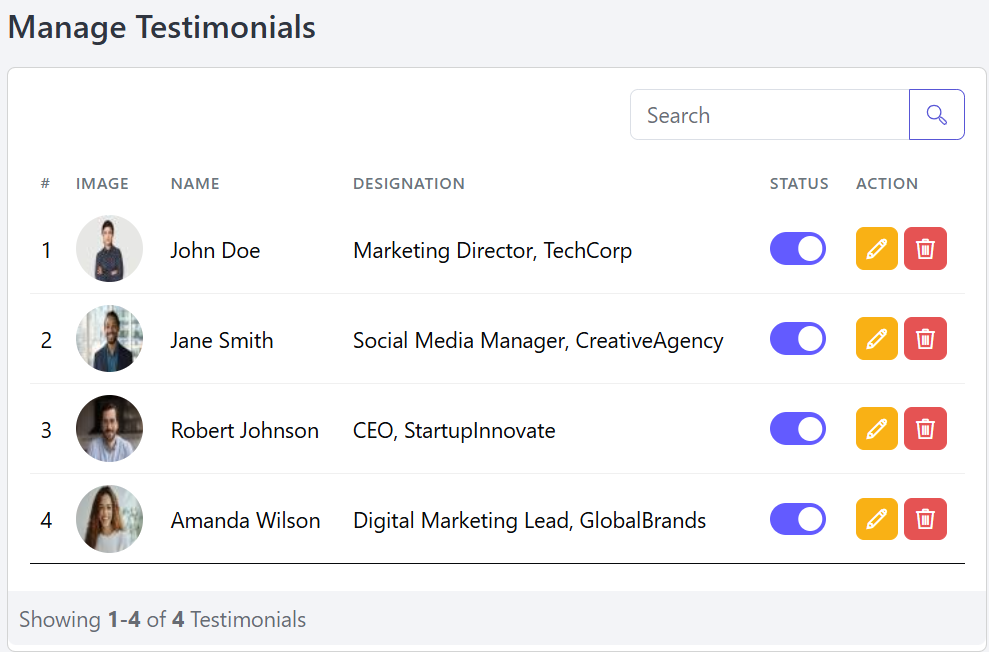
Manage Testimonials
Follow these steps to manage your Testimonials Section.
Go to the Admin Panel, select Website Settings, and click on the Testimonials tab to manage the testimonials.
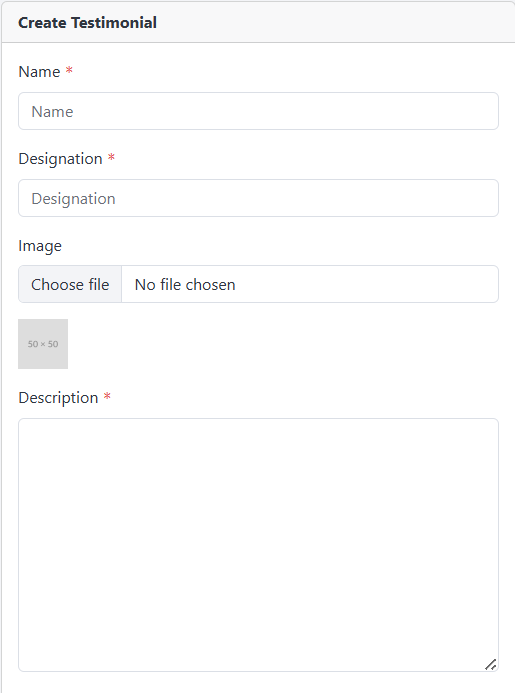
Please enter the required information to add a new Testimonial to your website.
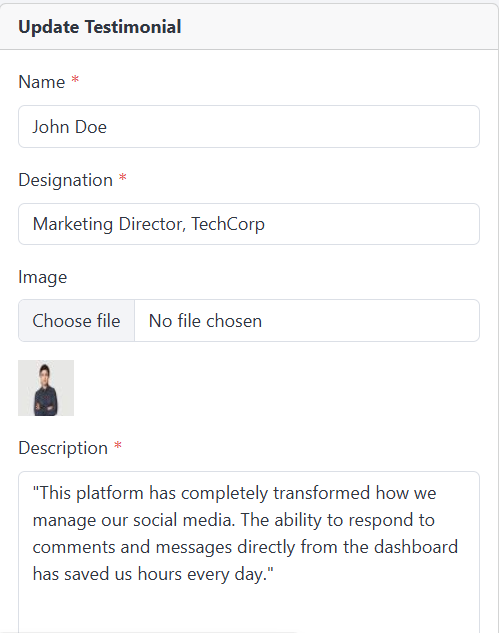
You can update the Testimonial details at any time as needed.
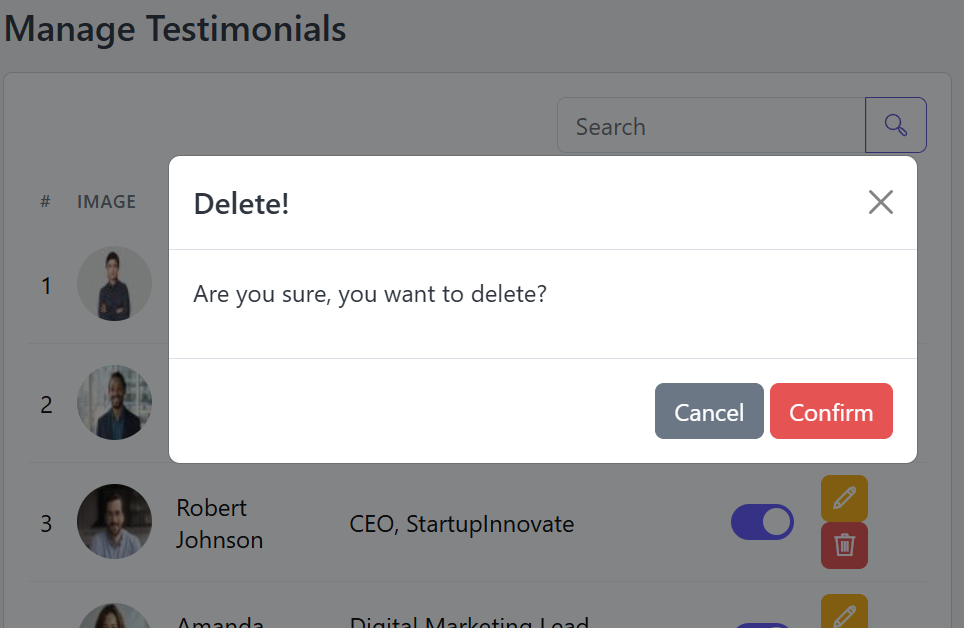
Click the Delete button in the Action column to remove a Testimonial.
Manage Faqs
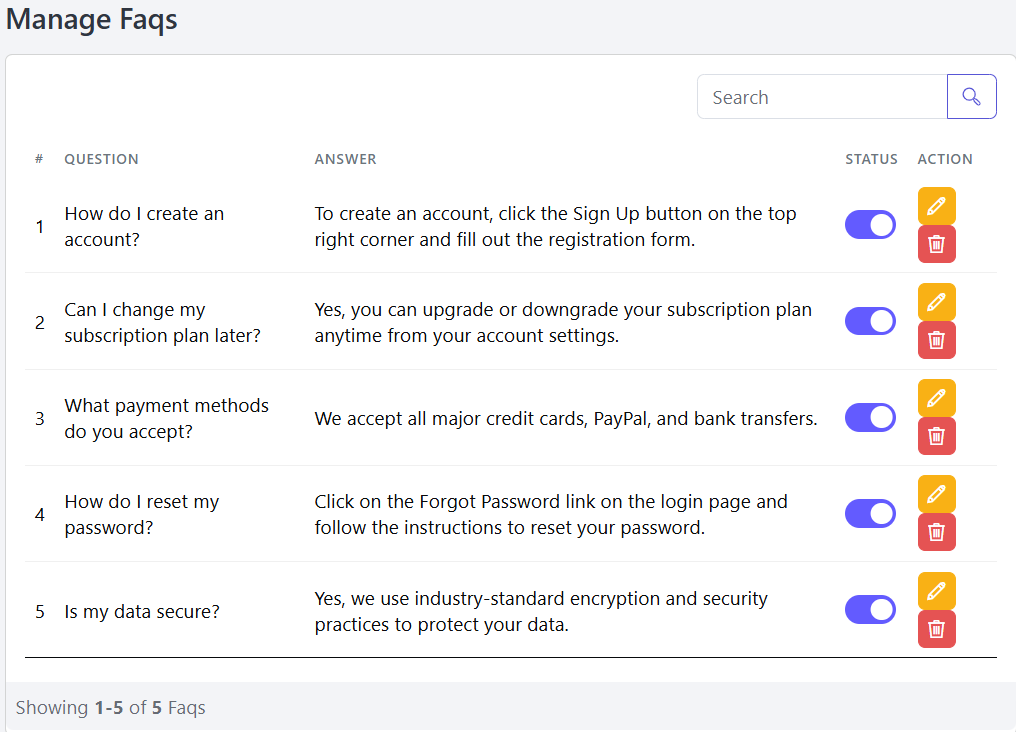
Follow these steps to manage your FAQs section effectively.
Open the Admin Panel, go to Website Settings, and click on the FAQs tab to manage your FAQs.
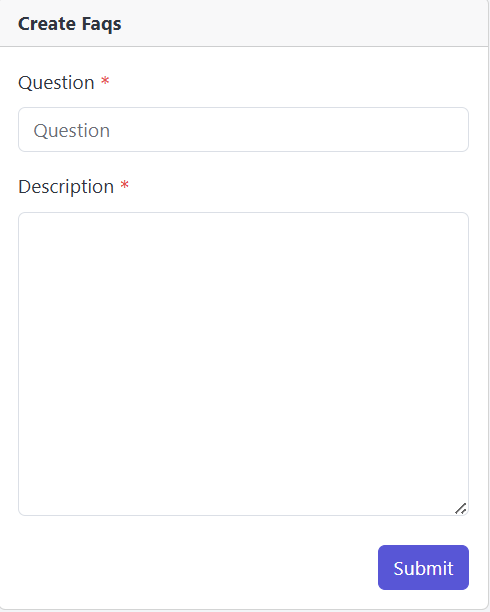
Please enter the required information to add a new Faqs to your website.
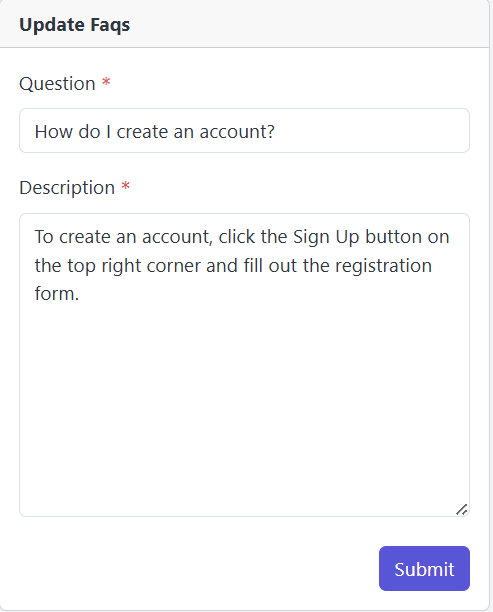
You can update the FAQs details at any time as needed.
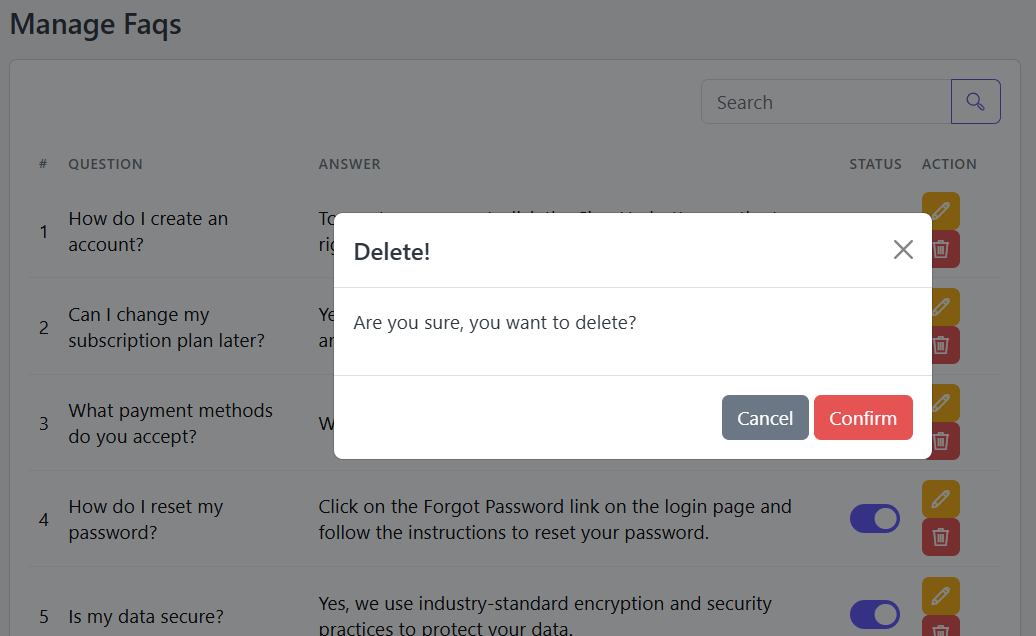
Click the Delete button in the Action column to remove a FAQs.
Manage Page
Follow these steps to manage your Page section effectively.
Open the Admin Panel, go to Website Settings, and click on the Page tab to manage your Page.
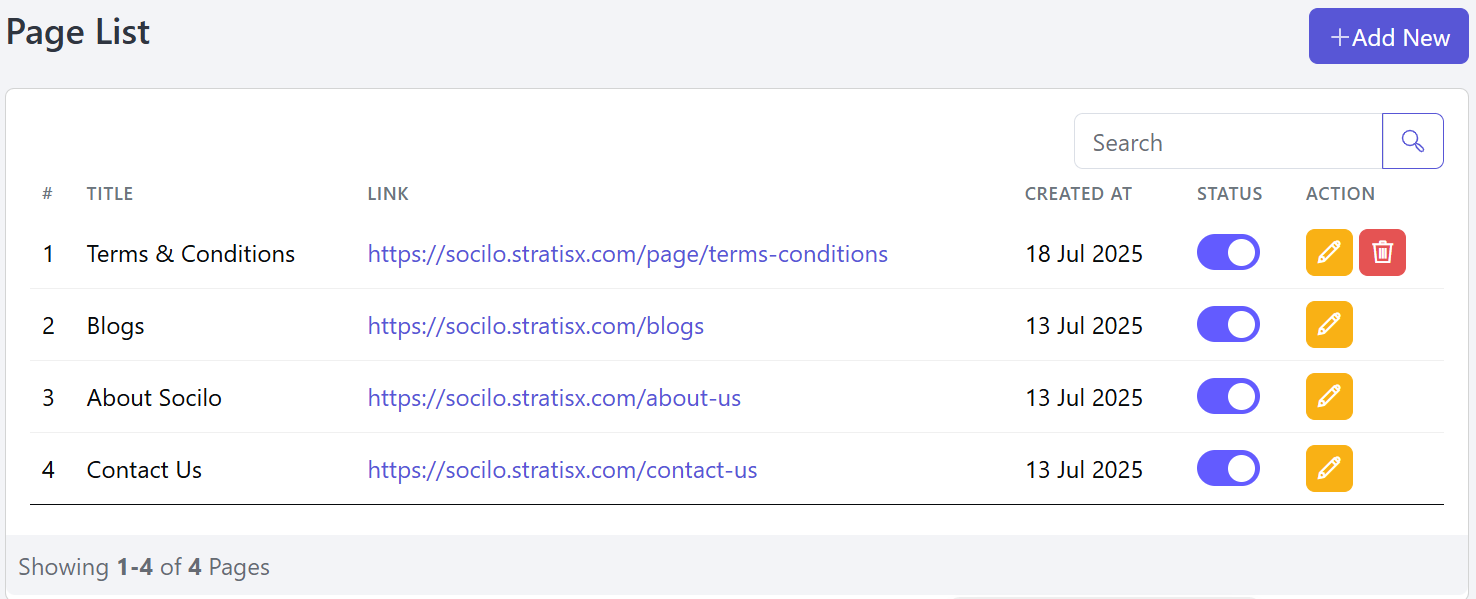
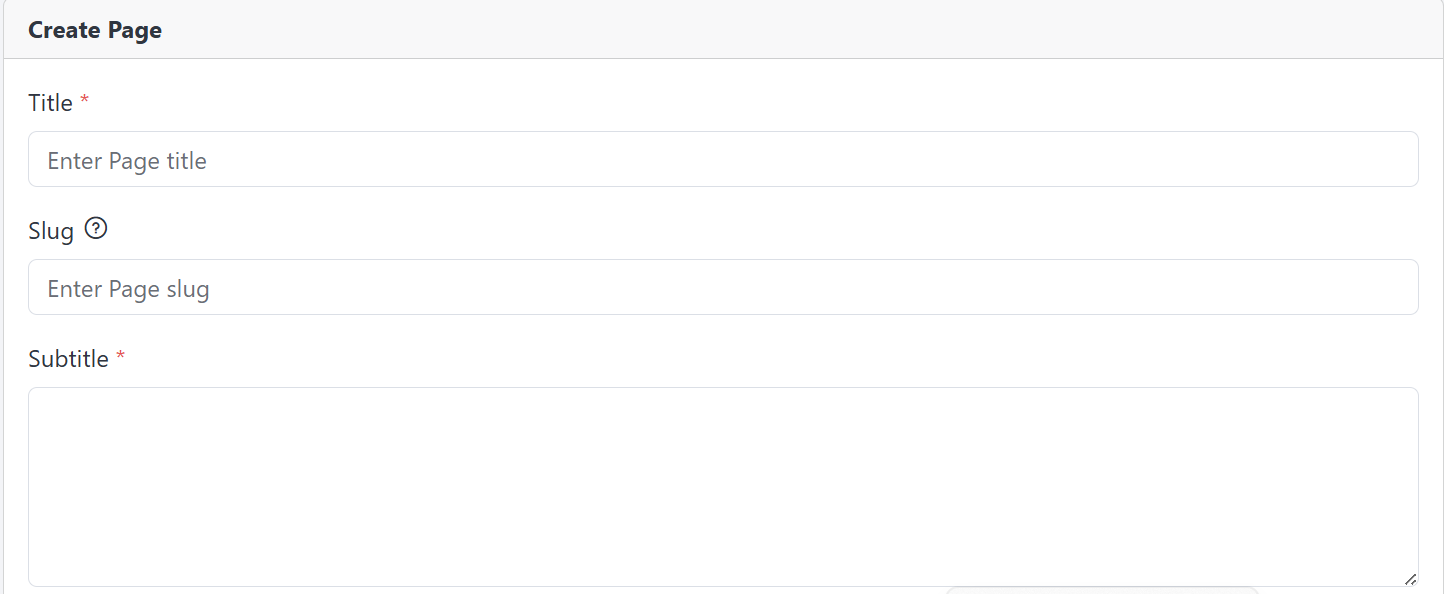
You Can enter the required information to add a new Page to your website.
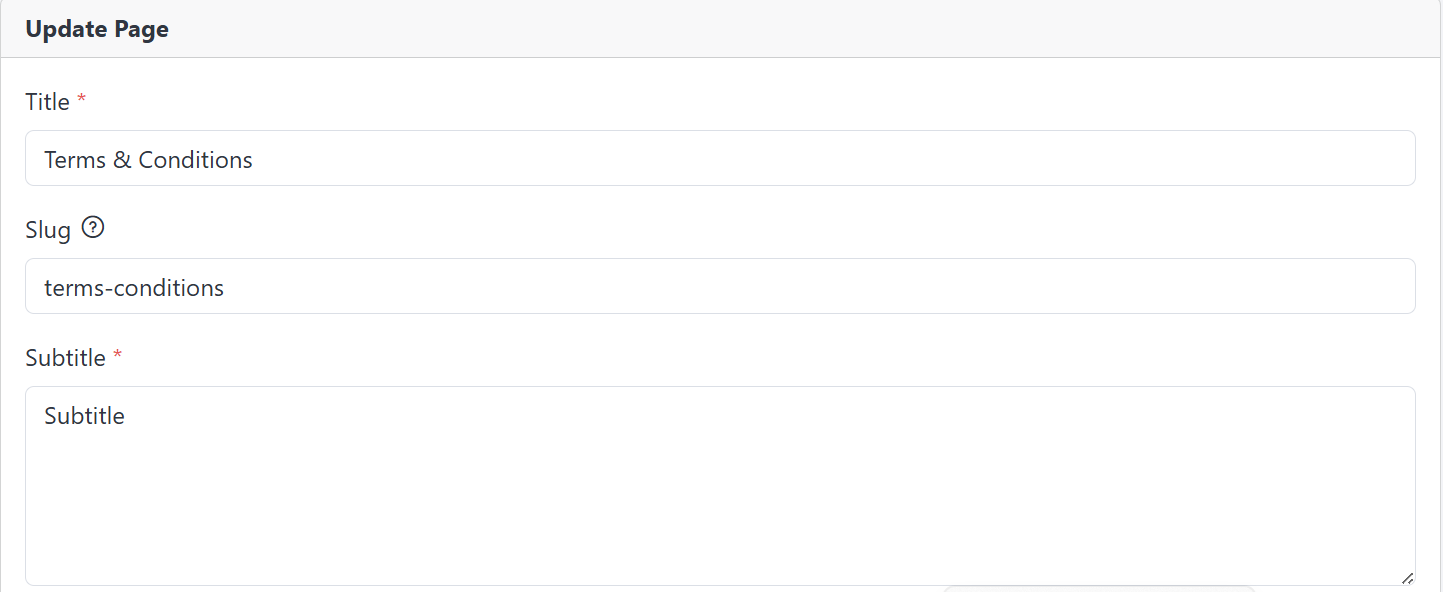
You can update the Page details at any time as needed.
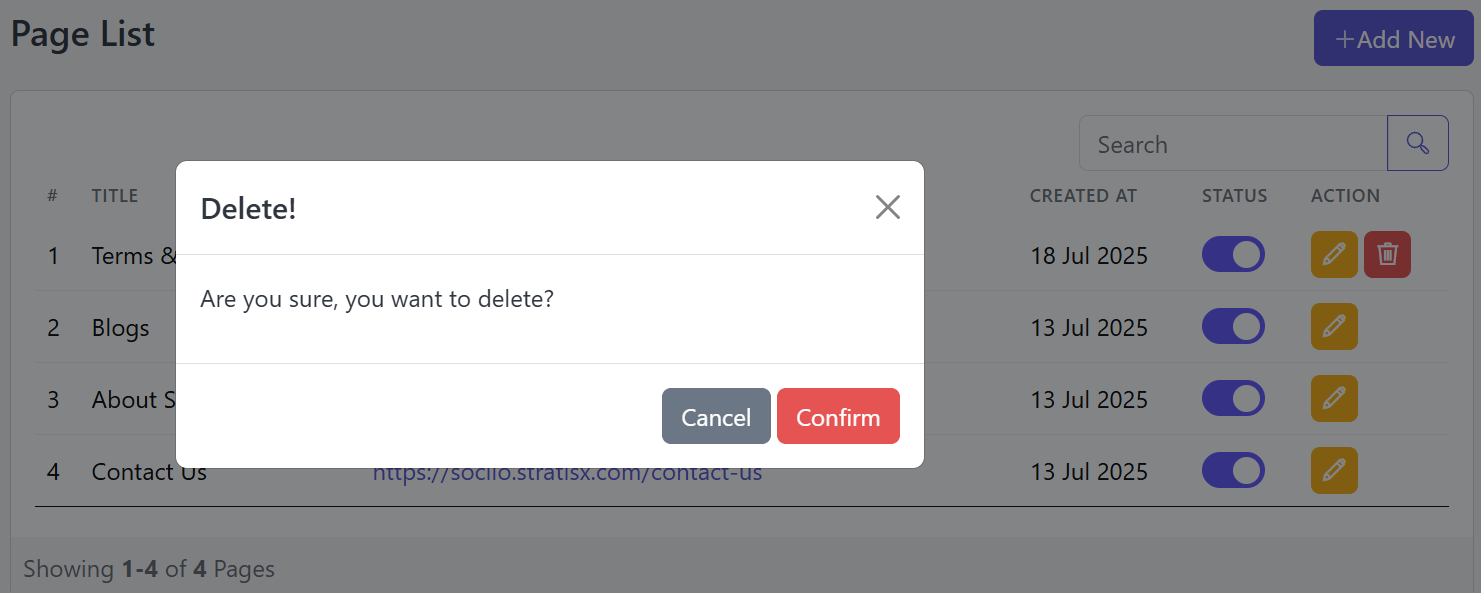
Click the Delete button in the Action column to remove a Page.
CTA Section
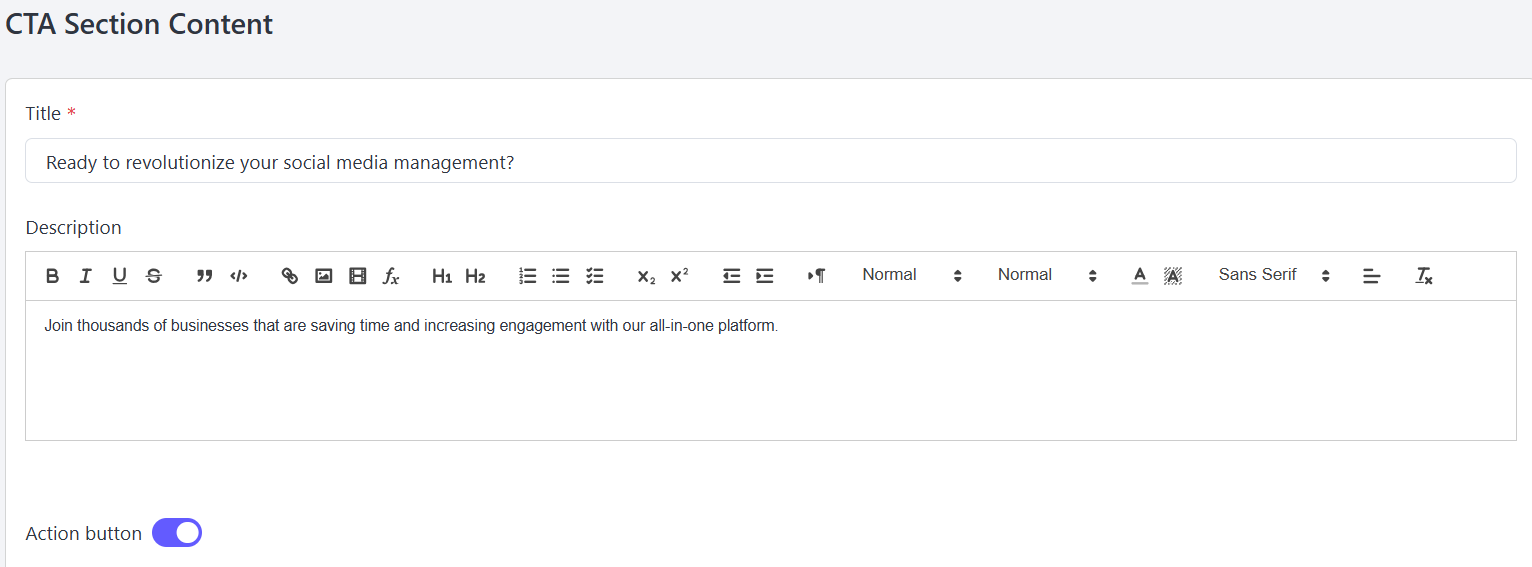
Follow the steps below to configure the CTA Section.
Go to the Admin Panel and click on Website Settings. Then open the CTA tab to configure your CTA content.
Footer Category
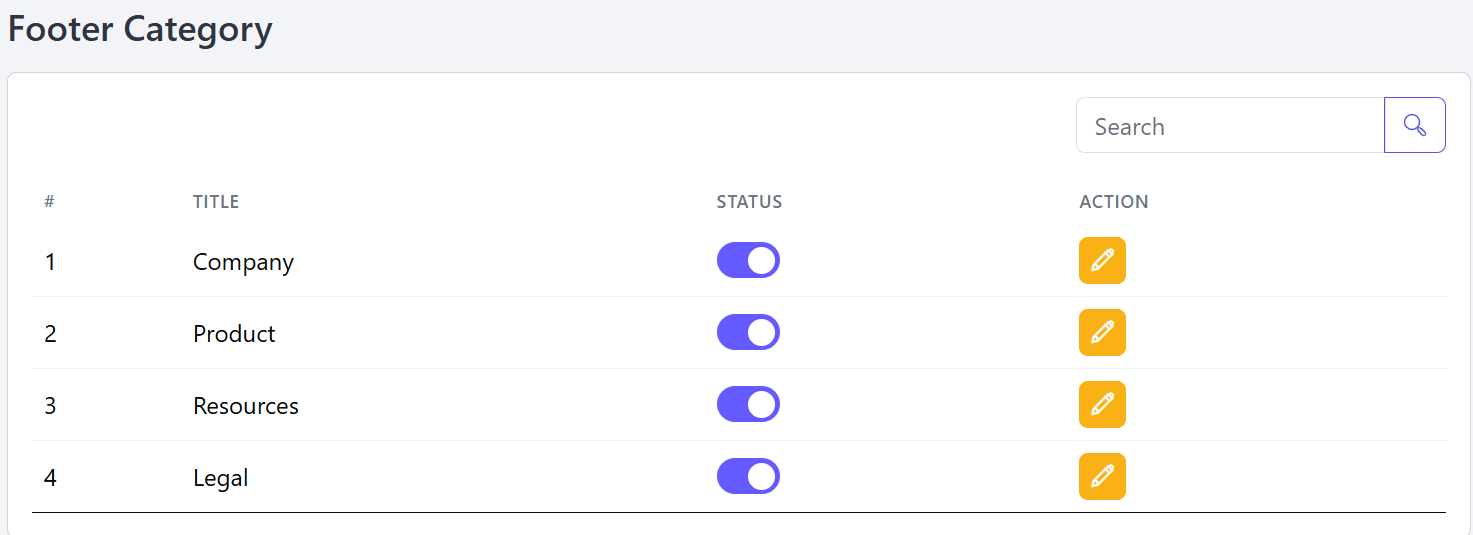
Follow these steps to manage your Footer Category section effectively.
Go to the Admin Panel and click on Website Settings. Then open the Footer Category tab to configure your Footer Category section.
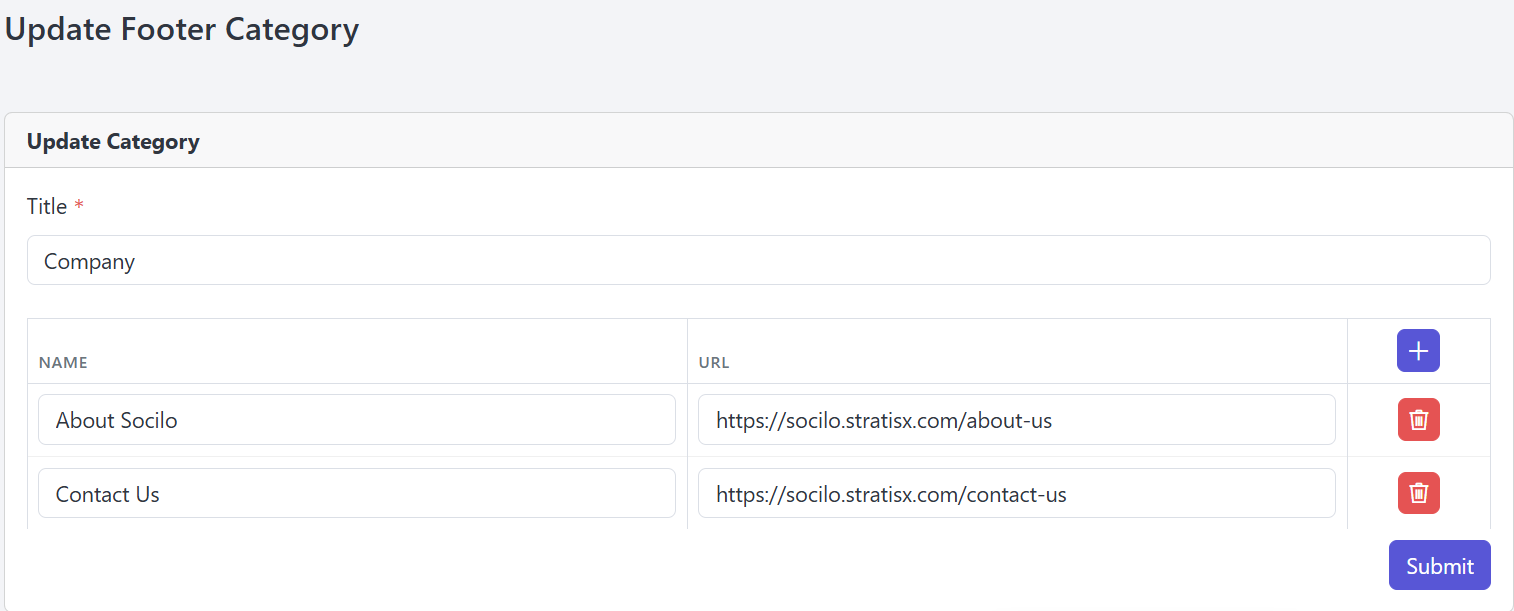
This section allows you to update an existing Footer Category by modifying its title and managing the links under it using the Edit button.
Title: Enter the name of the footer category (e.g., Company). This will appear as a heading in the website footer.
Name and URL Fields:
You can add multiple items under this category:
- Name: The label or title of the link (e.g., About Socilo, Contact Us).
- URL: The destination link associated with the name (e.g.,
https://socilo.stratisx.com/about-us).
Add Button (+): Click this to add a new name–URL pair.
Delete Button (🗑️): Click the red delete icon to remove any existing link entry.
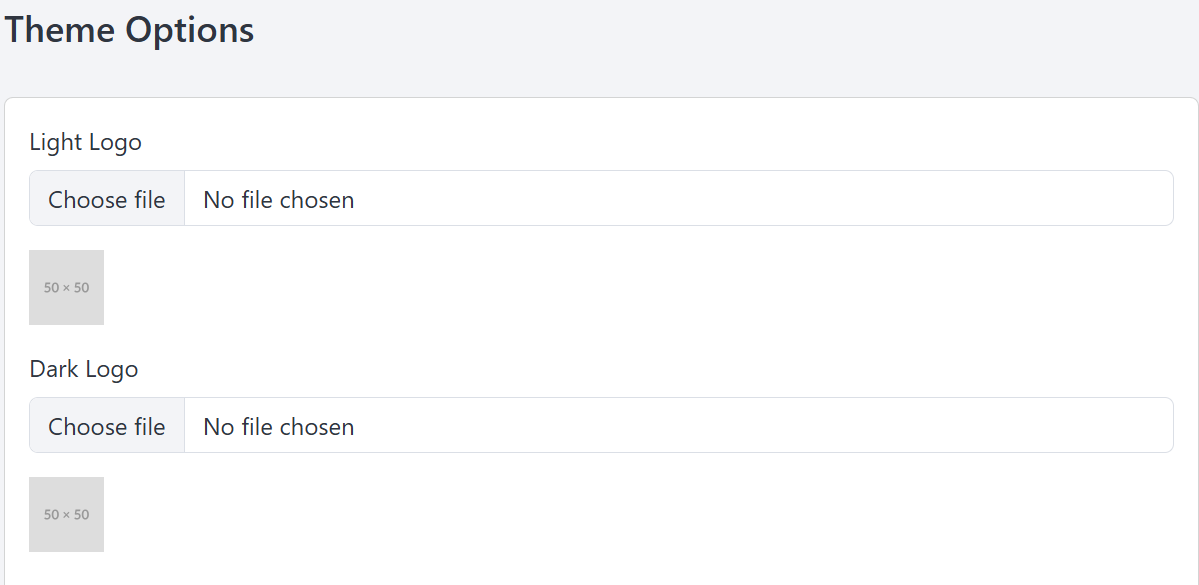
Theme Options
Follow these steps to Manage your Theme Options section effectively.
Go to the Admin Panel and click on Website Settings. Then open the Logo & Favicon tab to configure your Theme section.
Website SEO
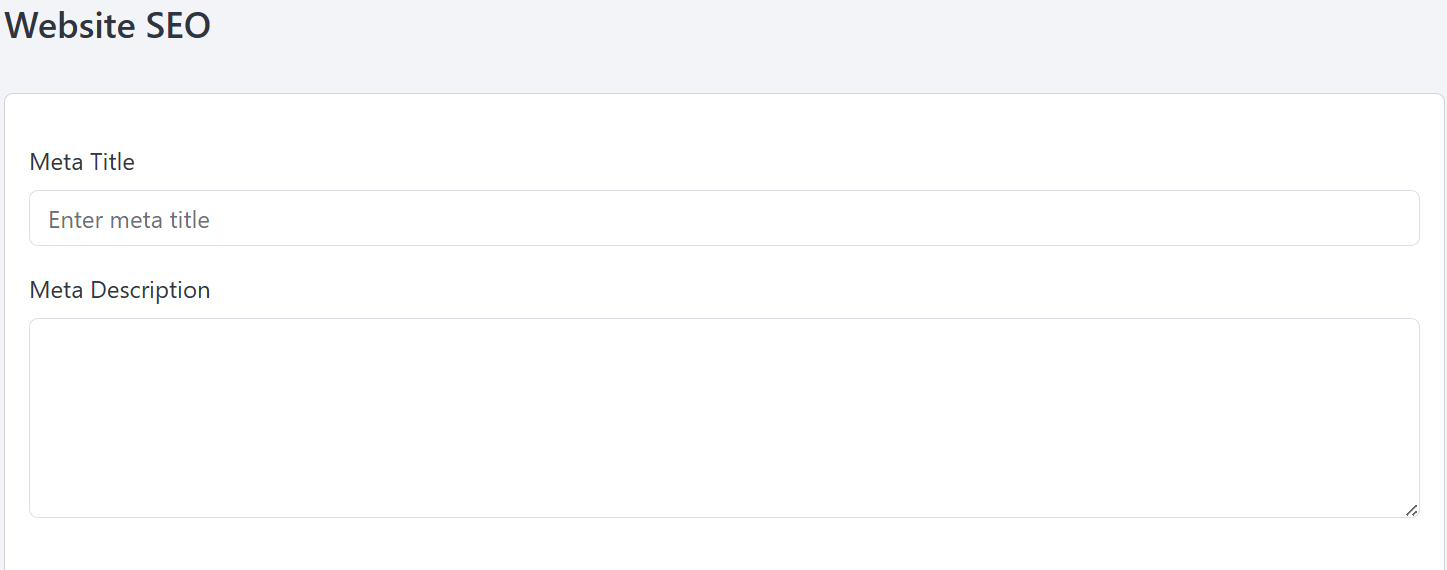
Follow these steps to Manage your Website SEO section effectively.
This section allows you to configure basic SEO (Search Engine Optimization) metadata for your website.
GDPR Setting
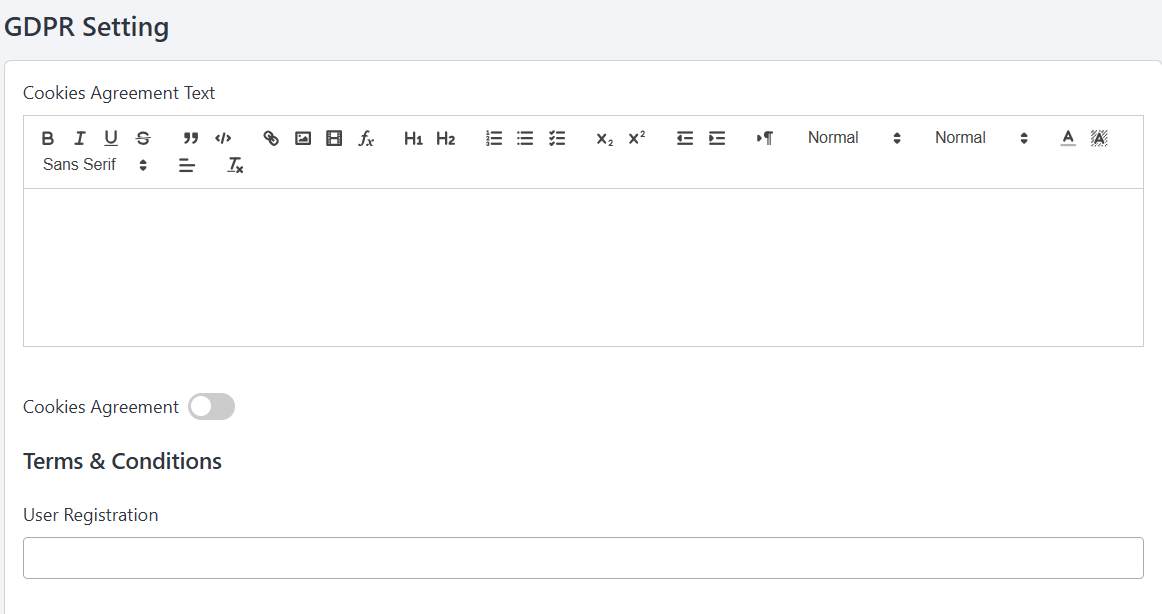
Follow these steps to Manage your GDPR Setting section effectively.
Go to the Admin Panel and click on Website Settings. Then open the GDPR tab to Set your GDPR Setting.
Custom CSS & JS
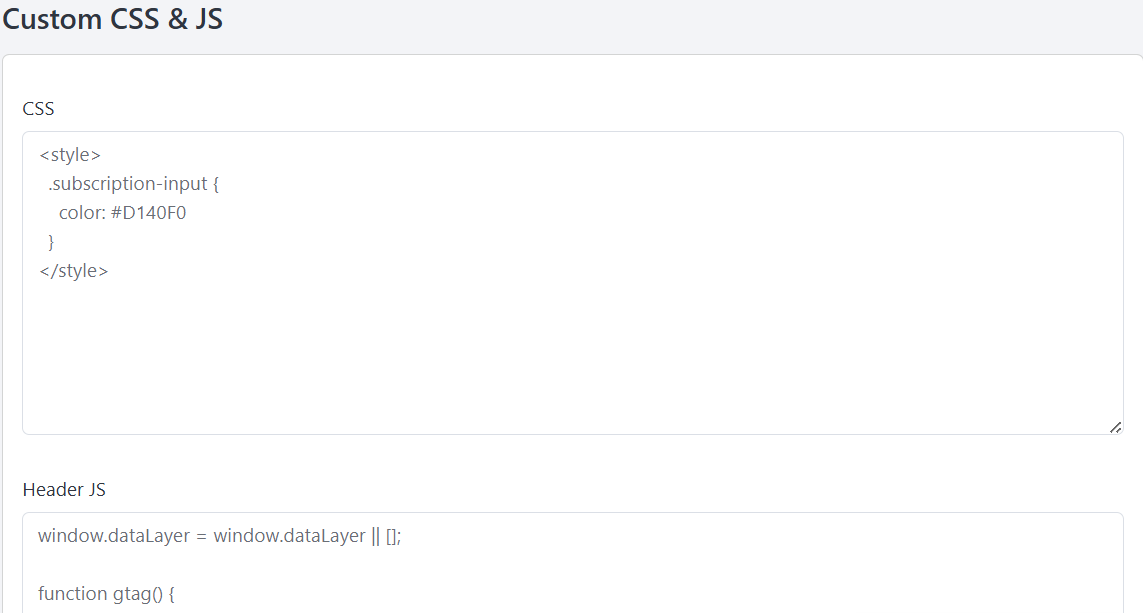
Follow these steps to Manage your Custom CSS & JS section effectively.
Go to the Admin Panel and click on Website Settings. Then open the CSS & JS tab to Set your Custom CSS & JS.
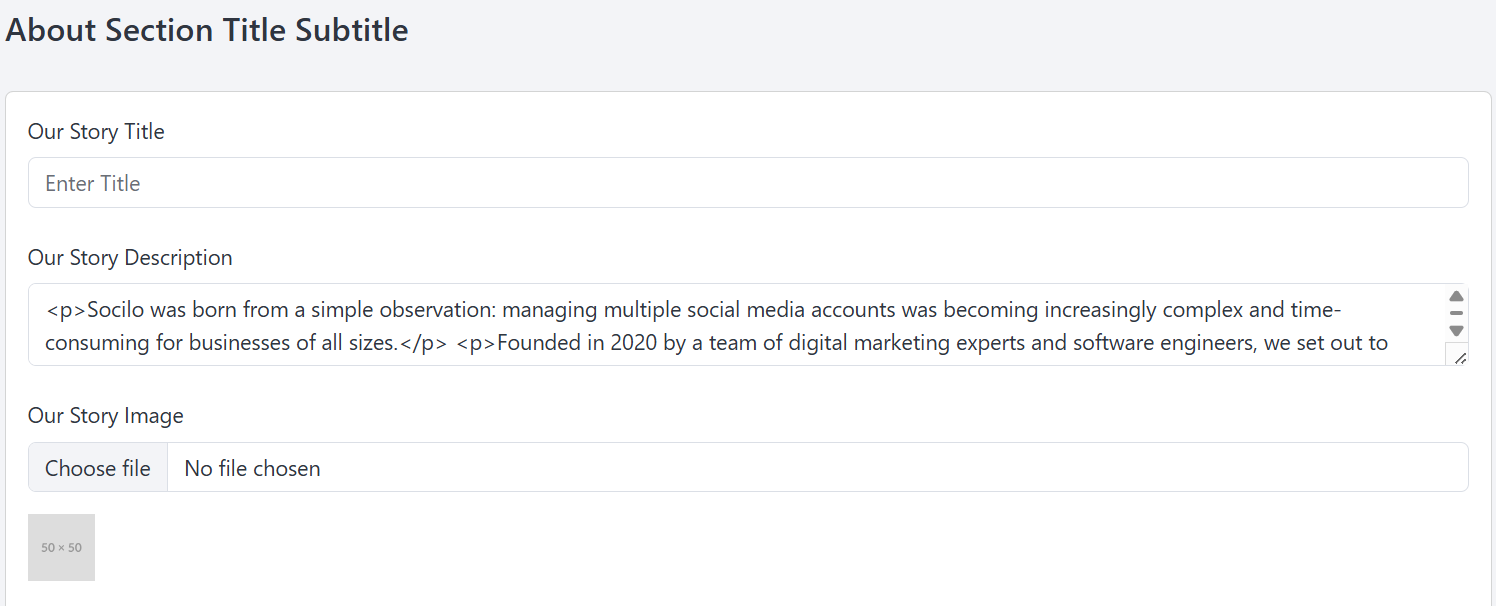
About Section Title & Subtitle
Follow these steps to efficiently manage all the section titles and subtitles of your About Us page.
Open the Admin Panel and click on About Us. Then go to the Title & Subtitle tab to manage all section titles and subtitles of the About Us page.
Mission & Vision
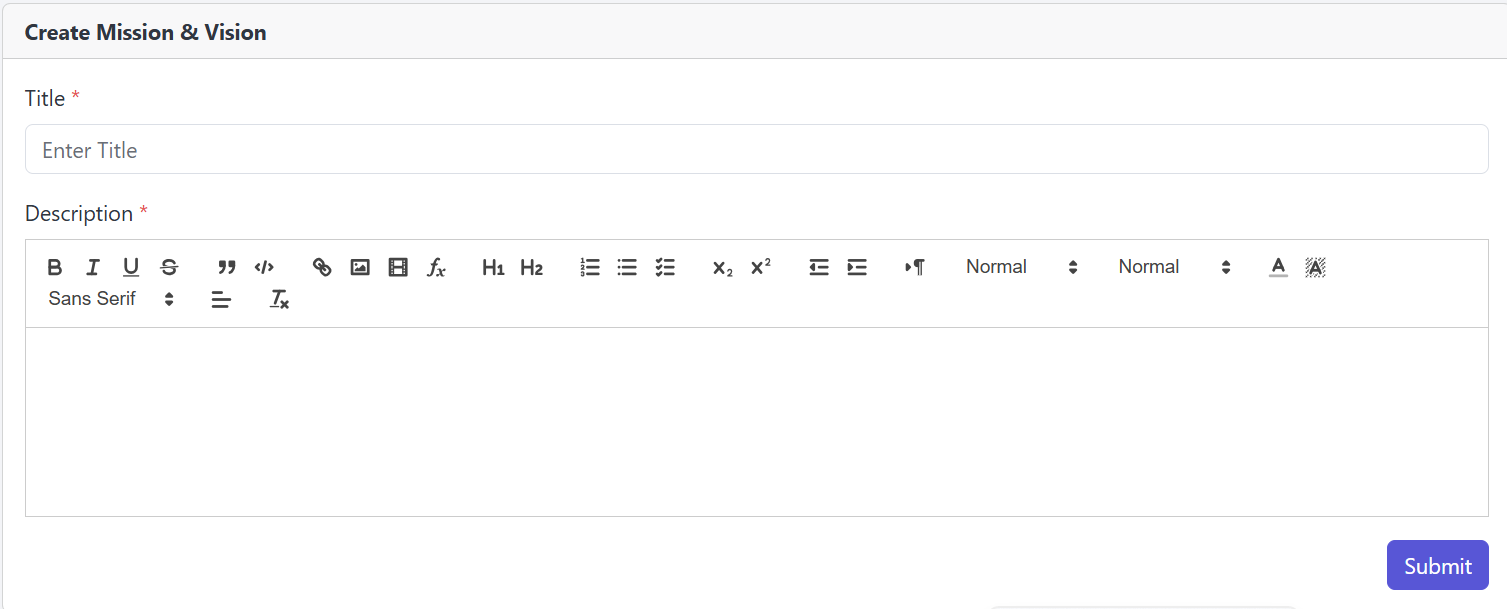
Follow these steps to efficiently manage Mission & Vision of your About Us page.
Open the Admin Panel and click on About Us. Then go to the Mission & Vision tab to manage Mission & Vision of the About Us page.

You can add a new here by entering the required information.
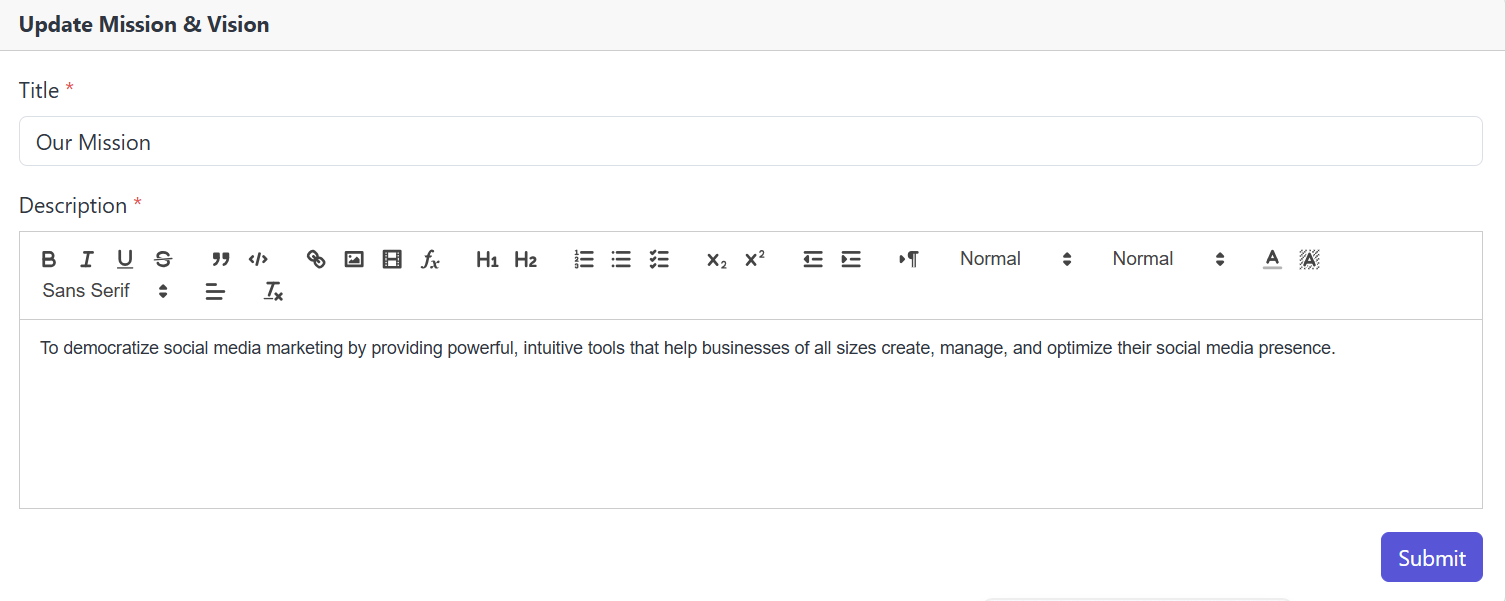
You’re allowed to modify This Mission & Vision information as needed.
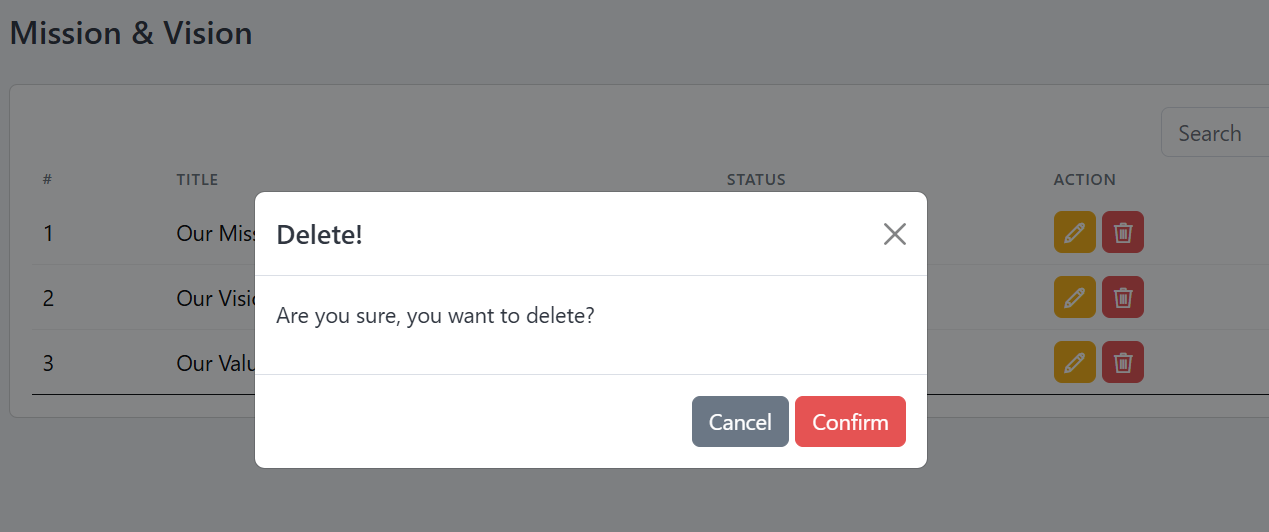
To remove a Mission & Vision, click the Delete button in the Action column.
Teams
Follow these steps to efficiently manage Your Team of your About Us page.
Open the Admin Panel and click on About Us. Then go to the Teams tab to manage Your Team Members of the About Us page.
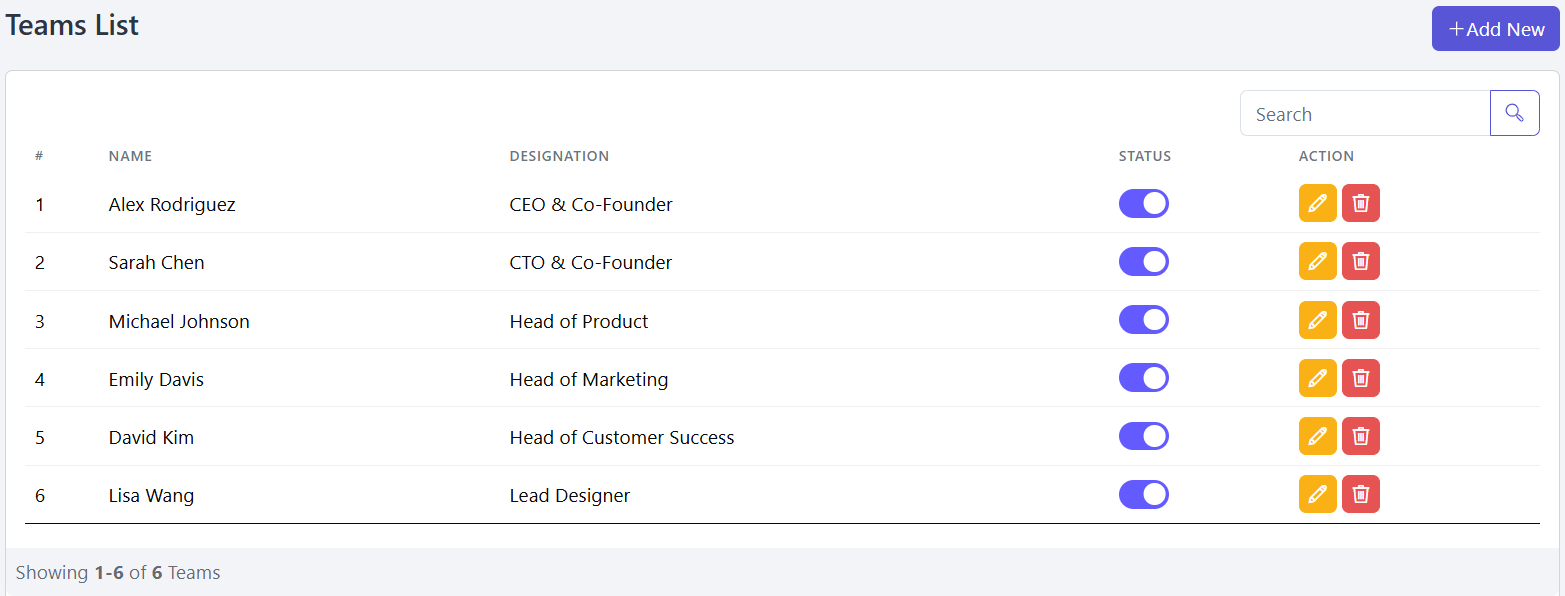
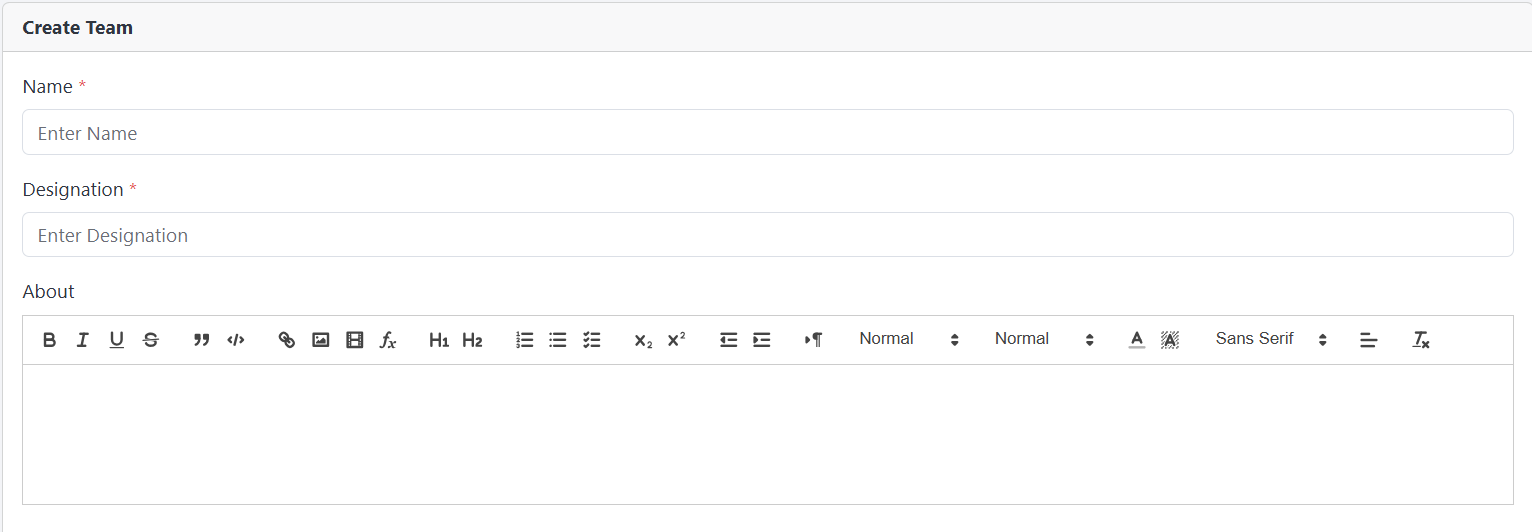
Also You can add a new Teams Member here by entering the required information.
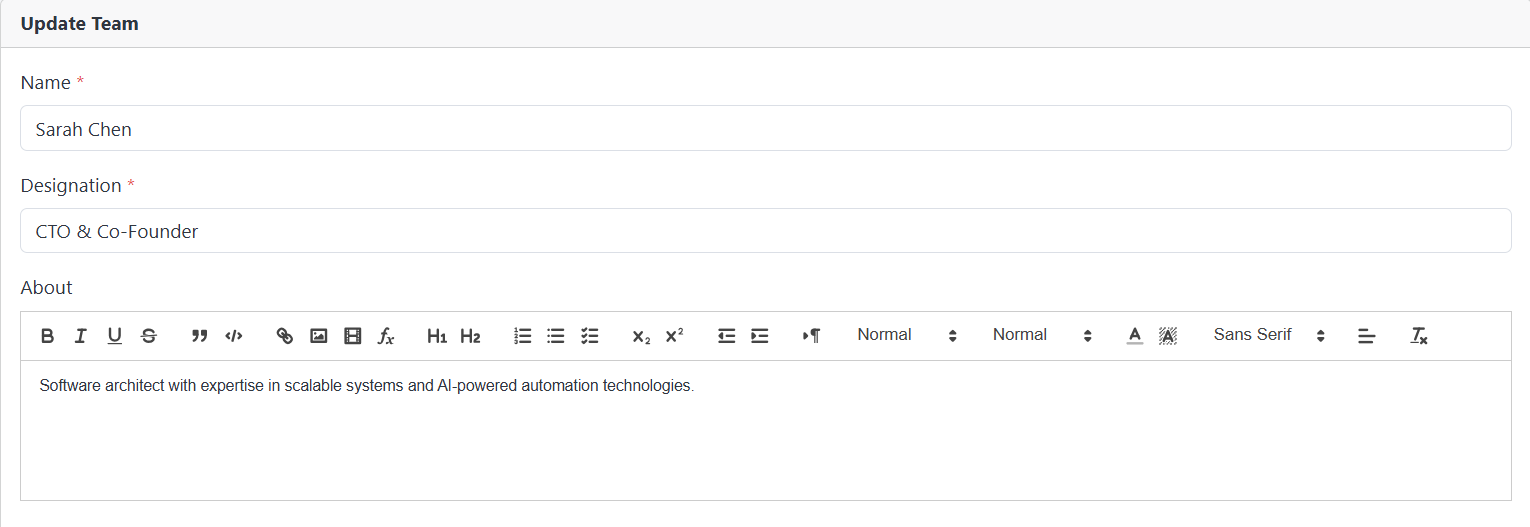
You’re allowed to modify This Teams information as needed.
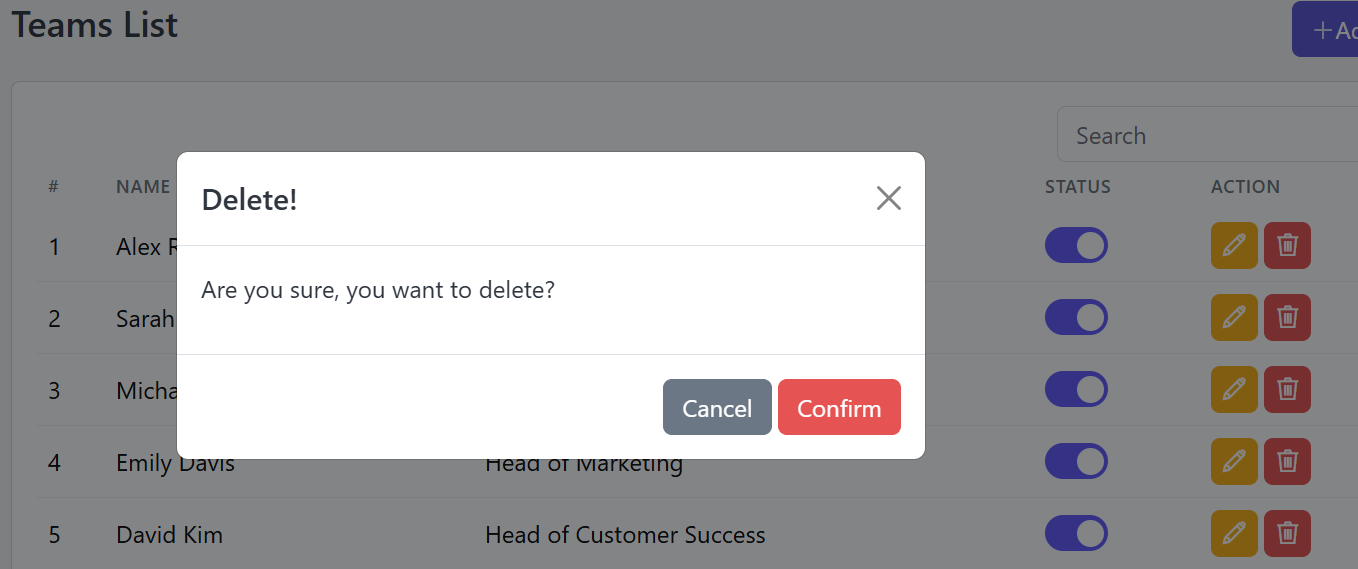
You Can Remove the teams, click the Delete button in the Action column.
Our Core Values
Follow these steps to manage the Core Values section of your About Us page.
Open the Admin Panel and click on About Us. Then go to the Core Values tab to manage Core Values of the About Us page.
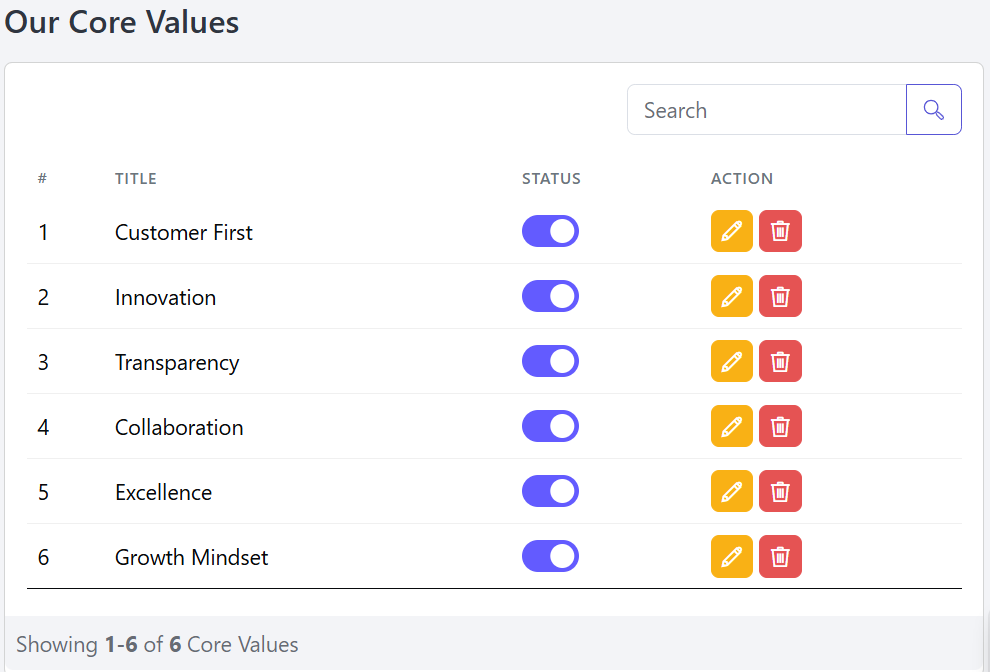
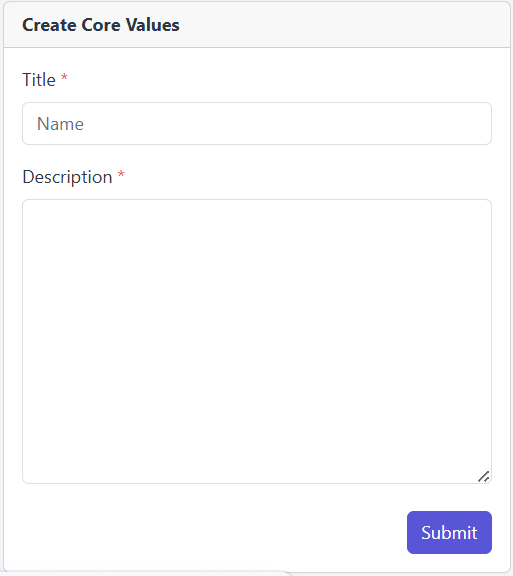
Also You can add a new Core Values here by entering the required information.
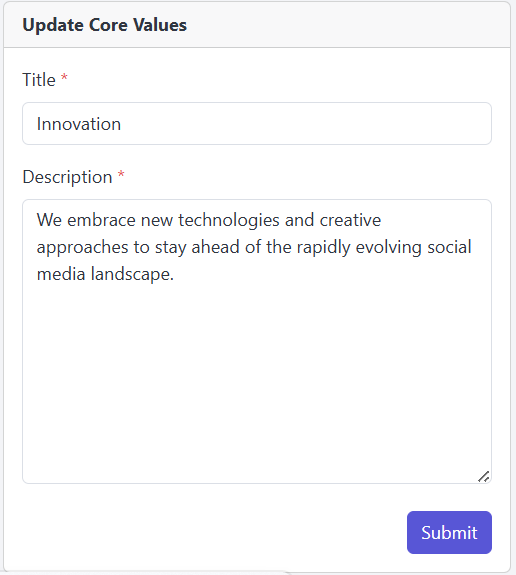
You’re allowed to Update This Core Values information as needed.
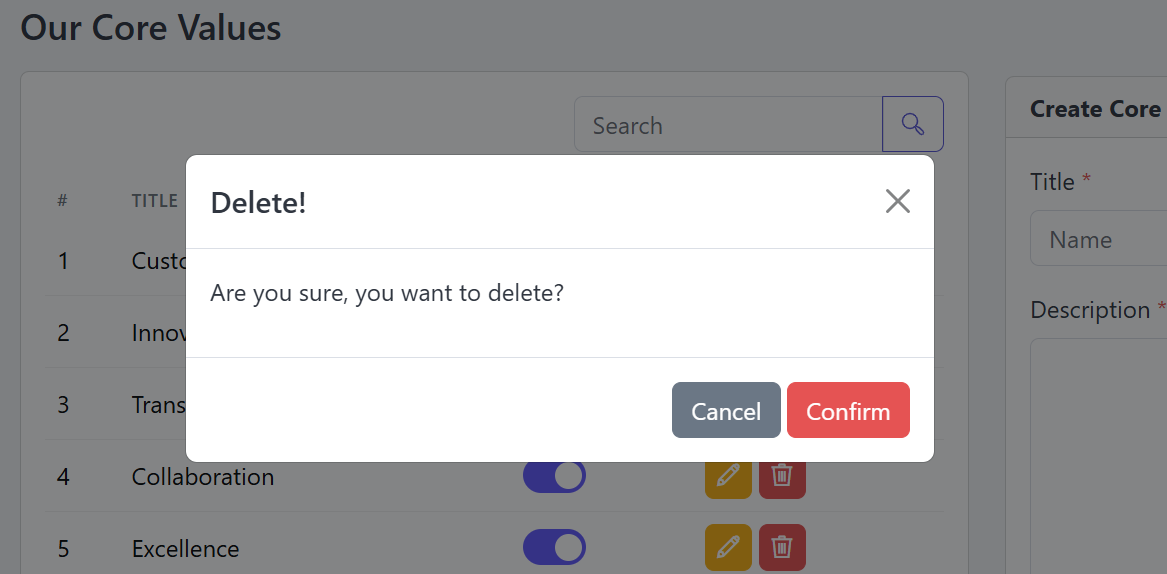
You Can Remove the Core Values, click the Delete button in the Action column.
Our Journey
Follow these steps to manage the Our Journey section of your About Us page.
Open the Admin Panel and click on About Us. Then go to the Our Journey tab to manage Our Journey of the About Us page.
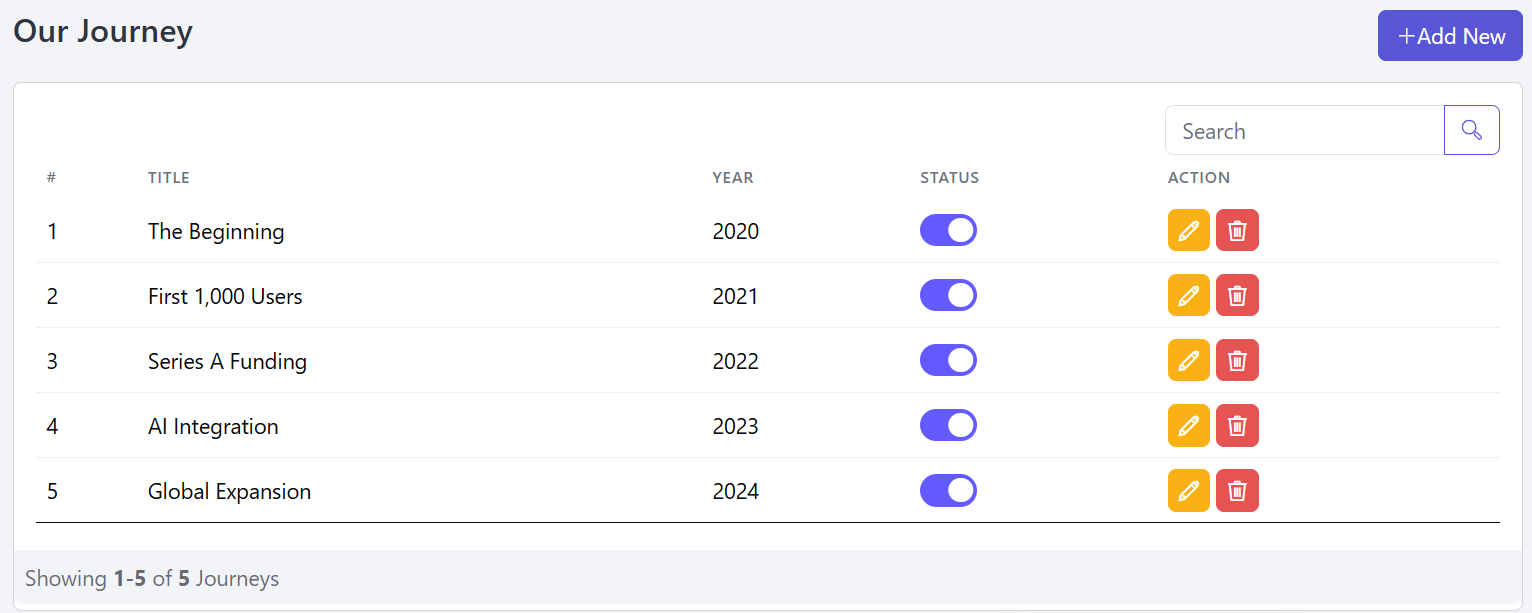
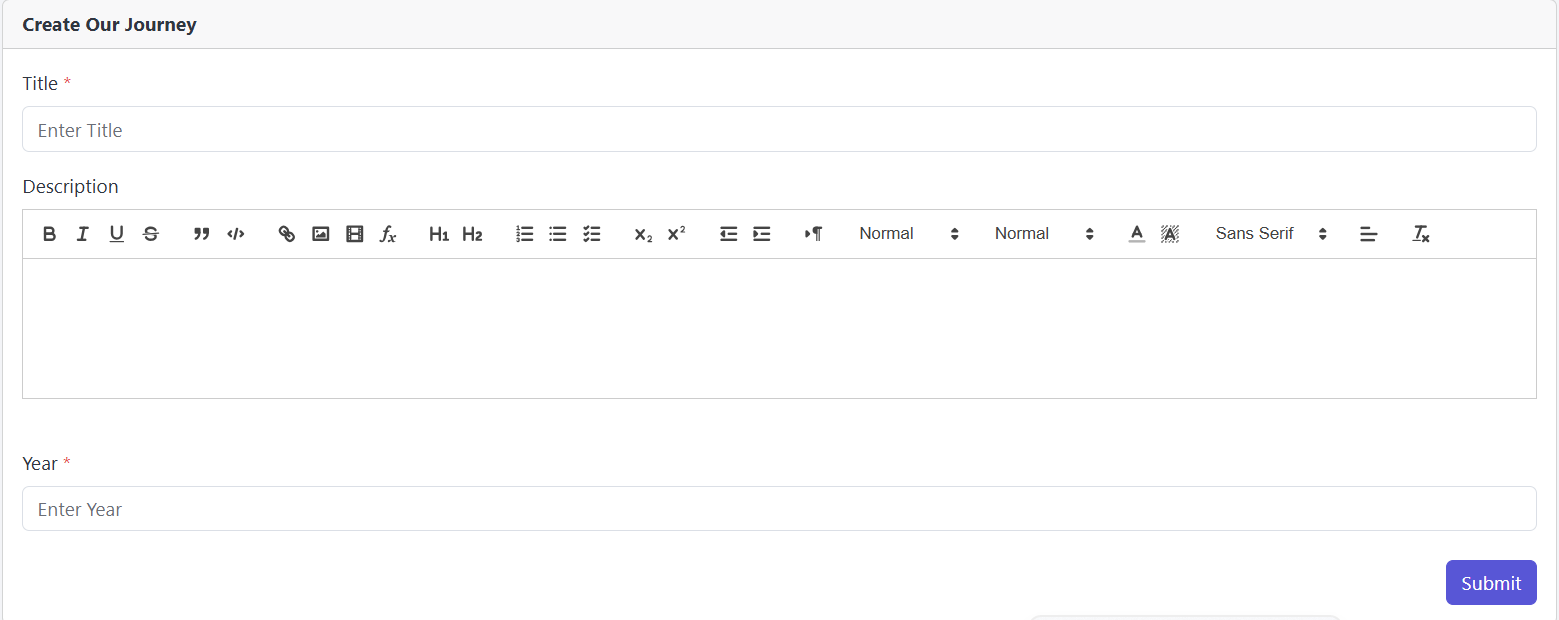
Also You can add a new Our Journey here by entering the required information.
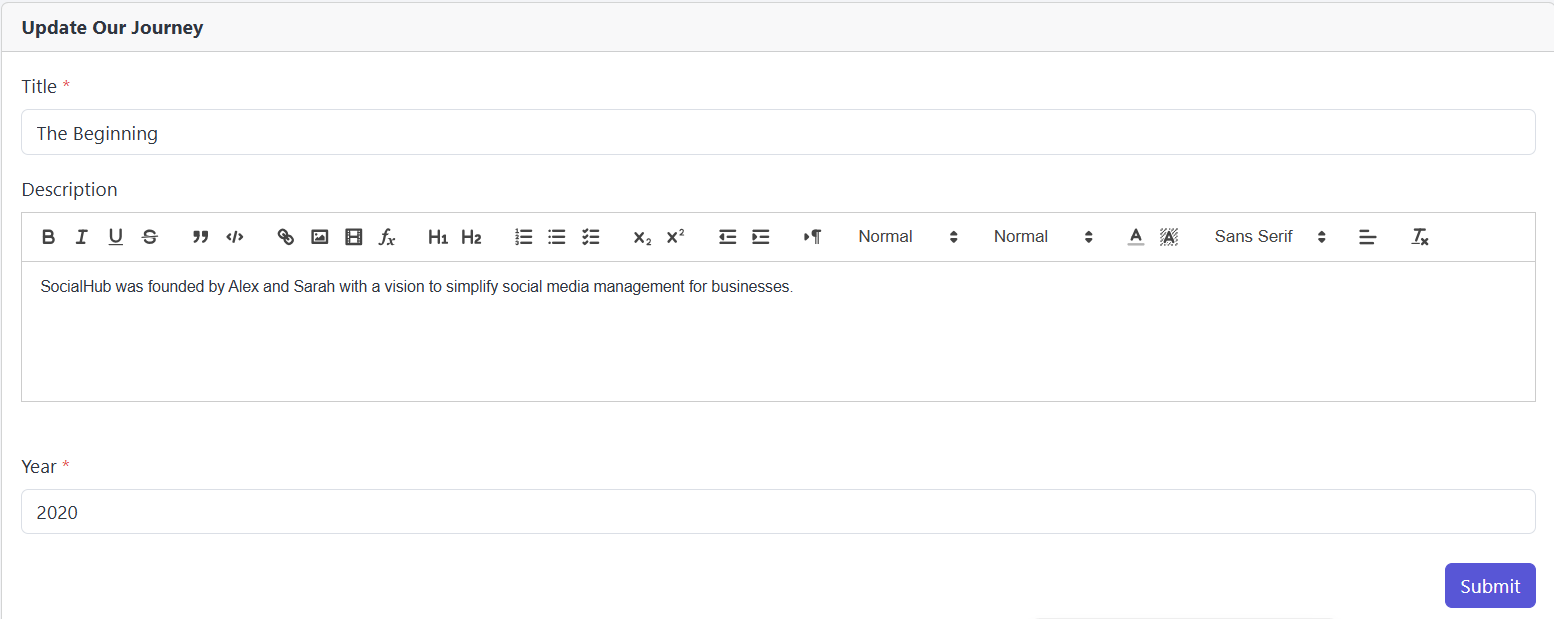
You’re allowed to Update This Our Journey information as needed.
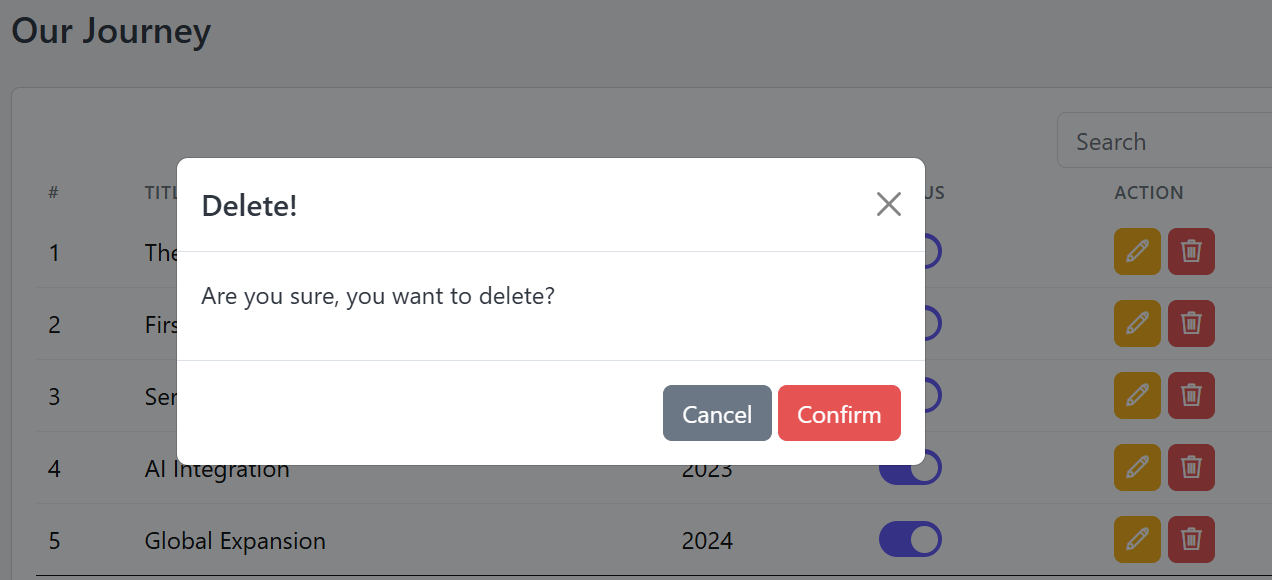
You Can Remove the Our Journey, click the Delete button in the Action column.
Blog Category
Follow these steps to manage the Blog Category section.
Go to the Admin Panel and select Manage Blog. Then click on the Blog Category tab to manage your categories.
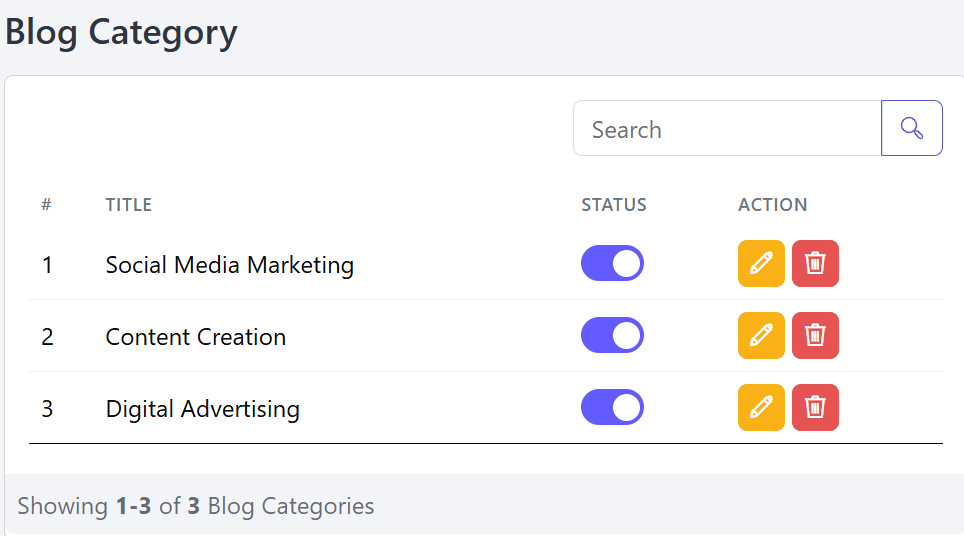
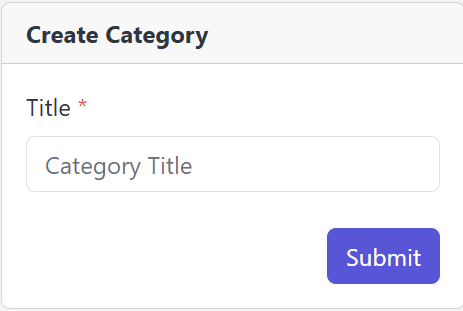
You can also add a new Blog Category by filling in the required information here.
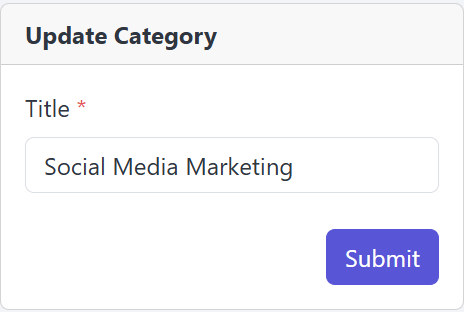
You’re allowed to Update This Blog Category information as needed.
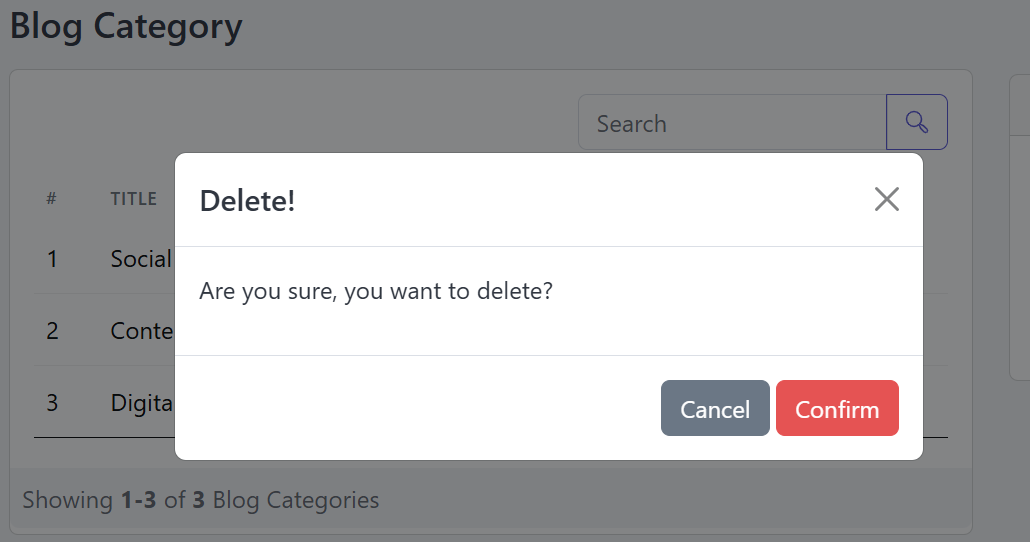
You Can Remove the Blog Category, click the Delete button in the Action column.
Manage Blog
Follow these steps to manage the Blog section.
Go to the Admin Panel and select Manage Blog. Then click on the All Blog tab to manage your Blog Section.
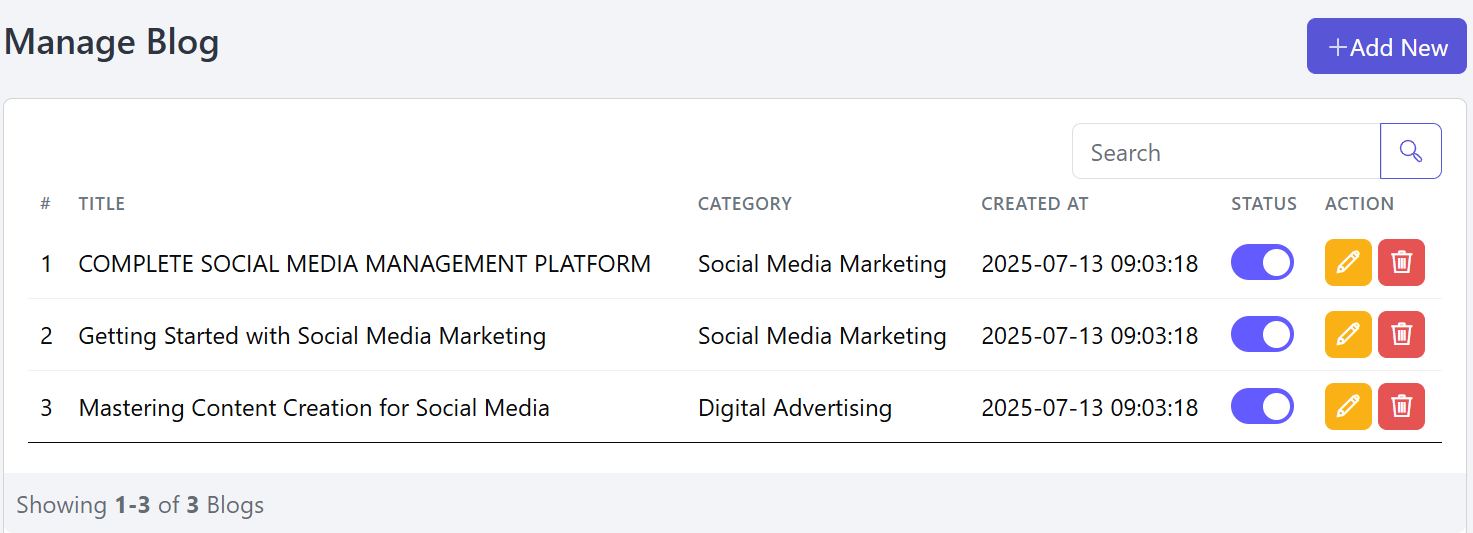
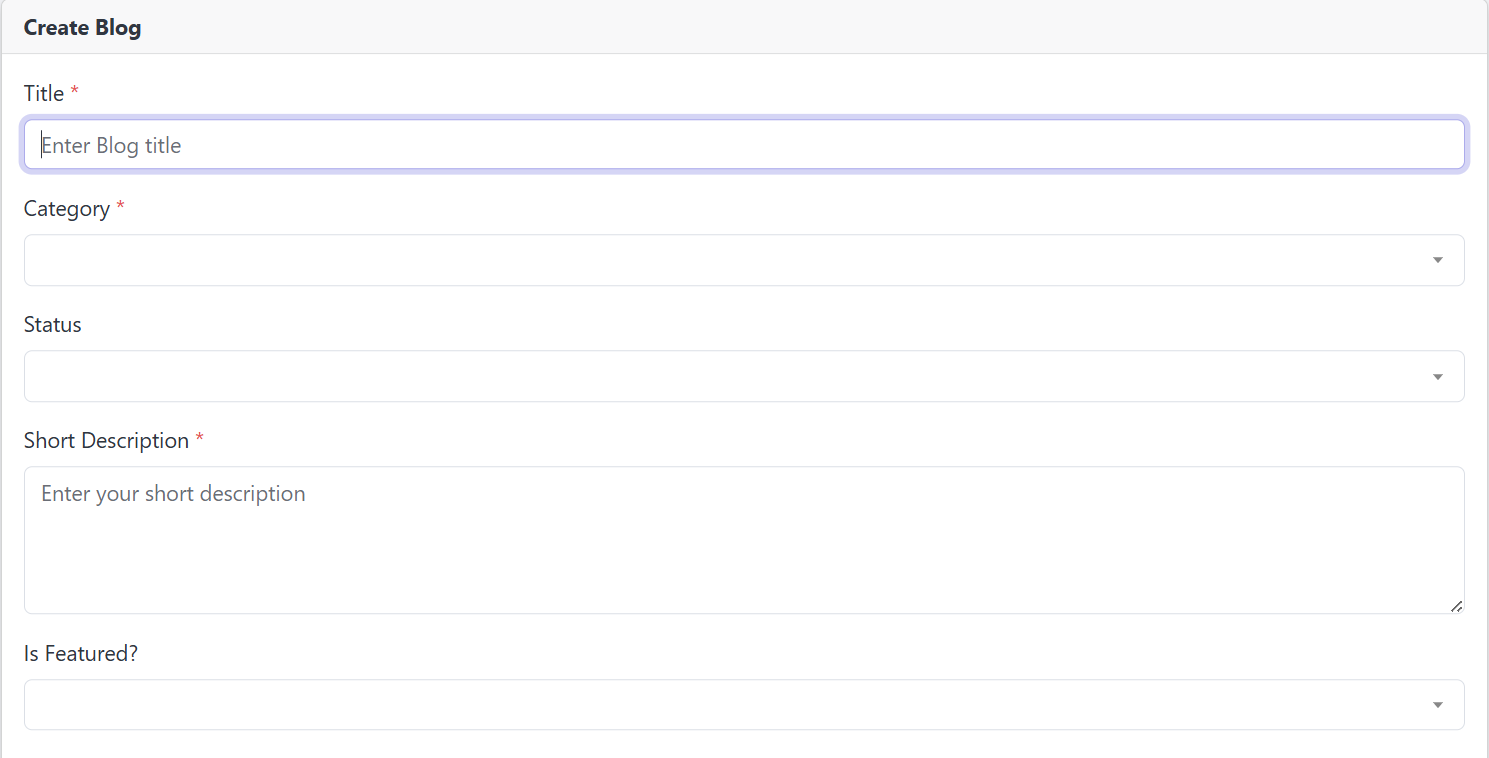
You can add a new Blog by entering the required information in this section.
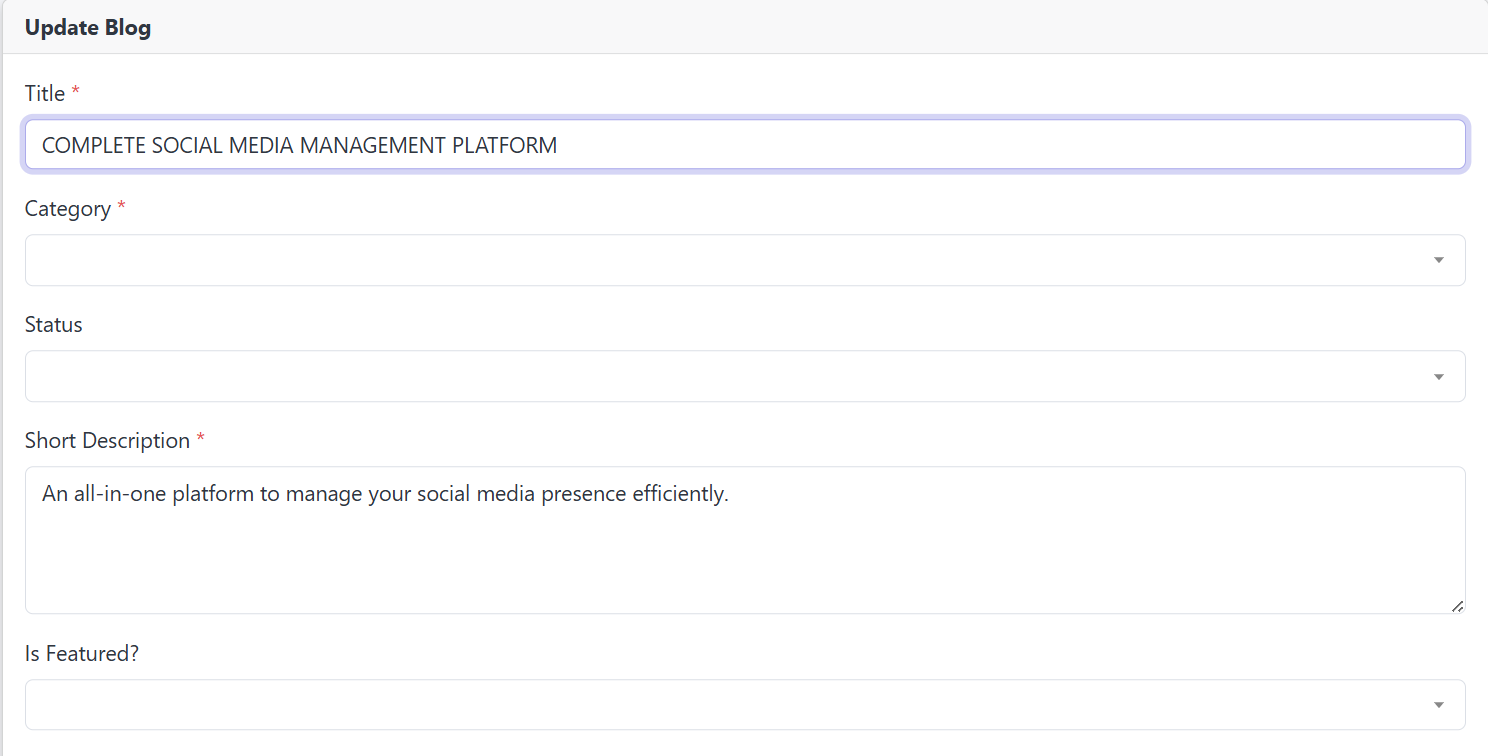
You’re allowed to Update This Blog information as needed.
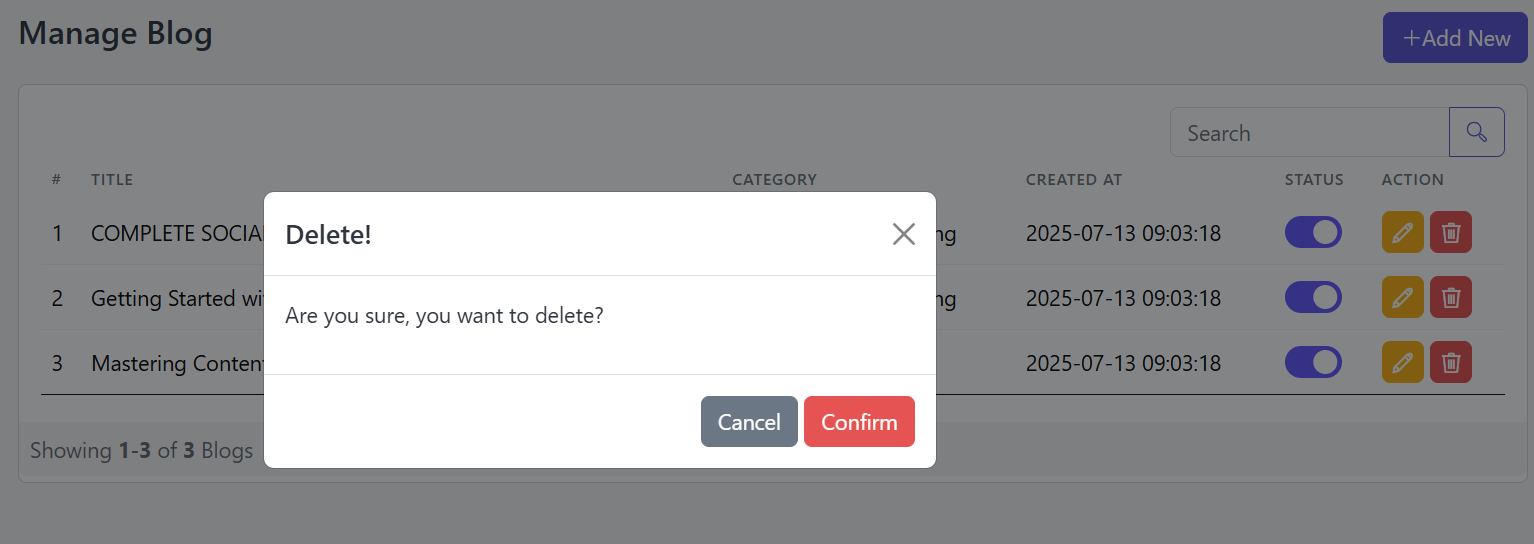
You Can Remove the Blog, click the Delete button in the Action column.
Subscribe
Follow these steps to manage the Subscribe List section.
Go to the Admin Panel and select Marketing. Then click on the Subscribe tab to manage your Subscribe Section.

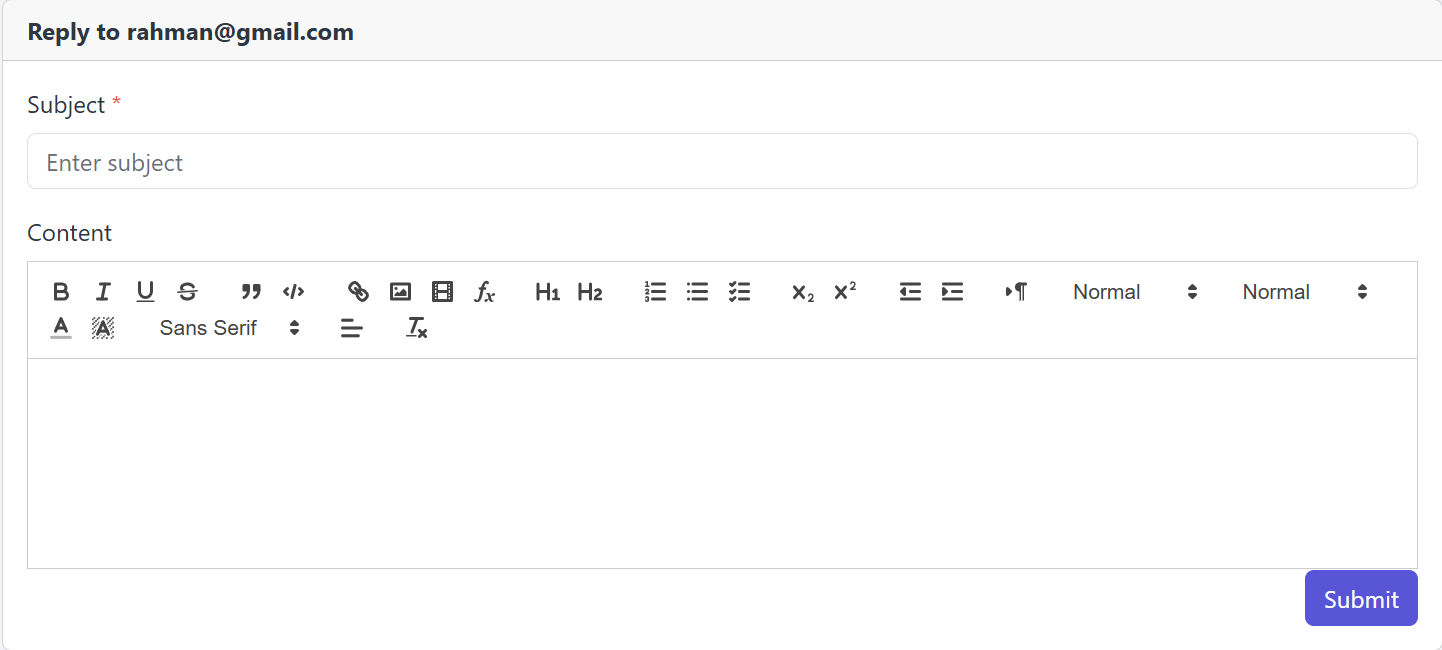
You can send a message to the subscriber by using the Reply button in the Action column.
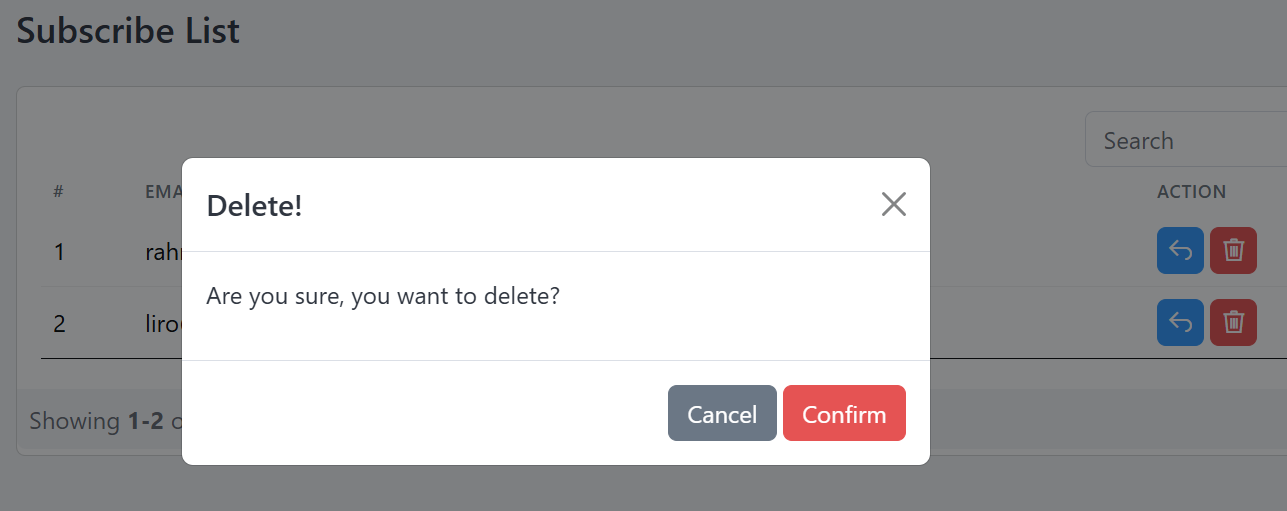
You Can Remove the Subscribe , click the Delete button in the Action column.
Contact Us
Follow these steps to manage the Contact Us List section.
Open the Admin Panel and click on Marketing. Then go to the Message tab to view the Contact Us list and messages.

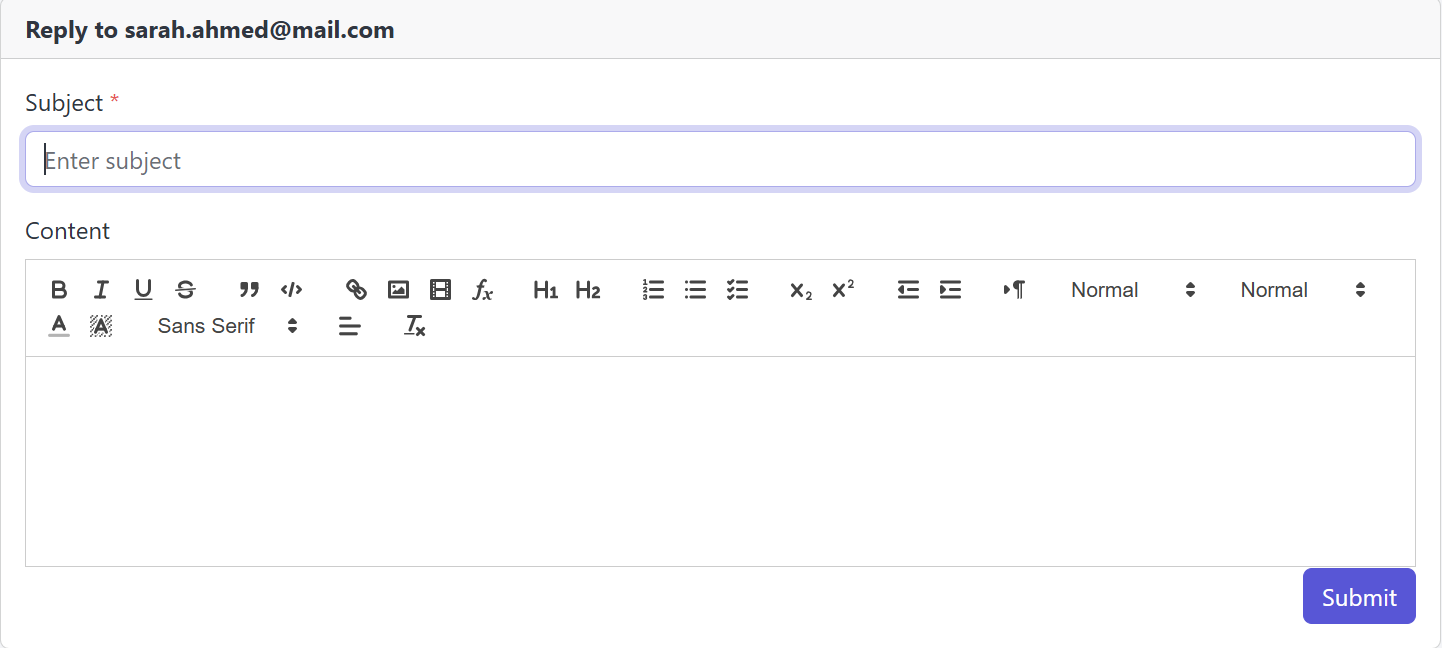
Those who send you a message, you can reply to them using the Reply button.
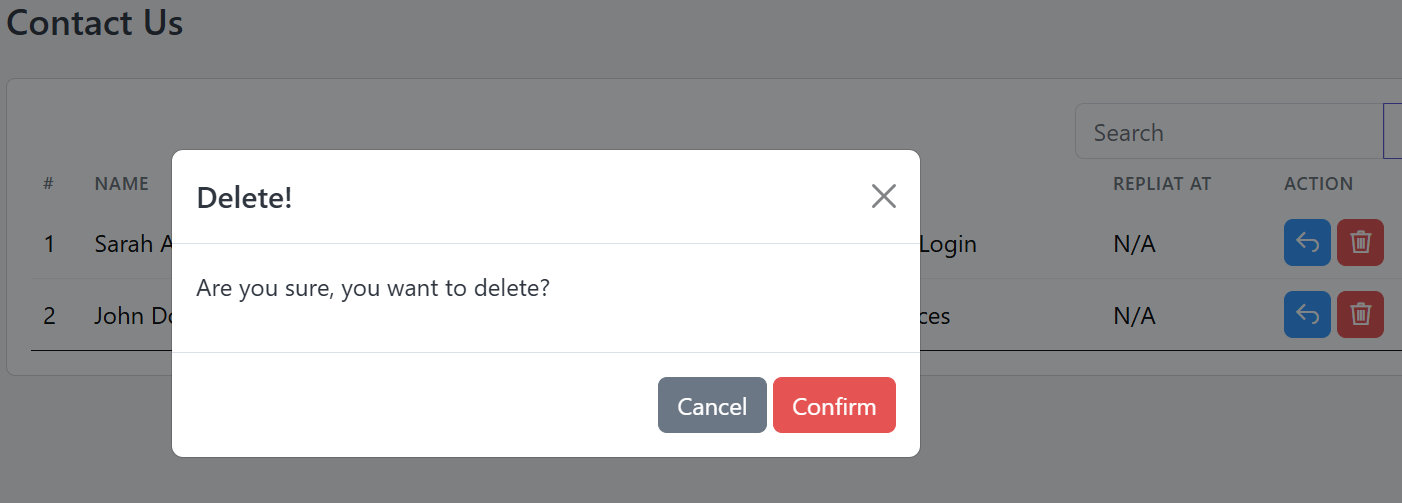
You Can Remove the Contact Us List, click the Delete button in the Action column.
Department
Follow these steps to manage the Department section.
Go to the Admin Panel and select Support. Then click on the Department tab to manage your Department Section.
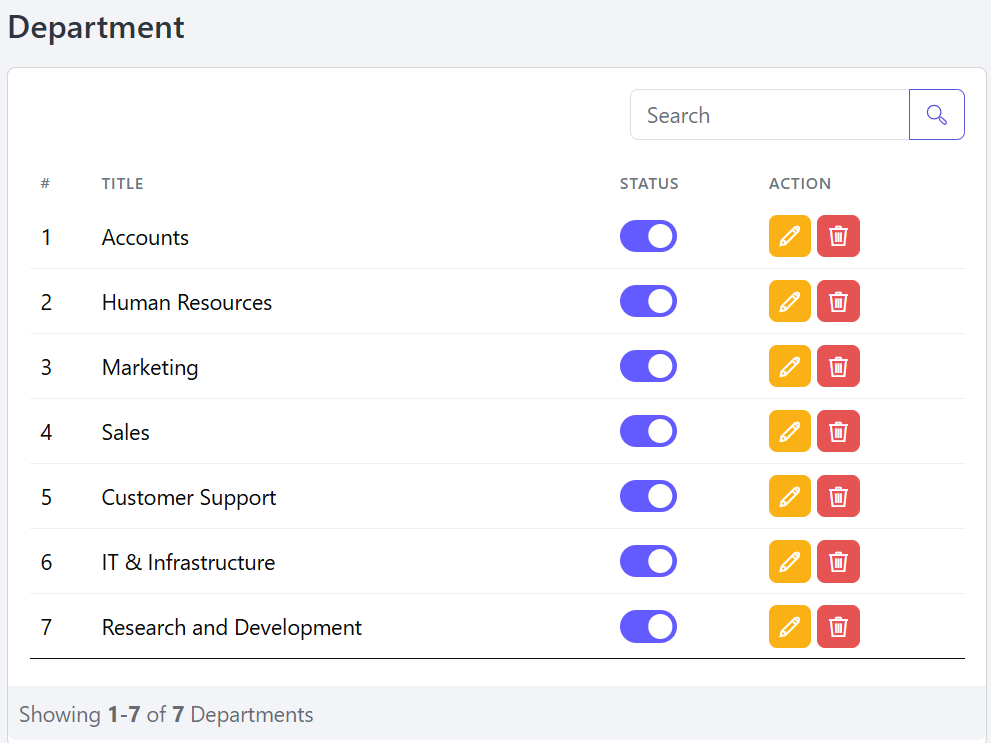
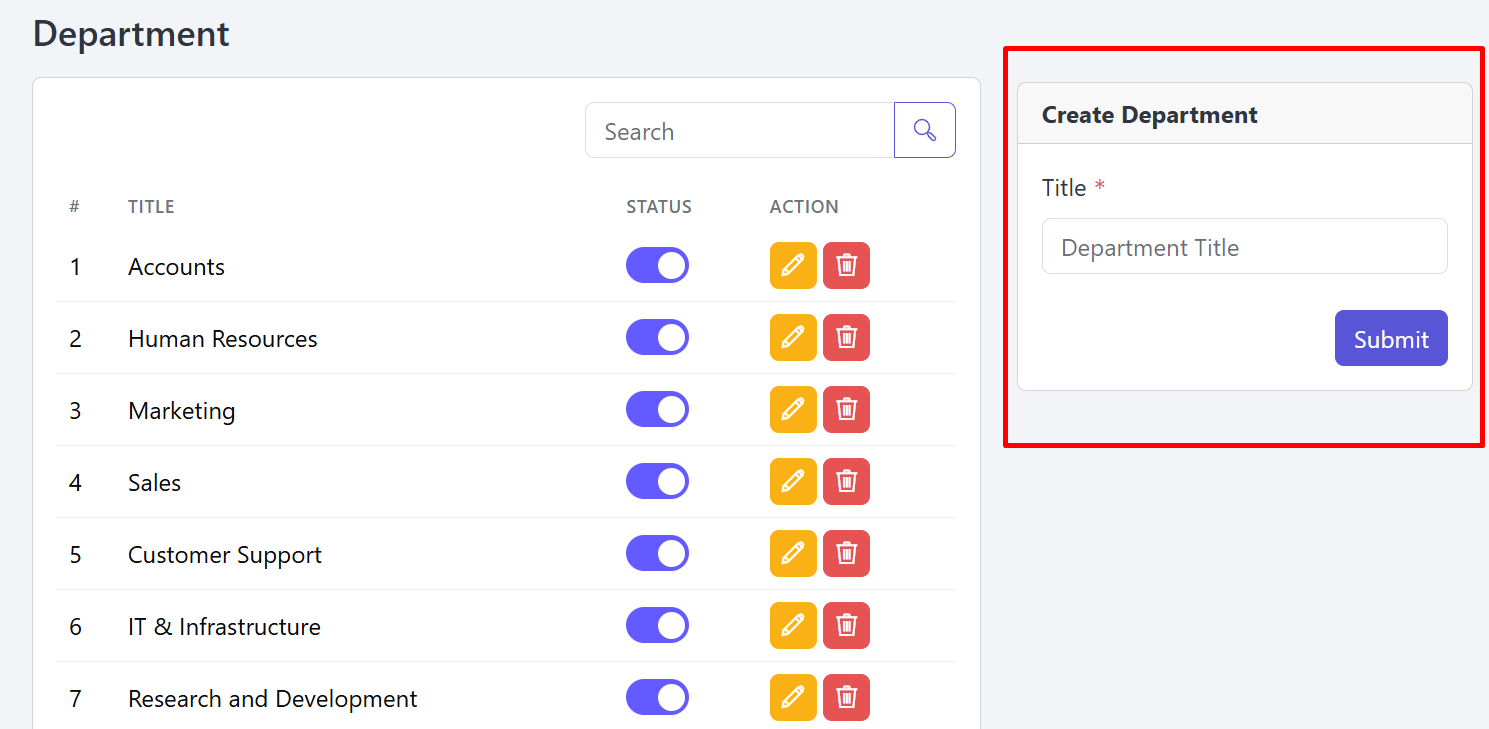
You can add a Department by submitting the form marked in red.
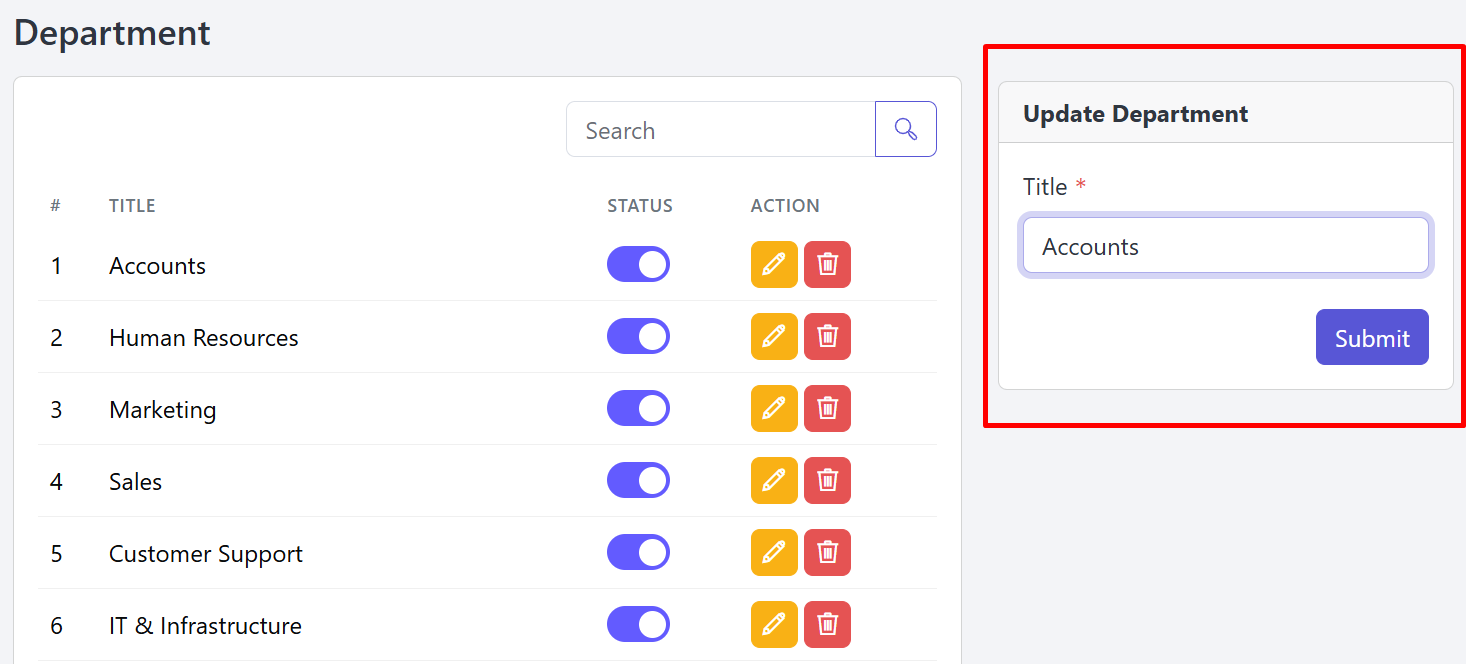
You’re allowed to Update This Department information as needed.
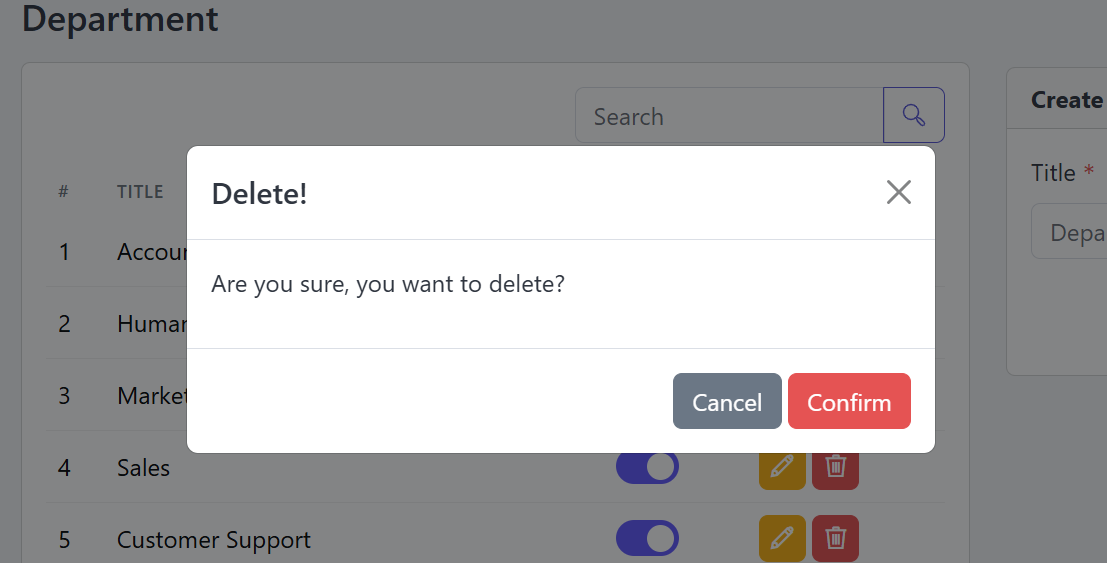
You Can Remove the Department, click the Delete button in the Action column.
Support Ticket
Follow these steps to manage support Tickets for your application.
Open the Admin Panel and select Support. Then, go to the Ticket tab to manage your tickets. Here, you can view all tickets along with their current status.

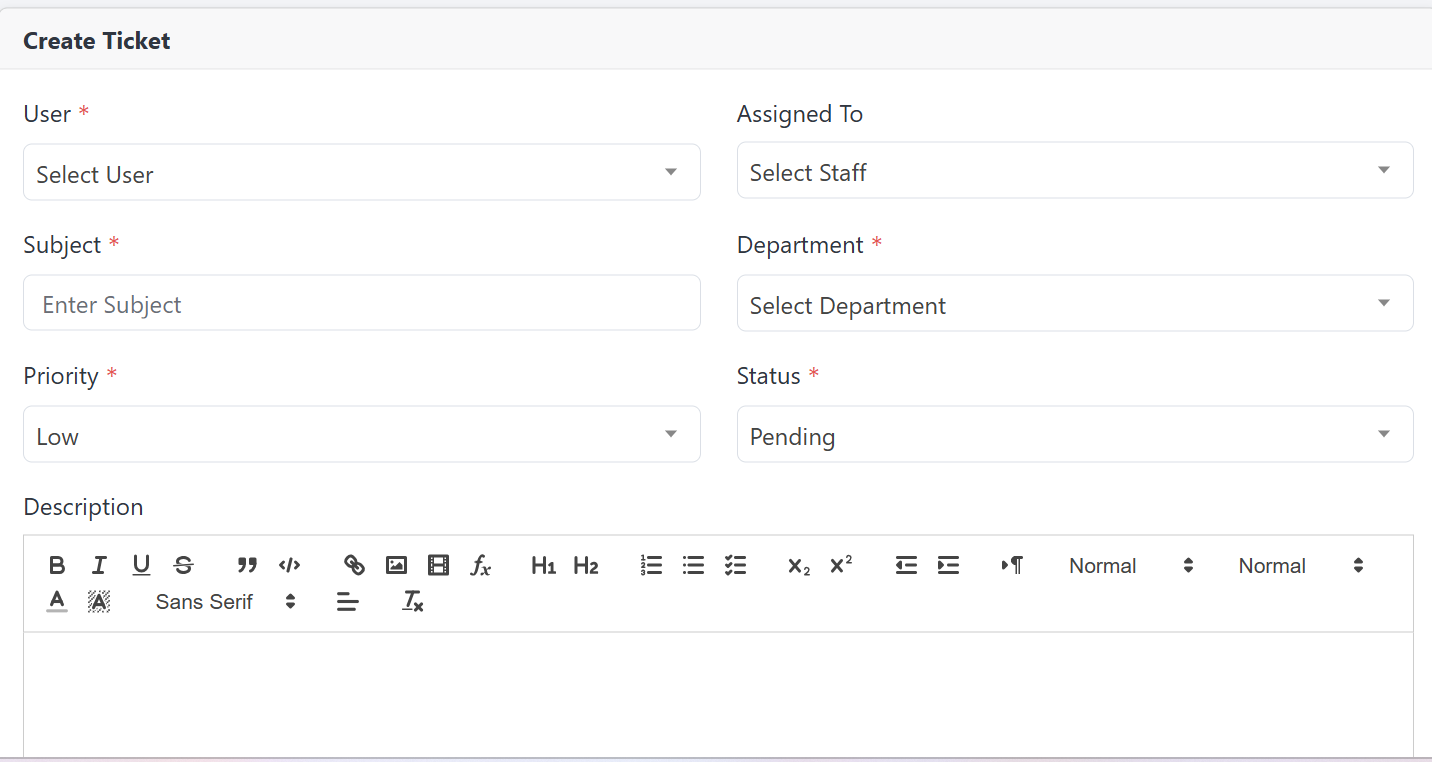
From the Admin Panel, you can create tickets on behalf of users. This allows you to submit tickets directly for users whenever needed.
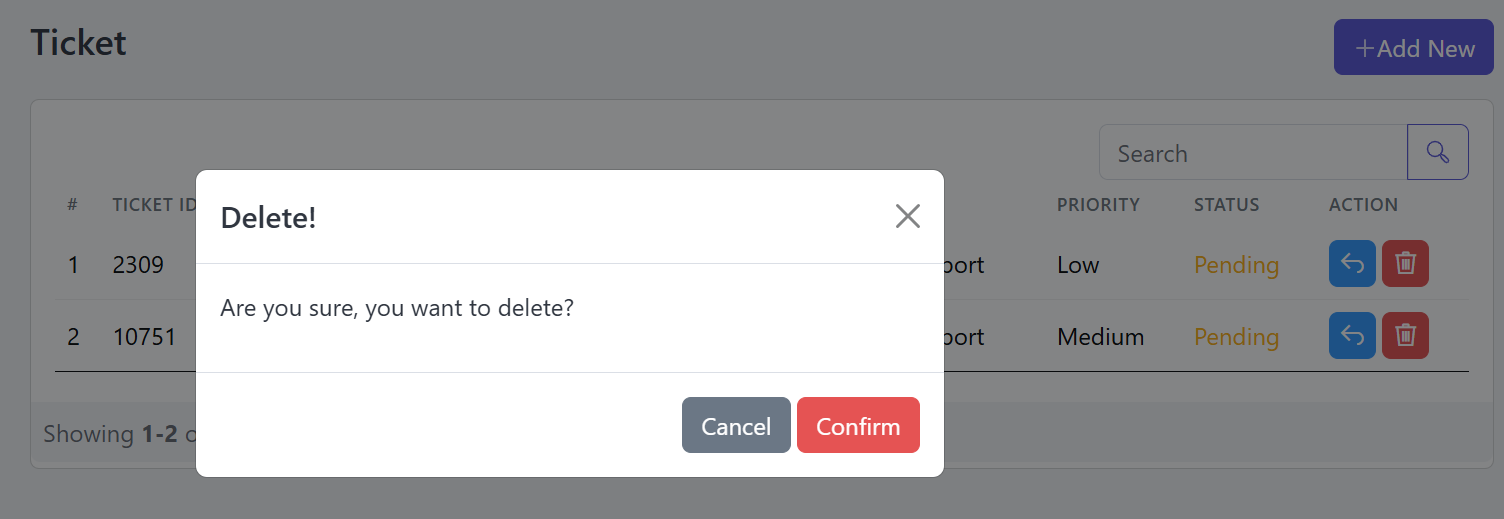
You can delete any Ticket.
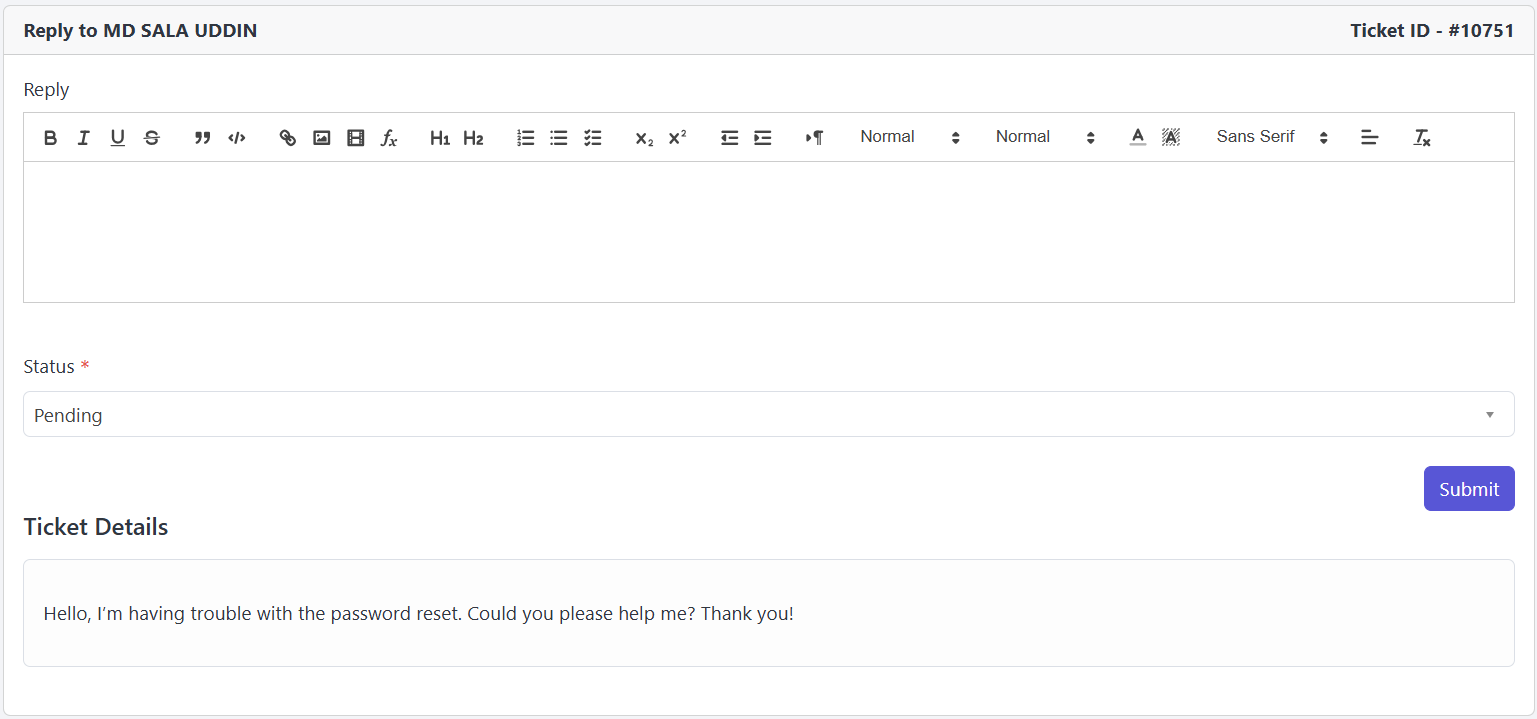
From here, you can view the details of all tickets created by users and reply to them.
System Update
From here, you can update to our upcoming versions.
You can download our upcoming versions from CodeCanyon, upload the ZIP file in the 'Upload Update File' field, and click 'Update Now' to complete the update.
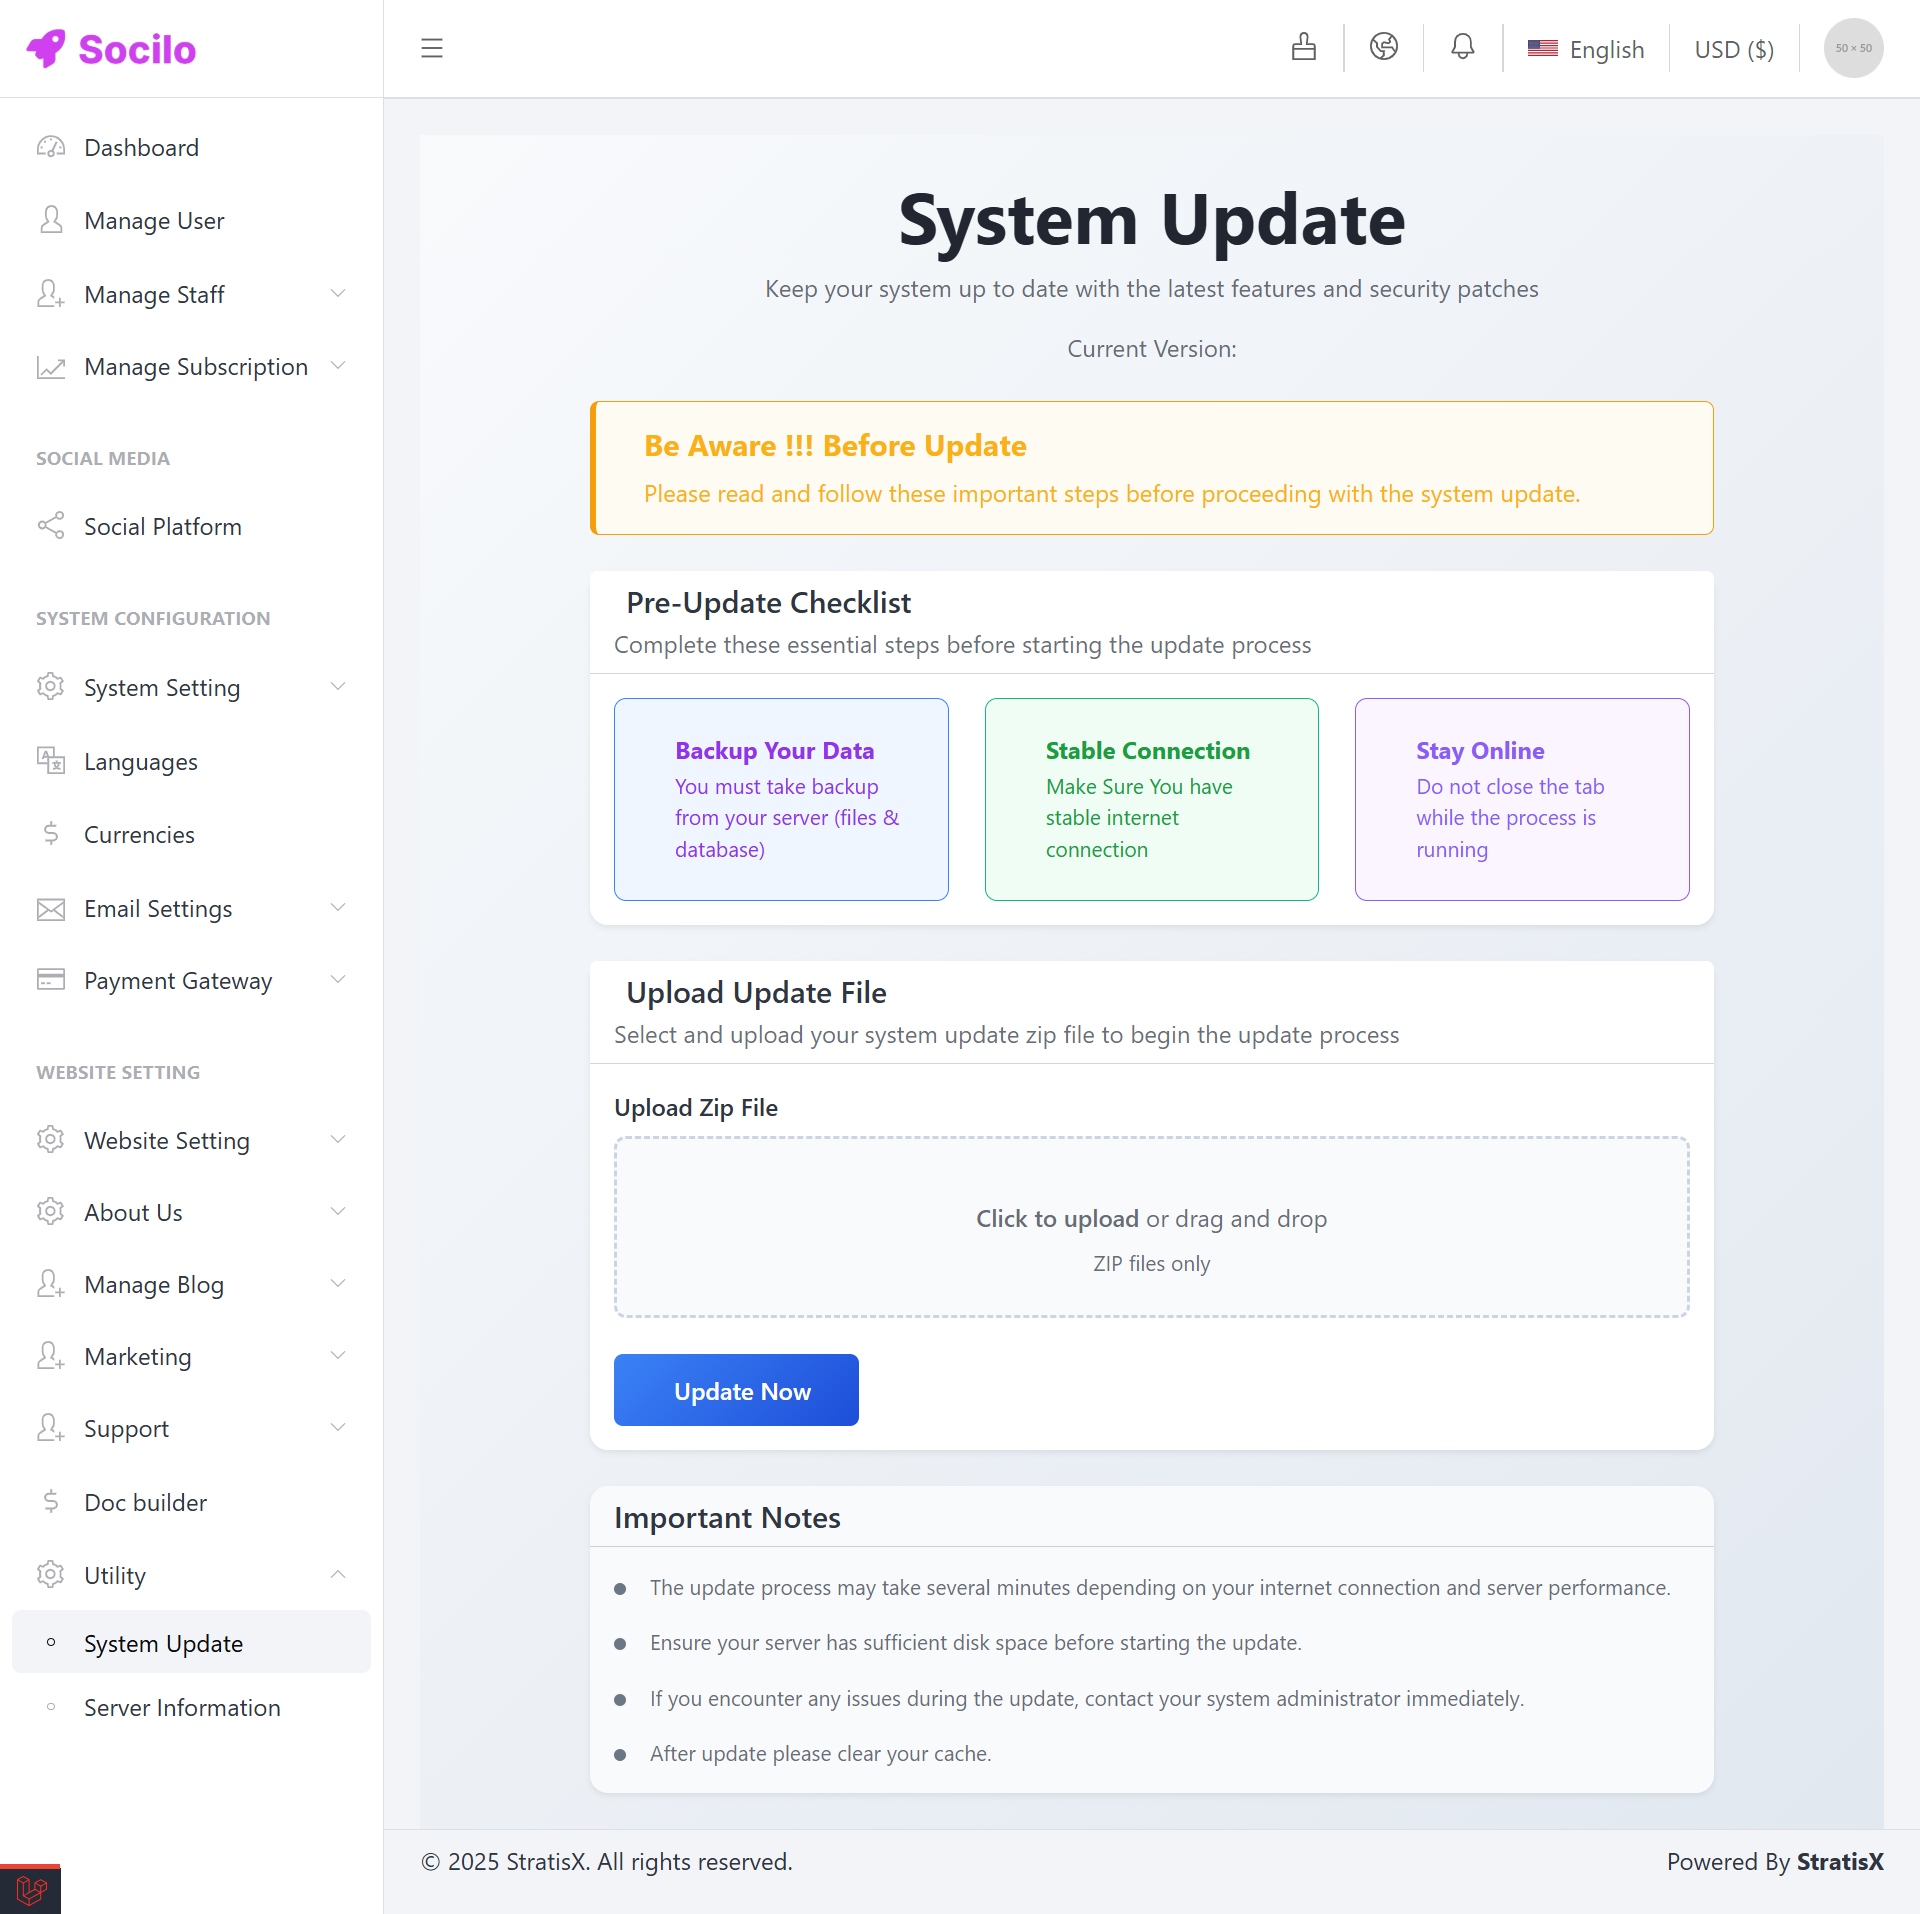
If you face any issues during the update, please contact us at stratisx@support.com.
Server Information
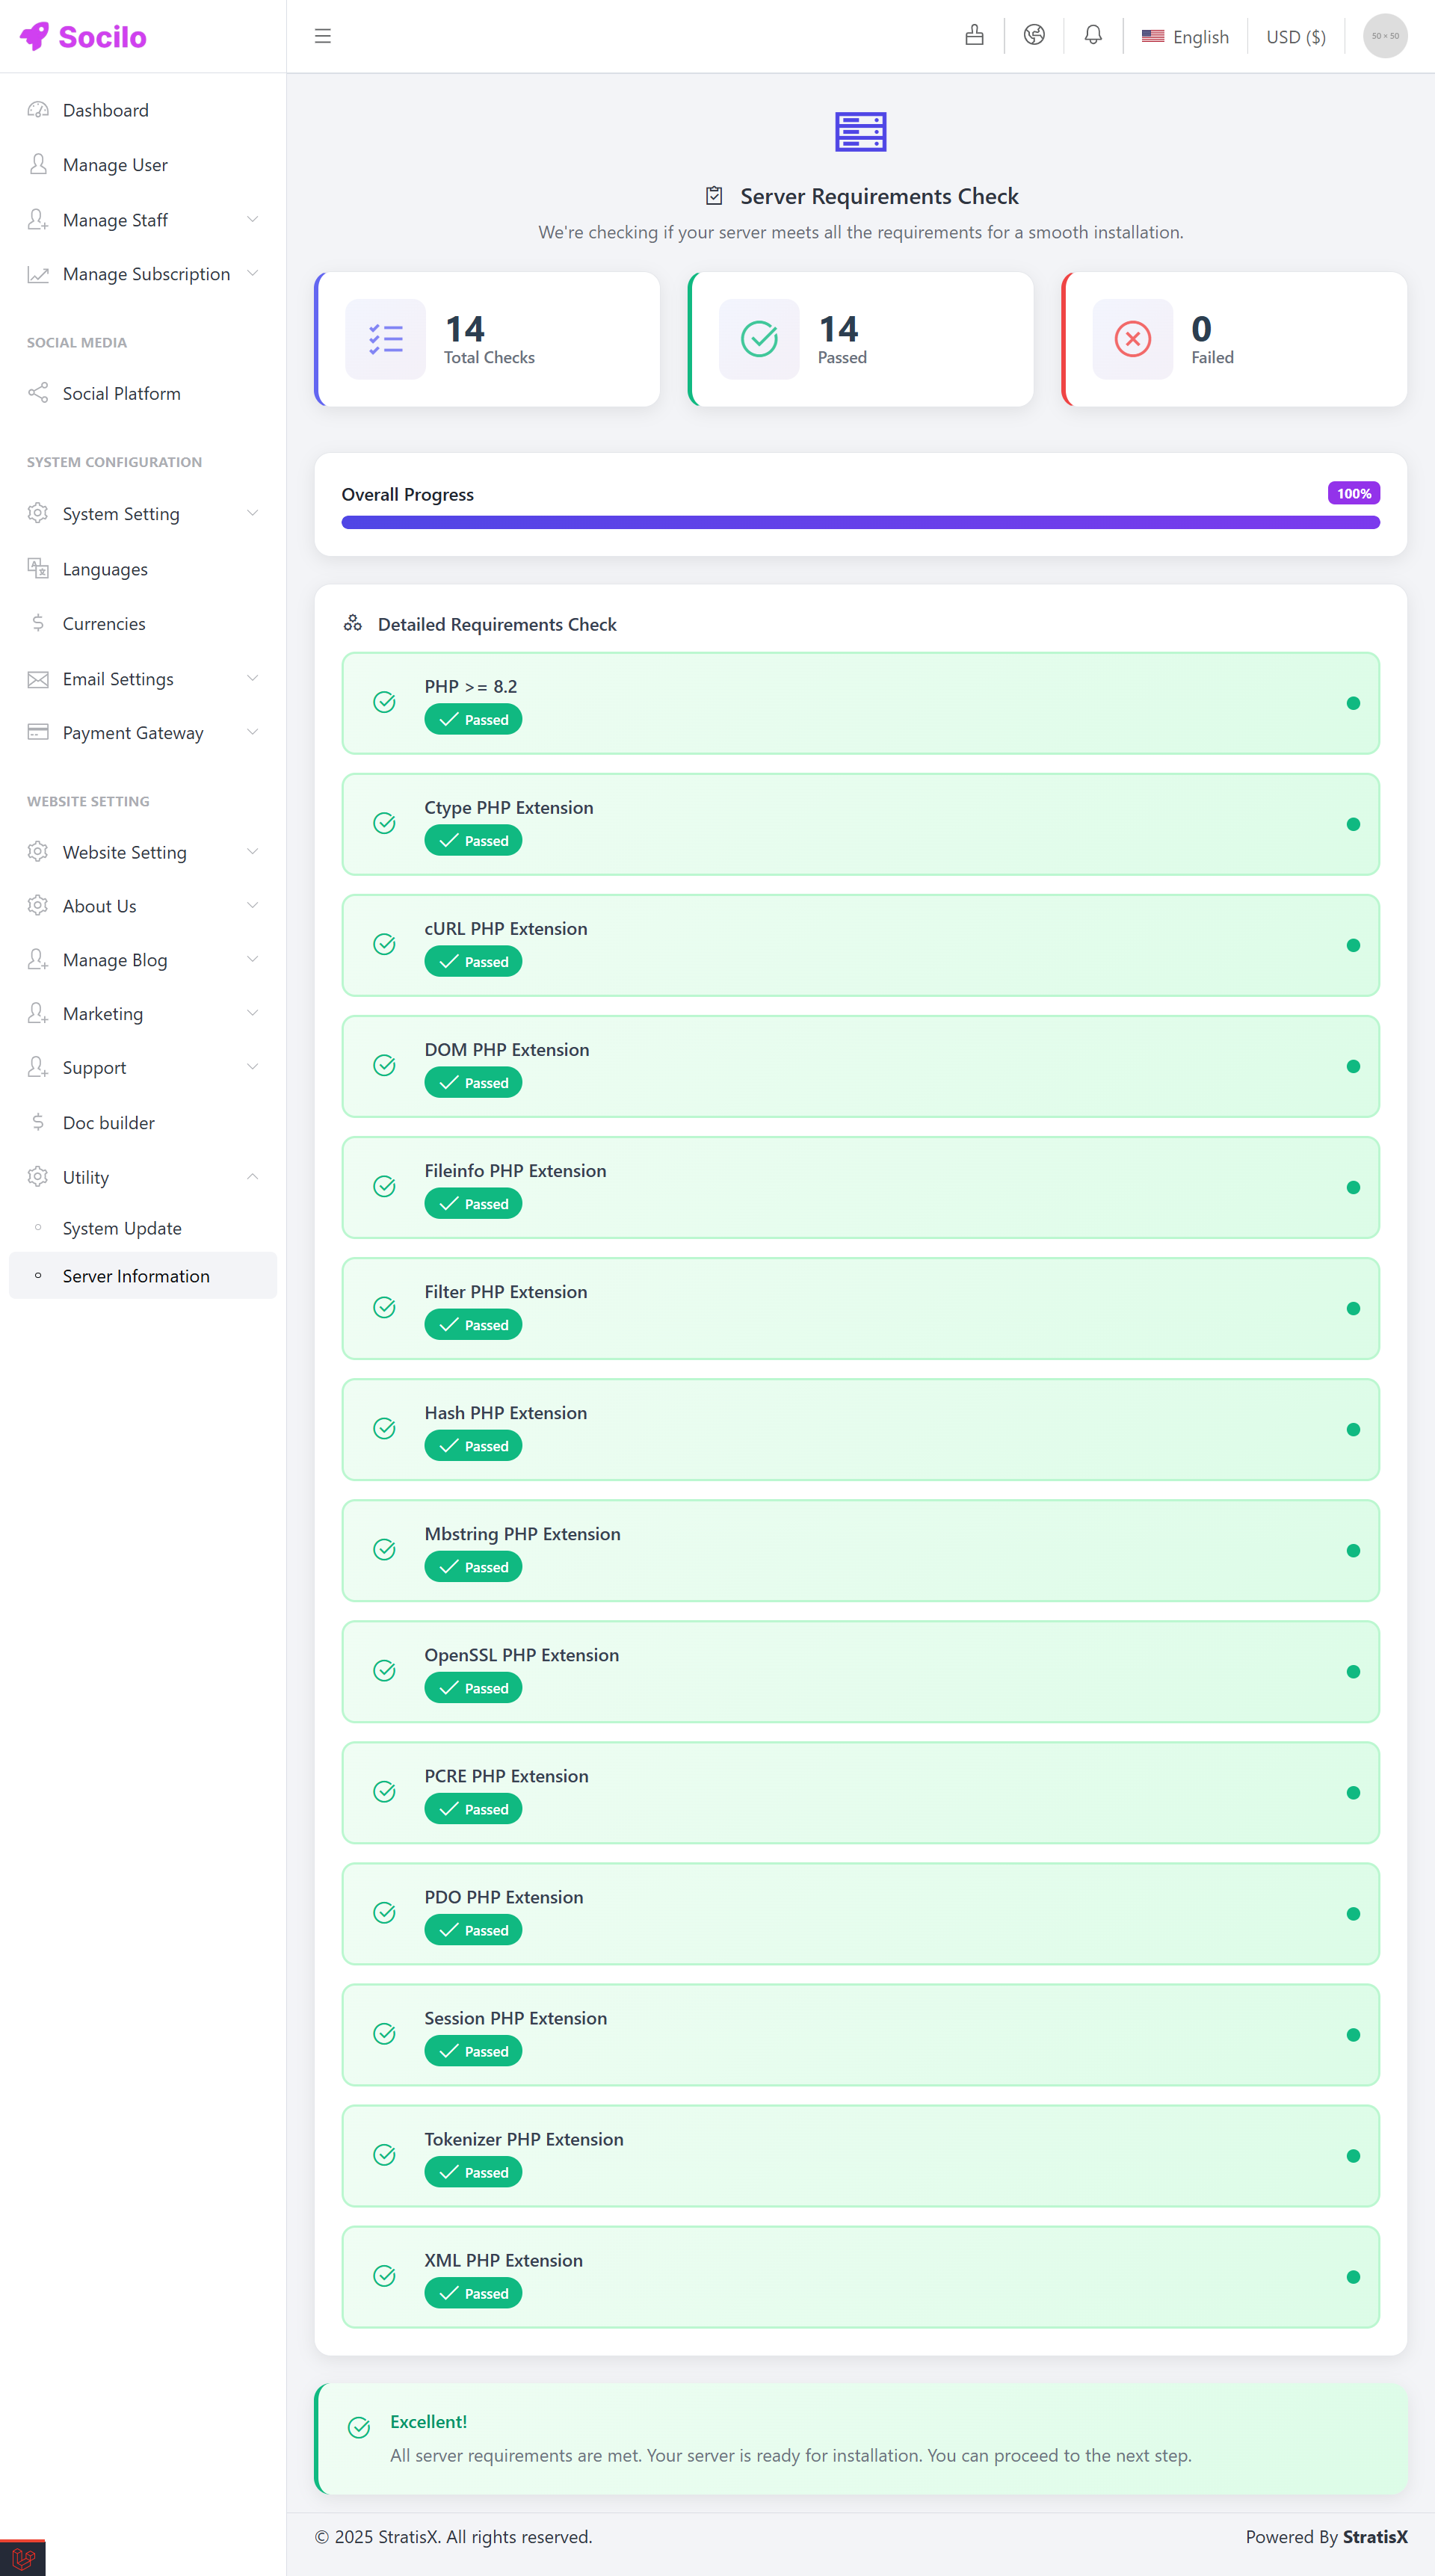
This screen displays the Server Requirements. Here, you can see all the necessary components checked to ensure your server is ready for installation.
